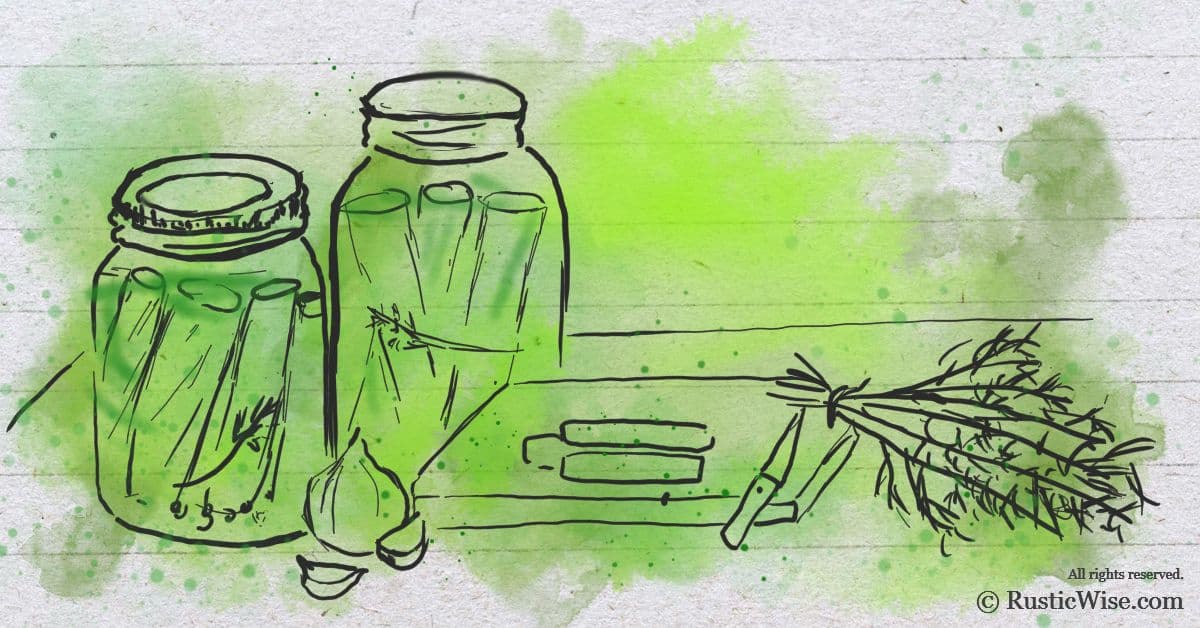
How to Make Your Own Pickles—Quick and Easy
While we all have slightly different pickle preferences (some like dill pickles, others like ‘em sweet), we can all agree that the most delicious classic pickles are crunchy and tangy. Am I right?!
If you’re drawn to the idea of homemade pickles and are yearning to make your own canned pickles, you’ve come to the right place.
While making homemade pickles might sound intimidating at first, with a few basic safety procedures in place, you’ll have canned pickles in no time.
Did you know that you can ‘pickle’ pretty much any kind of fruit and veggie? With the right combination of vinegar, spices, salt, and sugar, you can get pretty creative. But to keep things simple, we’re just talking cucumbers here.
The best types of cucumbers to use
If you want to know how to make your own pickles, you should know that not all cucumbers are created equal, especially for pickling. Some cucumbers are best eaten garden-fresh, while other varieties are great for canning.
The best types of cucumbers for pickling have the following characteristics:
- Short.
- Plump.
- Skin that tastes less bitter than slicing cucumber varieties.
- May have bumpy skin and/or black spines.
- Varies in greenness depending on the direction facing the sun.
A few good pickling varieties include: Kirby, Persian, County Fair, Liberty, Pioneer, National Pickling, and Alibi.
Avoid using English cucumbers. They are too long and have slightly bitter tasting skin.
The best places to procure cucumbers are straight from your garden, or from a farmer’s market. The store-bought varieties often have a layer of wax which doesn’t jive well when pickling.
When selecting cucumbers, try to select ones of similar size and shape for more uniform canning. A good size is generally between four and five inches.
The 2 main methods of making canned pickles
There are two main methods of canning pickles:
- Quick-process method (aka fresh-pack or raw-pack). This method goes by so many names, but it’s basically unfermented pickles. As the name suggests, it’s quicker and easier than fermenting. This involves packing fresh cucumbers into a jar and covering with hot brine or syrup before canning and processing them. Processing pickles involves giving them a boiling water bath for a few minutes to kill any nasty microorganisms and gives them a shelf life up to a year. Processed pickles are slightly less crunchy. So, if crunchy pickles are your thing, you could skip the processing and make a batch of refrigerator pickles. These pickles last for several weeks in the fridge.
- Fermentation. Fermentation (aka brining) creates a sharper more sour taste, and also takes longer. Fermentation changes the color, texture, and taste of foods. In cucumbers, you can expect your newly created pickles to become translucent on the inside and an olive green color on the outside. Once cucumbers are fermented, you’ll still need to pack and process them.
Fermentation is trickier and more labor-intensive than the quick-process method, especially for beginners. For this post, we’ll just be covering the quick-process method.
Tips for making delicious canned pickles
Are you new to canning? Read up on canning safety tips and basic canning knowledge here.
Learning how to make your own pickles is one of the best and easiest ways to start canning. And using the quick-process method lets you use up garden produce without the need for creating huge batches. The key to making great pickles is in the ingredients.
- Water quality. If you have hard or chlorinated water, this can make for a bad batch of cloudy pickles. Consider using distilled or bottled water. Or, if you have hard water, boil and let it sit for 24 hours to cool and let the sediment settle. Skim off the top before use making sure not to stir the sediment on the bottom. For chlorinated water, try filling containers with water and let them sit for 48 hours to allow the chlorine to dissipate.
- Vinegar quality. Since vinegar is such a fundamental part of any pickle recipe, it’s vital you use vinegar with 5 percent acidity. Don’t alter the amount of vinegar in your recipe. Vinegar helps to acidify, preserve, and flavor your pickles. If you want pickles that are slightly less sour, try adding a pinch of sugar.
- Whole spices. Use whole spices. Powdered spices will make your pickles clouded.
- Proper salt. Ditch the table salt as it’s iodized which will make your brine murky. Use granulated salt that’s labelled safe for canning or pickling.
- Remove the blossom. Always remove the blossom end of the cucumber (the side opposite the stem). This contains an enzyme that causes cucumbers to spoil. Trim off at least ¼ inch.
- Good cucumbers. It goes without saying that good cukes make for good pickles. Pick the freshest ones and wash them thoroughly.
Pickling equipment and supplies
When learning how to make you own pickles at home, you’ll need a few basic things:
- Mason jars, lids, and screw bands. When making canned pickles, most recipes call for pint or quart-sized jars. Wide-mouth mason jars are perfect for pickles!
- Cutting board and knife.
- Colander for washing cucumbers.
- A large pot if you’ll be water-bath processing. This can be a large soup pot. The pot needs to be large enough so that water covers at least two inches from the top of upright jars.
- Perforated rack. This is a wire rack that holds jars upright during a water bath. This prevents your jars from coming in direct contact with the heat source.
- Jar lifter. This nifty tool helps safely remove sealed, full , processed jars by clamping tightly just under the lid. Jars get very hot and slippery! A jar lifter prevents dropping and breaking your precious pickles.
Pickle processing times
It’s vital to stick to proper processing times when learning how to make your own pickles. Check out this chart for proper processing times for raw-pack pickles:

How to make your own pickles step-by-step
You’ll need:
- Pint jars
- 4 lbs. pickling cucumbers roughly four inches long
- 14 split garlic cloves
- ¼ cup pickling salt
- 2 ¾ cups vinegar (five percent)
- 3 cups water
- 14 heads fresh dill
- 28 peppercorns
Yield: 6 to 7 pints
Before you begin, you’ll want to do a quick clean up of your kitchen sink and countertops. Clear a space designated for cooling your processed jars. You can do this by lining newspapers, dish towels, or simply placing a cutting board onto a flat surface. You don’t want to let your boiling hot jars touch a cold surface!
Prep work:
The following recipe for Quick Kosher Dill Pickles is adapted from the book, The Encyclopedia of Country Living by Carla Emery, 40th Anniversary Edition. The term kosher just refers to the addition of garlic to the recipe. It’s not indicative how the food is prepared according to religious kosher guidelines.
Step 1:
Wash cucumbers and remove blossom end. Cut cukes in half lengthwise. Meanwhile, if you’ll be processing your jars, prepare your water bath by filling your pot two-thirds full and bring to a boil.
Step 2:
Make the brine by combining garlic, salt, vinegar and water in a saucepan to boiling.
Step 3:
Carefully remove garlic from the mixture and place four halves into each jar.
Step 4:
Pack cucumbers into jars. Don’t pack too densely—you’ll want the brine to circulate nicely around the cukes. As you’re packing, place two heads dill and four peppercorns into each jar.
Step 5:
Pour hot brine into each jar and leave ½ inch of headspace.
Step 6:
Wipe the rims and put on the lids and screw bands. It’s vital not to skip this step as any liquid or salt around the rims will prevent a good seal. A good seal is essential to keep harmful microorganisms out. The screw bands should be snug but not too tight.
Step 7:
Carefully place your jars one by one into your water bath. Ensure the jars are upright when placed on the wire rack. Start timing as soon as all jars are in and your water begins to boil.
Step 8:
Once you’ve processed the jars for the proper amount of time, remove them from the pot using a jar lifter. Let jars cool at room temperature for 24 hours in your designated cooling area. You can check to see if your jars are sealed properly if the ‘button’ on the lid is popped down. Store any jars with unpopped lids in the fridge and use them as soon as possible.
Step 9:
Remove the screw bands from jars that are properly processed and sealed. Jars that you plan on storing in your pantry or basement don’t need the screw band any more. However, you can leave the screw bands on for refrigerator pickles.
Step 10:
Don’t forget to label jars with the date and name of your recipe!
Store processed jars in a cool, dark place like a pantry or basement. If you skipped processing, place the cooled jars in the refrigerator.
While you might be dying for a taste of your homemade pickles, be patient. Letting the pickles sit for a few weeks before you enjoy them makes for tastier, more flavorful pickles.


Author: Josh Tesolin
Josh is co-founder of RusticWise. When he’s not tinkering in the garden, or fixing something around the house, you can find him working on a vast array of random side projects.