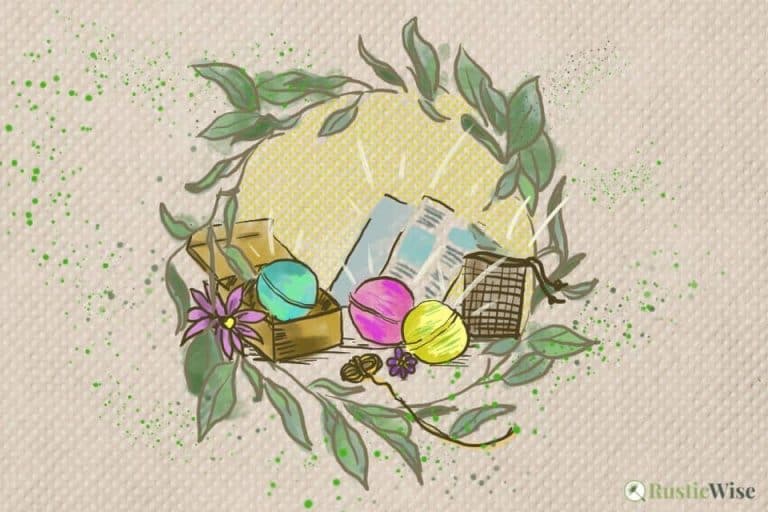
A Timeless Guide To Soapmaking for Beginners
It’s tough to beat something handmade. With handmade soap, you get to control all the ingredients you put in. Plus, you can ditch those nasty chemicals. Considering how much soap is used nowadays, isn’t this a comforting thought? If you’re looking to make your own homemade soap, we’ve put together a timeless guide to soapmaking to help you get started.
Yes, soapmaking at home takes time. Yes, it costs money upfront for some basic supplies and materials. But, if you’re planning on making soap for yourself, family, and friends, you’ll save money in the long run.
Soapmaking is a rewarding hobby that allows you to get your creative juices flowing and make something useful and nourishing for the body. It’s also scalable. Start off small, and graduate to bigger batches of soap. You can even ramp up production later to start your own soap side hustle.
Ready to dive in? Let’s get started!
Soapmaking Hacks and Tips for Beginners
New to soapmaking? Here’s a few tips and tricks to help you get started.
Benefits of homemade soap
Is homemade soap better for your skin? In a nutshell, yes. But first, let’s be clear on something—the quality of homemade soap depends on the quality of ingredients used.
Is Handmade Soap Healthier For You?
A closer look at why homemade soap is good for your skin and what exactly is in manufactured soaps.
You shouldn’t assume that all homemade soap bars are natural. If a home soapmaker chooses to use artificial additives, fragrances and colorants, that’s his/her prerogative. If you’re buying handmade soap, the best way to know what’s exactly in a bar of soap, is to ask the soapmaker.
At its most basic level, homemade soap requires just three ingredients: lye, water, and oil/fats. When these three ingredients are mixed together, a chemical process known as saponification, or the making of soap, occurs.
Lye is essential to the soapmaking process as without it, water and oil/fats wouldn’t mix together. Without lye, you would just have a big gooey mess. A homemade bar of soap made from scratch consists of these three basic ingredients, plus whatever additional oils, fragrances, colorants, and add-ins that are thrown in.
Compare this to manufactured soaps which typically have multiple synthetic detergents and surfactants, and artificial fragrances.
There are so many ways that a handmade bar of soap differs from your average store-bought variety. Here’s a few benefits of handmade soap:
How To Infuse Oils For Soapmaking
Want to customize your soaps with your fave botanicals and herbs? Here are three ways you can infuse your own oils for soapmaking.
- Naturally moisturizing: One of the byproducts of natural soapmaking is glycerin. When you make (or buy) homemade soap, the glycerin is left intact. It’s a tragedy that commercially-produced soap removes the glycerin from soap and uses it for other products such as face creams and body lotions. The manufacturer then replaces that glycerin with synthetic ingredients. Glycerin helps to restore and lock-in moisture to skin, great for those with dry or sensitive skin.
- Nourishing and natural ingredients: Home soapmakers can get really creative by adding natural ingredients such as dried flowers and botanicals, infuse oils, make lye water tea, and add essential oils for their therapeutic properties. Many homemade soaps use quality ingredients like shea butter, olive oil, coconut oil, and goat’s milk—stuff that just isn’t feasible for large-scale manufacturers to use.
- Wide variety of soap: Once you’ve made a few batches of soap, you’ll get a feel for different ingredients and their properties in soap. Experienced soapmakers know exactly which ingredients to add or subtract. Want a soft, mild soap? Use olive oil. Want more lather? Add castor oil. Want natural exfoliants? Try coffee grounds or oatmeal.
- Safer for your skin and the earth: One of the negative impacts of mass-produced soap is their impact on the earth, especially our waterways. Preservatives and other chemical ingredients also wreak havoc on our health. There are many studies done on the adverse impact of synthetic fragrances on human health.
If you want to dive deeper into what’s really in commercial soaps, check out our post about the benefits of homemade soap.
A quick look at soapmaking techniques
Here are four different ways to make soap, each with their own unique methods and processes.
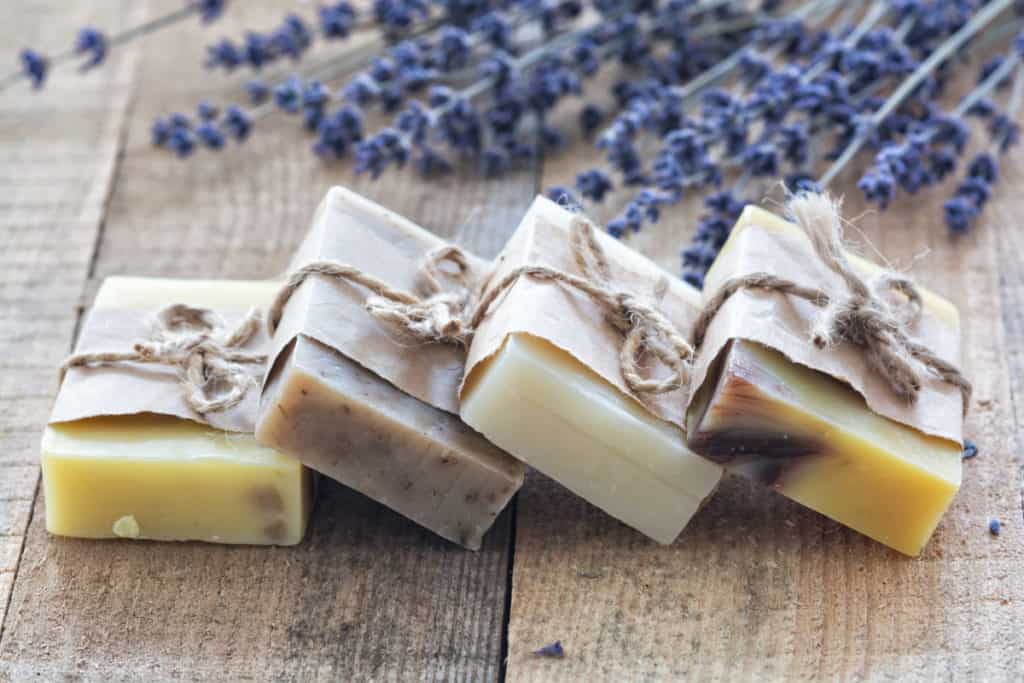
Cold process: A popular form of soapmaking that involves making soap from scratch and handling lye. It’s called “cold” process because it doesn’t involve cooking or heating the soap mixture (besides heating the oils/fats). Cold process soaps require a longer curing time, typically between 4-6 weeks. The longer you allow your bars to sit, the harder and longer lasting your bar of soap becomes.
An Intro to Melt and Pour Soapmaking
Welcome to melt and pour soap making, a method that doesn’t require handling lye.
Hot process: Similar to cold process, hot process also involves making soap from scratch and working with lye. It’s called hot process because it requires cooking the soap mixture in a slow cooker or pot for several hours until the mixture becomes neutralized. Some prefer hot process over cold process as the soaps are ready to use when fully hardened, typically at least 2-3 days. BUT, although the soap is safe to use, it’s best to allow it to cure for at least one week (preferably longer).
Melt and pour: Sometimes called soap casting, melt and pour is a quick and easy way to make soap without needing to handle lye. You can buy a wide range of premade soap bases that have already saponified. A popular soap base is glycerin which makes transparent/translucent bars of soap. You simply melt the soap base, add fragrances, oils, colorants, and other add-ins. Soap is ready to use in a matter of hours. Since the store-bought soap bases are designed to accept different colors, fragrances and add-ins, you can get really creative with this method.
Hand-milled or French-milled soap: Similar to melt and pour, this method involves grating and melting pre-formed or leftover bars of soap. This is a great way to use up any “accidents” or batches of soap that didn’t turn out quite the way you liked. And like melt and pour, you don’t need to handle any lye. You can also buy opaque bars of simple cold or hot process soap and start your hand-milled project at home.
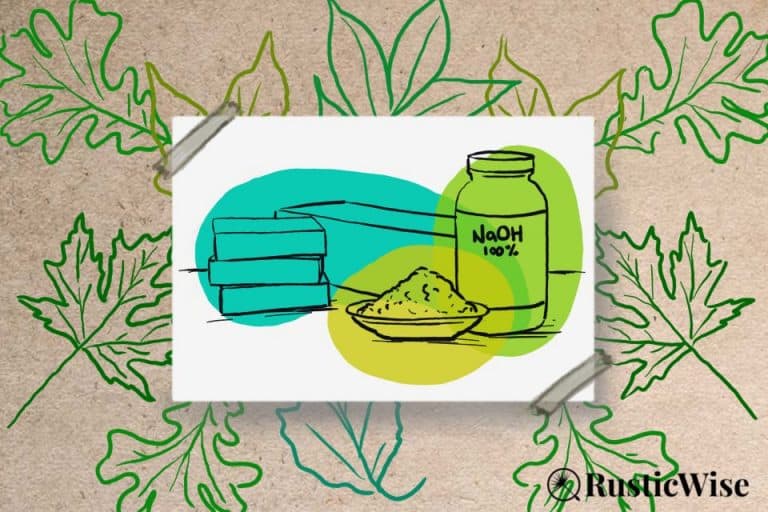
Similarities and Differences Between Sodium and Potassium Hydroxide
While these two compounds are both used in soapmaking, the two can’t be used interchangeably.
Key soapmaking terms
Here’s a few common soapmaking terms you’ll probably hear.
- Trace: Your soap has reached trace when thickened enough to leave a “trace” or dribble on the surface of the soap mixture. It’s kind of like thickening gravy. To do this, just take a stir stick and drizzle a small amount on top of the soap mixture. If there’s no mark, or trace, it hasn’t reached this state yet. Continue mixing. There are varying levels of trace from light to heavy. Ensure you follow your recipe carefully. You might be adding fragrances or colors at different levels of trace in your recipe.
- Gel phase: Cold or hot process soap goes through gel phase when it has generated enough heat to properly harden. A soap that has gelled looks a bit shiner and translucent. In some types of soaps, gel phase may help to bring out the colors. This may require insulating loaf molds with towels, or placing and carefully stacking individual silicone molds in a larger container with a lid to reach the desired temperature. Not all soaps need to go through gel phase.
- Saponification: Simply put, saponification is just a fancy term for “turning into soap.” The chemical process of saponification happens when lye, water, and oil/fat are mixed to produce soap. A finished bar of soap typically has a pH between 8 and 10.
- Superfat: No, this is not a mean name you call someone. It refers to extra oils and fats added to the soap recipe to create a gentler bar of soap. This helps to ensure that no excess lye is present in the finished bars of soap. Superfatting goes hand-in-hand with the term “lye discounting” which reduces the amount of lye used in the recipe. Soaps with too much superfatting (excess oil) are prone to spoilage.
For more common terms, check out this Soap Glossary from the Handcrafted Soap & Cosmetic Guild.
Is Lye Safe To Use in Soap?
You’ll see lye or sodium hydroxide listed as an ingredient in soap and cosmetics. Is it really safe to use?
Overview of the soapmaking process
While every soap recipe is different, here’s a high-level guide to soapmaking. Remember if you’re using melt and pour, or hand-milled process, you don’t need to handle lye.
- Set up your soap making workspace by covering your table, gathering supplies and ingredients, and putting on your safety gear.
- Measure lye and water individually. Slowly and carefully add lye to water. It’s vital you add lye to water, and not the other way around! Allow to cool. Typically, you wait until the lye mixture cools to around 110 degrees Fahrenheit (43 degrees Celsius).
- Measure oils and fats. Melt together and let cool.
- Once both the lye mixture and the oil/fats mixture are roughly 110 degrees Fahrenheit, add lye mixture into oils. Blend until trace.
- Add essential oils, and other add-ins as desired.
- Pour into soap molds and allow to harden.
- Unmold and cut into bars.
- Allow soap bars to fully cure. For cold process that can mean anywhere from 4-6 weeks. Hot process bars do well if cured for at least a week or more. Melt and pour soaps are ready for use when fully hardened (within several hours).
Places Where You Can Buy Lye For Soapmaking
Here’s a roundup of all the places online and locally you can buy sodium hydroxide (lye).
Lye and lye safety
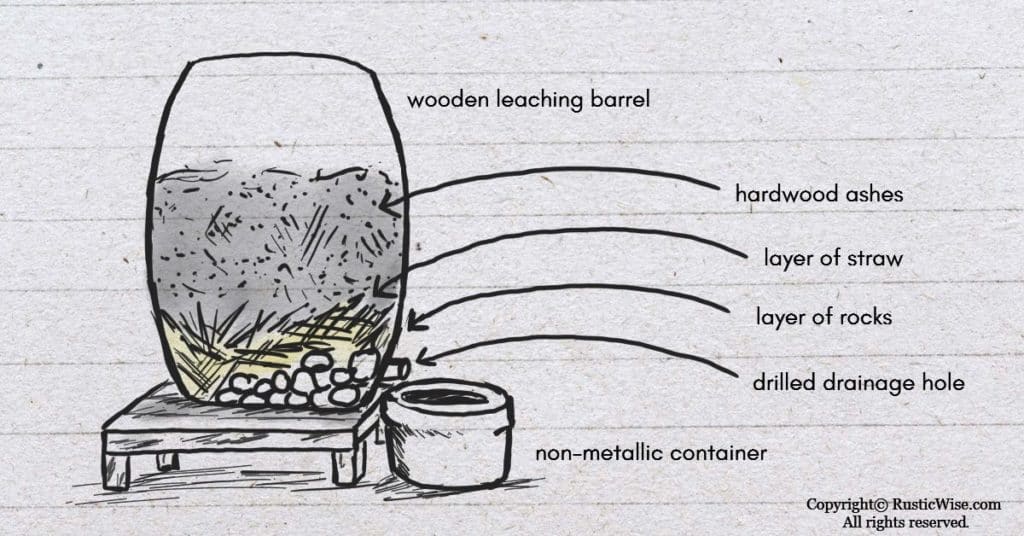
Lye was traditionally made using a slurry of hardwood ashes and water. This homemade lye (potash lye) was mixed with animal fat (tallow or lard), to make softer soaps.
Nowadays, you can buy lye from the store, or online. It comes in a variety of forms including pellets, flakes, beads, and powder.
Lye commonly refers to sodium hydroxide (NaOH). Sometimes the term lye also applies to potassium hydroxide (KOH). While these two compounds have many similarities, you can’t use them interchangeably.
Sodium hydroxide creates hard bars of soap. This is the type of lye most home soap makers use. Potassium hydroxide on the other hand creates liquid soap, or soft bars of soap. Read up on the differences and similarities between sodium and potassium hydroxide here.
Tip: Before you dive into soapmaking, it’s so important you read up about the properties of lye and lye safety. Lye is a corrosive alkali that can damage skin, eyes, and the respiratory system. When handling lye, keep small children and pets out of harm’s way. Work in a well-ventilated room and always wear protective safety gear (goggles, mask, gloves, and long-sleeves).
Storage and Shelf Life of Lye
No, that bottle of sodium hydroxide pellets doesn’t last forever. Here’s what you need to know.
Things you should know about lye:
- Gives off a strong exothermic reaction when combined with water. Lye mixtures can get very hot quickly. Lye also gives off fumes which you must not inhale.
- Sodium hydroxide reacts to moisture in the air which is why you need to carefully store it in an airtight container. Read more about lye storage and shelf life here.
- Lye reacts strongly with metals such as aluminum, magnesium, tin, and brass. Over time, lye may etch glass and cause it to shatter. Stick with 100 percent stainless steel pots and utensils when working with lye. Silicone and certain types of plastic utensils and containers are also suitable materials to use when handling lye.
After reading about how harmful lye can be, you might be wondering if lye is safe to use in soap. The short answer is, yes. While lye in and of itself is harmful, it’s rendered harmless once your soap mixture has fully saponified and cured. The corrosive properties of lye are neutralized during saponification.
Read up on more lye safety practices from the Handcrafted Soap & Cosmetic Guild.
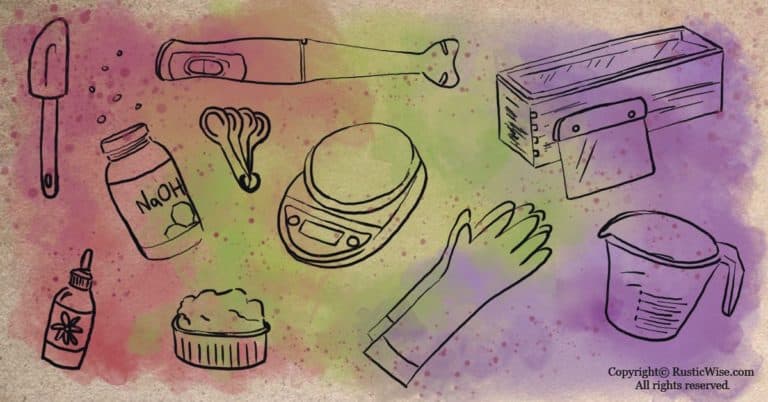
Soapmaking supplies
Like other crafting hobbies, you’ll need to invest in some basic soapmaking supplies.
If you want to avoid handling lye (sorry if we scared you!), you can make soap using the melt and pour, or hand-milling methods.
If you’re planning on making hot process soaps, you’ll need a slow cooker.
Essential Supplies For Soapmaking
Here’s a comprehensive list of everything you need to buy if you’re new to making handmade soap.
Here’s a basic soapmaking supplies list:
- Safety equipment: Goggles, mask, gloves, long-sleeves, and oven mitts.
- Lye: Sodium hydroxide or potassium hydroxide depending on your needs.
- Measuring scale: Accurate measurements are vital to making a good batch of soap. Make sure your scale measures in both ounces and grams.
- Immersion (stick) blender: This is handy for hot or cold process soaps. This drastically cuts down on mixing time. Ensure it has 100 percent stainless steel blades.
- Thermometer: It’s nice having at least two accurate thermometers—one to take the temperature of your lye mixture, and one for the oil/fats. Or, a temperature gun works great too.
- Stainless steel pot: A big pot between 8-12 quarts is handy for mixing lye.
- Double boiler: Handy for melting oils.
- Heat-safe glass measuring cups.
- Measuring spoons.
- Several heat-safe plastic bowls or a pitcher: This is to mix lye in. The plastic needs to be high-quality. Look for either #5 (polypropylene) or #2 (HDPE) on the bottom of the container.
- Several small glass bowls or containers: For measuring fragrances or colors in.
- Silicone spatula: Great for scraping out mixtures.
- Stainless steel utensils: Whisks or spoons for stirring.
- Soap molds: Loaf molds or silicone molds work fine. You can also make your own molds from old paper milk cartons.
- Old rags: Because there’s always a mess or two that needs cleaning!
- Vinegar: Helps to neutralize any lye spills on surfaces. It’s also handy during cleanup.
- Rubbing alcohol: Pick up a bottle of Isopropyl alcohol and put it in a spray bottle. This helps to remove excess air, prevent bubbles from forming, etc. Check out our post for more tips on soapmaking for beginners.
- A few of your favorite essential oils, colorants, add-ins.
For a more detailed list, check out our post, Soap Making Supplies for Beginners: The Essential List.
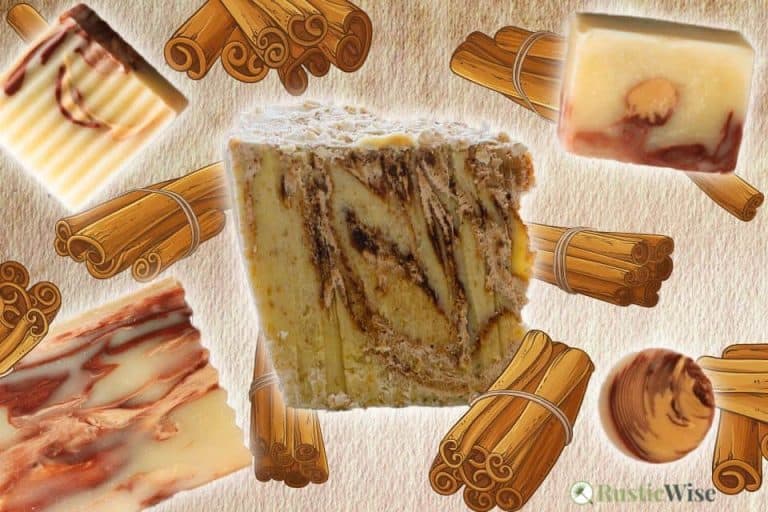
Soap recipes
Easy Melt and Pour Coffee Ground Soap Recipe
Goat’s milk soap base provides nourishing properties, while ground coffee is a great invigorating exfoliant (via Imperfectly Happy).
Basic Hot Process Recipe
Here’s a basic hot process recipe which produces oodles of glycerin (and who doesn’t love that?).
A Guide To Plant-Based Oils for Vegan Soap
Here are a few popular plant-based oils used to make vegan soap.
Kitchen Hand Soap: 3 Ways
Using a basic hot process base recipe, you can customize a bar of kitchen hand soap 3 ways: coffee soap, lemon soap, and super-clean (grease-cutting) soap.
How To Make Liquid Antibacterial Soap With Natural Ingredients
No handling lye here with this quick and easy DIY using liquid Castile soap as a base.
DIY Olive Oil Nabulsi Soap Recipe
If you’re looking for a mild, yet cleansing bar of soap with minimal ingredients, this is the recipe for you.
Lemon Soap Recipe
Lemon zest and shea butter combine in this refreshing cold process recipe (via Heart’s Content Farmhouse).
Honey & Dandelion Soap Recipe
Make use of those dandelions in your yard with this cold process recipe (via The Nerdy Farmwife).
DIY Paper Soap
If you’re looking for a clever travel hack, you can make your own single-use paper soap using water-soluble paper. You’ll also learn how to make paper-thin sheets of soap without water-soluble paper.
How to Make Your Own Liquid Antibacterial Hand Soap
Using natural ingredients, here’s an easy DIY for making your own liquid hand soap.
Guide to soapmaking FAQs
What is vegan soap?
While traditional soap was made of animal fat (tallow or lard), vegan soap is free of animal-derived ingredients including goat’s milk. There are many vegetable or plant-based oils available today that make a fine bar of soap. A few plant-based oils include olive oil, shea butter, coconut oil, and avocado oil. Many vegan bars of soap go the extra mile and use quality ingredients that are organic or cruelty-free.
Read more about vegan soap and plant-based oils.
Can you make your own lye?
Yes, but it takes time. Oldtimers have been making their own lye using hardwood ashes and water in a leaching wooden barrel. Check out our guide to making your own homemade lye. It’s important to note that the type of lye made using this method is actually potassium hydroxide. Soaps made using potassium hydroxide make liquid or soft soaps. If you’re looking to make a hard bar of soap, you’ll need sodium hydroxide.
Does vinegar neutralize lye?
There’s much debate amongst home soapers about whether vinegar actually neutralizes lye. The thinking is that since lye is a base, and vinegar is acidic, the vinegar works to neutralize it. This isn’t quite right. While vinegar is handy if you accidentally spill lye on a surface (just apply vinegar on an old cloth and wipe up), this isn’t the case when it comes to skin contact.
A Guide To Making Homemade Lye
Here’s how to make lye (potassium hydroxide) the old-fashioned way.
Applying vinegar directly onto a skin burn may intensify it.
If you ever get lye on your skin, rinse with water, and then rinse some more. If you read any of the Material and Safety Data Sheets for sodium hydroxide (lye), they’ll tell you to first remove any contaminated clothing, blot off any lye, and rinse with cold water for 30 minutes. Only after rinsing thoroughly with water can you apply a diluted vinegar solution to the area.
Why does my soap have orange spots?
Ah, you’ve encountered dreaded orange spots (DOS), a common soapmaking occurrence.
DOS occurs for a number of reasons. A few common reasons are oxidation, contact with metals, high levels of excess oils (superfatting), and oils or fresh purées going rancid. The good news is, you can still safely use soap with orange spots so long as it doesn’t have a rancid odor. Sometimes, you can try cutting off the orange parts.
New to making soap? 🧼❓
👉We have a fantastic overview on the whole soapmaking process here: read our Timeless Guide To Soapmaking.
If you would like to see our soapmaking posts organized by topic type, see our Soapmaking Collection.
Would you like more timeless tips via email?
Fun tips to help you live an independent, self-sustaining lifestyle. Opt-out at any time.


References:
- Steinemann, A. Fragranced consumer products: exposures and effects from emissions. Air Qual Atmos Health 9, 861–866 (2016). https://doi.org/10.1007/s11869-016-0442-z. Accessed February 2021.
- Handcrafted Soap & Cosmetic Guild, Glossary Of Soap-Related Terms, https://www.soapguild.org/how-to/make-soap/soap-glossary.php. Accessed February 2021.
- Handcrafted Soap & Cosmetic Guild, Lye Safety, https://www.soapguild.org/how-to/make-soap/lye-safety.php. Accessed February 2021.
- New Jersey Department of Health, Hazardous Substance Fact Sheet, Sodium Hydroxide, https://nj.gov/health/eoh/rtkweb/documents/fs/1706.pdf. Accessed February 2021.

Author: Josh Tesolin
Josh is co-founder of RusticWise. When he’s not tinkering in the garden, or fixing something around the house, you can find him working on a vast array of random side projects.