An Introduction To Melt and Pour Soap Making Techniques
Melt and pour soap making is an easy and fun way to make your own handmade soap. Not only do you not have to handle lye, there are so many ways to get creative and customize each bar of soap. We’ll go over basic melt and pour soap making techniques including swirling, layering, embedding, and stamping. Plus we’ll look at things not to add to your melt and pour soap.
Let’s dive right in!
What exactly is melt and pour soap?
Unlike soap made using cold process or hot process, melt and pour soap making techniques do not require any handling of lye. This is because the soap bases you buy to make your soap have already undergone the saponification process with lye beforehand.
If you’re one of the many home crafters that prefer to stay far away from lye, then melt and pour is the perfect soap making method for you!
Since there’s no handling of lye, this is a great way to let your little ones help out with soap making. Just ensure you still take the proper safety precautions as melted soap bases are hot and may cause burns.
Melt and pour soap making supplies
You actually don’t need too many supplies to get started using melt and pour soap making techniques. The most important thing is selecting a few good soap bases you’d like to work with. We’ll touch more on soap bases down below.
While not absolutely necessary for the melt and pour process, it’s handy having a measuring scale that measures in ounces and grams. This helps you get more accurate measurements. A measuring scale is a must for making cold or hot process soap recipes.
If you want a more in-depth look at supplies, check out our post on Soap Making Supplies for Beginners.
Melt and pour soap making in a nutshell
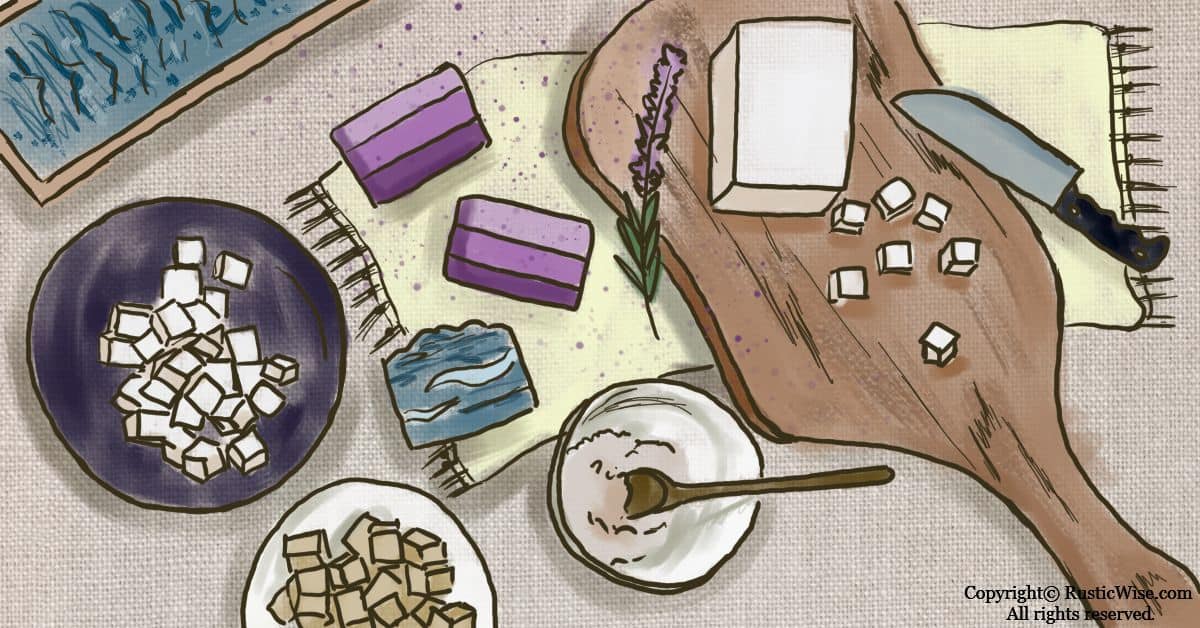
In a nutshell, the melt and pour method involves heating a premade soap base, adding any other ingredients such as colorants, fragrances, butters, or exfoliants, and pouring into a mold. Once the soap has hardened, it’s ready to use in a matter of hours.
All recipes are slightly different, but here’s a general overview of the melt and pour process:
- Measure out any essential oils and add-ins such as colorants. It’s a good idea to do this before you melt your soap base as you’ll need to work quickly once the base is in a liquid state.
- Heat the soap base. Follow the recipe. Some call for melting the soap base in a microwave, double boiler, or a crockpot. Depending on your recipe and add-ins you plan on using, you can add additional butters or oils.
- Transfer the melted soap to a heat-safe bowl. Allow to cool slightly and stir.
- Add in any fragrances, colorants or extra add-ins.
- Pour your soap mixture into a soap mold.
- Spray some rubbing alcohol onto the top of the soap mixture after it has been poured into the soap mold. This helps eliminate any bubbles in your homemade soap.
- Allow to cool and harden completely.
That’s it! Your melt and pour soap is ready to use once it’s hardened. Unlike cold process soaps which require several weeks to cure, melt and pour soaps are ready in a matter of hours.
Melt and pour soap bases
There are so many soap bases to choose from, each with their own nourishing properties.
Most melt and pour soap bases are composed of a number of different ingredients. Every manufacturer adds different ingredients to each base. It’s best to check the ingredients of a manufactured soap base before buying. SFIC and Stephenson are two examples of reliable brands of melt and pour soap bases.
Here’s a few of the most common soap bases:
- Aloe vera: With natural healing and soothing properties, most aloe vera soap bases are mixed with glycerin for a clear base with a slight green tint.
- Cocoa butter: Used for its moisturizing properties, cocoa butter produces a creamy lather and adds firmness to soaps.
- Glycerin: Glycerin is coveted for its deeply moisturizing properties and its naturally clear soap base. This is a popular choice if you plan on making clear soaps with embeds.
- Goat’s milk: Rich in vitamin E, goat’s milk is a great moisturizer, emollient, and creates a creamy soap.
- Honey: Besides smelling great, natural honey soap bases lend a lovely clear amber color to soaps and increases lather.
- Olive oil: Olive oil produces a very mild soap, ideal for those with sensitive skin.
- Shea butter: A creamy and rich soap base with emollient properties.
What can I add to melt and pour soap?
There are many different ingredients you can add to melt and pour soap. The key is to not add too much as this may interfere with the soap recipe and prevent the soap from properly forming.
As a general guideline, measure out 1 tablespoon of additives for every pound of soap. If you’re planning on using more than one additive, measure out less than one tablespoon for each, for example half a tablespoon.
Sometimes with soap making, it’s a bit of an experiment. Remember to keep track of what oils, butters, add-ins and essential oils work best for you.
Exfoliants:
- Coffee grounds
- Oatmeal
- Sea salt or Epsom salts
Dried herbs and botanicals:
- Calendula (aka marigold)
- Lavender
- Rosemary
- Mint
- Rose/Rosehips
- Dandelion
- Jewelweed
Additional oils and butters:
- Sweet almond oil
- Coconut oil
- Cocoa butter
- Shea butter
- Olive oil
Essential Oils
There are so many essential oils to choose from, each with their own unique fragrance and nourishing qualities:
- Tea tree
- Lemon
- Vanilla
- Peppermint
- Sage
You can also try infusing your own oils for soap making.
Colorants:
- Micas
- Color blocks
- Natural colorants
What not to add to melt and pour soap
When making soap, any water or moisture in added herbs or botanicals may contribute to mold growth.
This is why you should avoid using fresh botanicals when doing melt and pour soap making techniques.
Fresh botanicals, fruits, and vegetables may go rancid or become moldy in melt and pour soaps. It’s best to stick with dried herbs and botanicals only.
Those fresh lovely fresh lavender petals can quickly turn brown over a few weeks. And we don’t want that, do we?
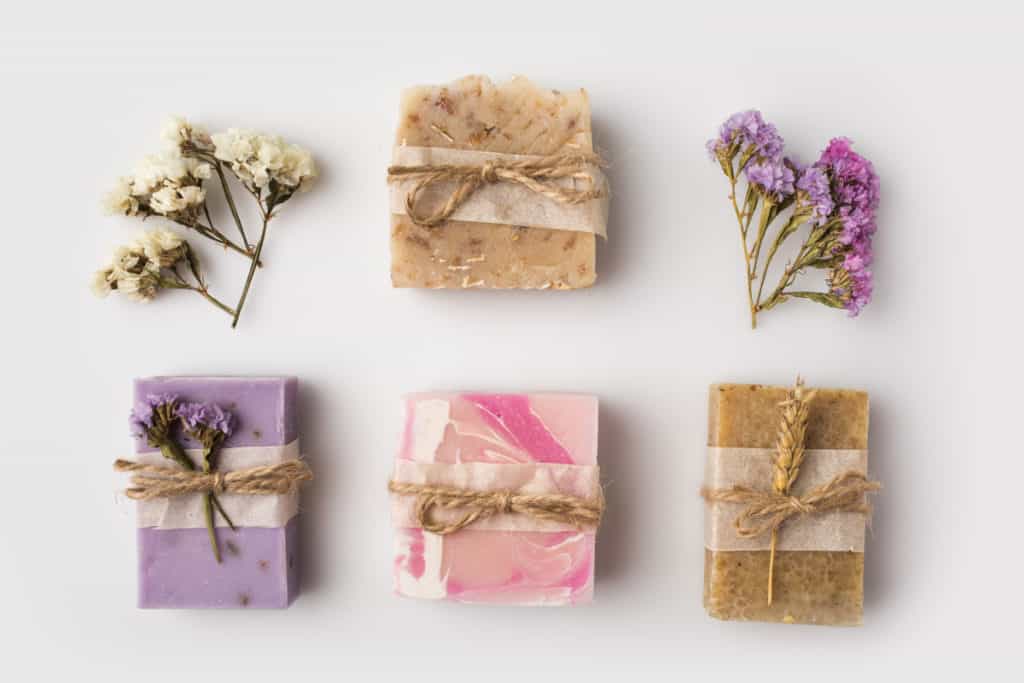
Melt and pour soap making techniques
Ready to get started with some melt and pour soap making techniques? Let’s do this!
Layering
One of the easiest and best melt and pour soap making techniques is layering. With melt and pour, you can really get clean, crisp lines between each layer, making an eye-catching batch of soap.
With melt and pour layering, you’ll get a good sense of temperature and texture in soapmaking.
The trick with layering is getting the temperatures between layers just right.
First layer:
Once you’ve poured your first layer, allow it to cool, but not harden completely. Get ready to pour your second layer when the first layer has formed a skin on top.
Second (and subsequent) layer(s):
Remember to spritz rubbing alcohol between each layer so that the layers adhere when the soap is removed from the mold. If the layers harden completely, they might split apart.
The temperature of the second and subsequent layers shouldn’t be too hot as it might melt through the layer beneath it.
Repeat as needed until your soap masterpiece is done!
Swirling
With swirling, you can get some really gorgeous, artistic-looking soaps. You can go with contrasting colors for a bright pop of color, or with similar colors for a more monochrome effect.
You can achieve a swirl effect using either a loaf mold, or individual silicone molds.
You’ll need:
- Rubbing alcohol in a spray bottle
- Several stir sticks or skewers
Tip: Ensure your soaps aren’t too hot. For best results, they should be at 130 degrees Fahrenheit (54 degrees Celsius) or lower.
- Pour your first layer of soap. Wait until it has formed a thin skin before adding the next colored soap.
- Spritz a stir stick with rubbing alcohol to prevent sticking. You can either “poke” the first layer with the skewer before pouring the next layer, or you can pour the second color directly on top of the first.
- Use your stir stick to move in circular motions to gently create a swirling effect. Avoid over-stirring as this may create “muddy” colors.
Tip: For a bright pop of color, use an opaque white soap base combined with some type of transparent color of your choice. Don’t be discouraged if your batch of soap doesn’t work as well as you hoped. Swirling takes a bit of practice.
Embedding
Embeds are eye-catching and fun. You can get really creative with soap embedding and add anything from rubber duckies, seashells, to other colorful leftover soap pieces.
Remember to pick items that are heat-resistant!
Just as with swirling and layering, getting the temperature right with embeds is the key.
- Fill your soap mold halfway with your soap mixture. Allow this first layer to form a medium-thick layer. This ensures the embedded item doesn’t sink to the bottom.
- Spray your object with rubbing alcohol.
- Gently press the object onto the first layer.
- Fill the mold with the rest of the soap mixture.
Stamping
Stamping is a great way to add some creative flair to your handmade soaps. While you can buy acrylic or resin stamps, resin-based stamps work better for melt and pour stamping.
You’ll need:
- A rubber mallet
- Resin stamps
Avoid hitting your stamp too hard with the hammer as this will split your soap. With melt and pour soap, it’s best to stamp just as the soap is setting, while it’s still slightly malleable and isn’t completely hardened.
- Spray your stamp with rubbing alcohol to prevent it from sticking to your soap.
- Place the stamp as desired directly onto your bar of soap.
- Use a rubber mallet to hit the stamp directly in the middle of the stamp, then each of the four corners, and once again in the middle.
- Gently peel away the stamp from the soap.
FAQs: melt and pour soap making techniques
What happens if you overheat melt and pour soap?
Try your best not to overheat or burn your melt and pour soap base. All sorts of unfavorable things can happen to the soap base when it’s overheated: it can change color/texture, lose its fragrance or moisture, and become all-around difficult to work with.
Depending on how badly you burn your melt and pour soap, you may need to toss it and start again.
If you’re using a microwave to melt your soap base, remember to heat in small increments to avoid burning. If you’re using a double boiler, set the heat to medium, or medium-low.
Why is my melt and pour soap sweating?
Melt and pour soaps are especially prone to sweating. This is because most melt and pour soap bases contain glycerin. Glycerin is a humectant which attracts and absorbs moisture from the air, resulting in “sweating.”
To prevent soap sweating, you can wrap your soap in plastic wrap.
If you don’t want to use plastic wrap, you can try these other methods:
- Place finished soaps in an airtight container with silica beads or rice for up to two hours. This helps remove excess moisture. But don’t leave soaps in too long as they’ll dry out.
- Use a fan to blow air over finished soaps.
- Use a dehumidifier. This may help in especially humid climates.
We hope you liked this introduction to melt and pour soap making techniques! Sharing is caring.


Author: Theresa Tesolin
Theresa is co-founder of RusticWise. She helps people unleash their inner DIY spirit by encouraging them to get dirty and make or grow something from scratch.