What’s the Difference Between Gelled vs Ungelled Soap?
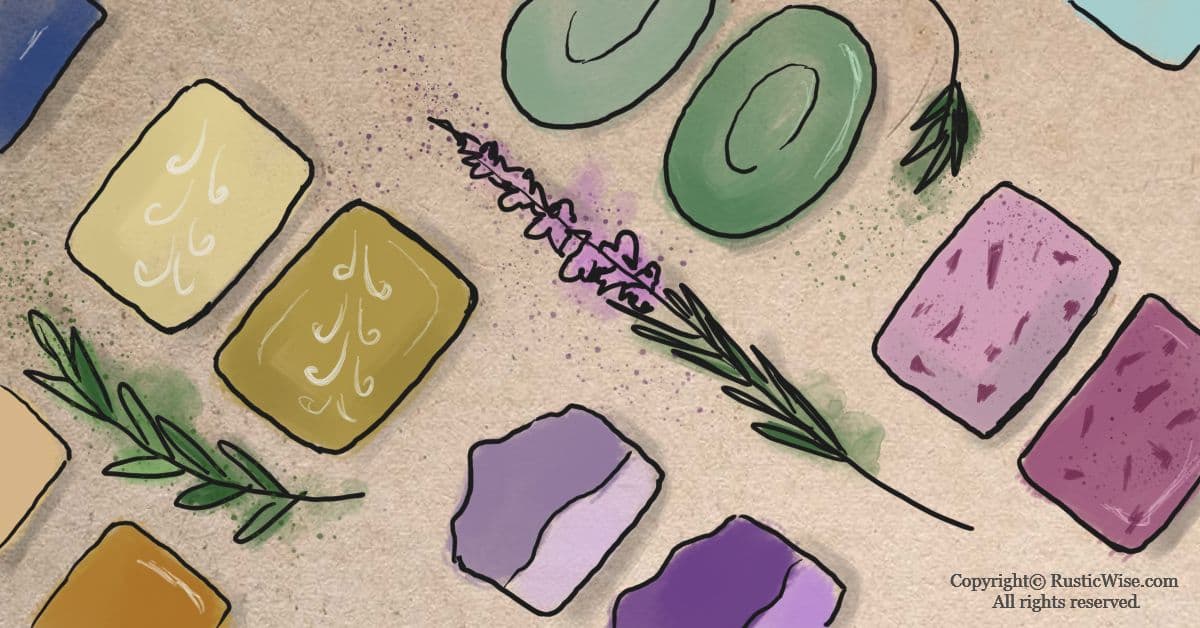
Are you wondering about the difference between gelled or ungelled soap when it comes to cold process handmade soap? First things first. Gelled vs ungelled soap is mostly a matter of aesthetics. It’s a matter of personal preference and has no impact on the usability or overall quality of the soap. Soaps that have gone through gel phase take on a more translucent quality. The colors are more vibrant and soaps often develop a sheen.
Not every soap needs to go through gel phase. As a soapmaker, you can decide whether to allow your soaps to naturally go through gel phase. You can also force a soap through gel phase, or prevent a batch of soap from undergoing it.
Clear as mud? Let’s take a closer look at the differences between gelled vs ungelled soap, plus reasons why you should (or shouldn’t) go through gel phase.
A closer look at gelled vs ungelled soap
Gelled soap is simply soap that has gone through gel phase. Gel phase gets its namesake as your soap mixture becomes gelatinous in the mold (think jelly or Vaseline). This is a brief period of time shortly after the soap mixture has been poured into the mold and begins to heat up. Gel phase may occur within the first couple hours after your soap mixture is poured.
During this time, the soap batter becomes hotter than the temperature you left it at. The soap mixture is quickly going through saponification and is actually absorbing heat. Lye and oil are combining to create soap and glycerin.
Heat starts from the inside and slowly spreads outwards. You’ll notice the center of your soap batter may begin to look darker and take on a translucent quality.
Your soap may gel completely, or go through partial gel where the center is darker than the outside edges. Soaps go through partial gel when the soap mixture doesn’t retain a high enough temperature to fully gel.
Some soaps may naturally go through gel phase, while others don’t at all.

At what temperature does soap gel?
It really depends on your soap. There are a number of factors that affect when cold process soap gels. (During hot process soapmaking, the soap gels during the cook time.)
Kevin Dunn, author of the book Scientific Soapmaking explains in more detail about the factors that affect whether soaps gel or not. The two main factors are the temperature of the lye mixture and oils when combined; and the water content of the soap recipe.
- The temperature of the oils and lye mixture: The higher the temperature of the oils and lye mixture when combined, the more likely the soap batter enters the gel phase.
- Water content: The amount of water used in your soap recipe affects whether your soap gels or not.
- Soaps with low-water gel only at extremely high temperatures. It can be difficult to reach gel phase with low-water content soaps.
- Soaps with high or medium water content reach gel phase more readily if the lye and oils are combined at warm or hot temperatures.
High-water soap “melts” or reaches gel phase at roughly 140 degrees Fahrenheit (60 degrees Celsius) when lye and oils are combined when warm or hot. Medium-water soap that’s combined when lye and oils are hot, reaches gel phase around 160 degrees Fahrenheit (71 degrees Celsius).
Other factors that may affect a soap’s ability to reach gel phase are:
- Type of fats used: Saturated fats saponify more quickly than unsaturated varieties.
- Fragrances and add-ins: Some fragrances and add-ins may increase saponification and temperature of the soap mixture.
- Type of molds used: Block molds are better at retaining heat than individual cavity molds. You’ll often see soap mixtures “darkening” at the center of block or loaf molds.
Ingredients that are prone to overheating
Some soapmaking ingredients or add-ins tend to raise the temperature of soap, all on their own. This causes your soap to gel whether you want it to or not. Even preventative measures like placing your soap mold in the fridge might not be enough to stop your soap from gelling.These ingredients include:
- Beer
- Honey
- Milk
- Fruit purées
- Wine
It’s recommended that you soap at lower temperatures to prevent these ingredients from burning and creating a nasty odor.
Characteristics of gelled soap
Gelled soap takes on a few unique properties:
- Colors deepen and appear more vibrant. This is especially true when you use natural colorants.
- Soap takes on a translucent quality.
- Soap develops a light sheen.
If you like any of the properties we described above, by all means, go ahead and allow your soap to become gelled.
When not to make gelled soap
Keep in mind that gelled soaps might not hold up well if you’re doing intricate designs. The high heat may burn off delicate oils or fragrances.
Tip: A benefit of soap going through gel phase is that it speeds up saponification. You’re able to unmold your soap more quickly as soap hardens from the high heat. BUT, your cold process soap still needs to cure for 4-6 weeks for best results.
How to coax gel phase
If you’re struggling to make your batch of soap gel, here are a few tips and tricks:
- Mix when warm: To ensure your soap reaches gel phase, aim to combine your lye mixture and oils when they’re roughly 120-130 degrees Fahrenheit (49-54 degrees Celsius).
- Insulate and wrap: Keep that loaf mold snug as a bug by wrapping a towel around it. If you’re using individual cavity molds, you’ll have a harder time reaching gel phase as heat disperses more. To insulate several individual cavity molds, try carefully stacking the molds inside a plastic container (such as a large Tupperware container with a lid). Secure the lid and wrap several towels around it (2)
- Heating pad: If towels aren’t doing enough, try placing a heating pad underneath the soap mold. Leave the heating pad on for around 30 minutes at a low or medium setting.
- Place outside (if warm and sunny): Sometimes the power of the midday sun is enough to do the trick. Place your wrapped soap molds outside in a safe, sunny location for several hours.
- Place in oven: Only use the oven method for heat-safe molds. Preheat your oven to the lowest temperature. Place the soap mold inside the oven and turn off the heat. Allow it to sit for several hours or overnight.
Tip: You’ll want to monitor the temperature of the soap and check in on it from time to time. Soap that gets too hot begins to crack on the surface as heat struggles to escape. In extreme cases, you may have a soap volcano on your hands—a messy eruption of soap batter. If you see soap cracks, remove any towels or blankets. Run a fan over it and allow air to circulate to cool it down. You can also try placing it in the fridge or freezer.
Characteristics of ungelled soap
So what about ungelled soap? Here are properties of ungelled soap:
- Muted, pastel-like colors.
- Opaque, matte finish.
- Soap is a bit smoother.
When to make ungelled soap
You’ll want to make ungelled soap when working with milk soaps, additives such as honey, or other delicate oils and fragrances you don’t want to put under extreme heat. Also, soap recipes which contain sugars may burn during the gel phase.
If you’re working with any of the above ingredients it’s best to avoid gel phase altogether. You may end up with a batch of soap that burns and produces a nasty odor, or discolored soap.
Also, soap that doesn’t reach gel phase often retains fragrances and essential oils better as it does not undergo high heat. You may get away with using less EO with ungelled soap.
How to avoid gel phase
The key in preventing gel phase is to keep temperatures low. Here are some things to keep in mind if you want to avoid gel phase:
- Allow lye and oils to cool: The temperature in which you combine your lye mixture with your oils is crucial if you want to avoid gel phase. Allow your individual lye and oil mixtures to cool to at least 110 degrees Fahrenheit (43 degrees Celsius) or lower.
- Use individual cavity molds: Large masses of soap are better able to retain heat. To prevent heat retention (and therefore gel phase), use individual cavity molds instead.
- Place in the fridge or freezer: Keep that soap batch nice and cool by placing it in the freezer or fridge overnight.
What to do with soap that reaches partial gel phase?
Sometimes when you let saponification do its magic, you’re left with a batch of soap that’s partially gelled. It looks darker in the middle and lighter around the edges. Depending on your outlook this could be a happy accident, or a mistake that warrants fixing.
You have a few choices.
You can leave it as is. As we mentioned above, whether a soap reaches the gel phase really doesn’t impact its quality. You may find that the dark spot in the middle lightens naturally with time.
Or, you could try coaxing the soap batch to fully gel by placing it in the oven. Set your oven to 170 degrees Fahrenheit (77 degrees Celsius). Place your heat-safe mold into the oven for a couple hours, remembering to check in periodically. Hopefully, the heat is enough to extend the gel phase to the entire loaf mold.
New to making soap? 🧼❓
👉We have a fantastic overview on the whole soapmaking process here: read our Timeless Guide To Soapmaking.
If you would like to see our soapmaking posts organized by topic type, see our Soapmaking Collection.
Would you like more timeless tips via email?
Fun tips to help you live an independent, self-sustaining lifestyle. Opt-out at any time.


References
- Dunn, Kevin (31 March 2016). “To Gel or Not To Gel,” Wholesale Supplies Plus. Accessed March 2021.
- Wholesale Supplies Plus, Simple Secrets: Gelling CP Soap, https://www.wholesalesuppliesplus.com/handmade101/learn-to-make-articles/Simple-Secrets-Gelling-CP-Soap.aspx. Accessed March 2021.
- Grosso, Alicia (2016). DIY Artisanal Soaps: Make Your Own Custom Handcrafted Soaps! Adams Media. ISBN 978-1-4405-9408-3.

Author: Theresa Tesolin
Theresa is co-founder of RusticWise. She helps people unleash their inner DIY spirit by encouraging them to get dirty and make or grow something from scratch.