Soda Ash on Soap: How to Prevent and Remove It
Have you ever noticed that sometimes your homemade cold process soap develops a white residue on the top? Don’t worry, it’s not mold—it’s probably soda ash on soap. Soda ash is caused by lye reacting with naturally occurring carbon dioxide in the air and forming sodium carbonate. The result is a scum-like crust over exposed soap. Luckily soda ash doesn’t affect the soap’s safety or usability—just the aesthetics. It typically occurs within the first three or four days after pouring.
While it’s frustrating to find this unwanted layer of crust on your soap, it’s a common occurrence and happens to pretty much all soapers at one point or another. We’ll cover how to prevent soda ash from forming in the first place, and how to fix soda ash when it does happen. So don’t even think about throwing out your batch of soap!
How to tell if you have soda ash
Not everything that forms on your soap is actually soda ash. White discoloration that runs deep may be glycerin rivers. Sometimes white marks on streaks may develop below the surface of soap which are not soda ash.
Kevin Dunn from Caveman Chemistry has some helpful tips on how to tell if that white stuff on your soap is actually soda ash:
- A while film appears only on the surface of soap.
- The white film forms a thin layer like “icing on a cake.”
- It comes off easily with water.
- Soda ash is not easily removed with alcohol.

Credit: Yay Images
Why soda ash is mostly a headache when making cold process soap
The reason why you mostly see soda ash develop in cold process soapmaking and not hot process or melt and pour is because of excess lye. Unlike melt and pour and hot process methods where the soap batter has already neutralized when poured, cold process soap batter is still in the process of saponifying when poured into molds.
Lye, also known as sodium hydroxide (NaOH) forms sodium carbonate (aka soda ash) when exposed to carbon dioxide in the air.
Top reasons why you may have soda ash on soap and how to prevent it
Now there are many possible reasons why your homemade batch of soap develops soda ash. Soapmaking is part science, part art form—any number of factors may affect the finished product. However, here are the top reasons why you might find soda ash on soap.
Excess lye
We mentioned how excess lye is a major contributing factor to soda ash. This is why it’s so important to carefully measure all ingredients when making soap.
Prevention: Measure out your lye, and measure it again to double-check. An accurate scale that measures in both ounces and grams is an invaluable soapmaking tool.
Cold process soap left uncovered while in the mold
Exposure to air while soap is curing is a contributing factor of soda ash, so it’s best to wrap it up!
Prevention: If you’re using loaf molds, you can either cover the top with plastic wrap several hours after its been poured, or use a towel to insulate it. (Insulating soap however will force it to gel.)
When using individual cavity molds, you can place these in a plastic container with a lid.
Or, you could try spritzing the tops of soap with isopropyl alcohol (99 percent). This creates a protective barrier between the soap and surrounding air.
Soap that’s removed too quickly from mold
Hey, sometimes we get a little impatient and can’t wait to check out our batch of homemade soap. However, there are consequences of our impatience—namely the formation of soda ash.
When you unmold soap, more of its surface area is exposed to air making it more susceptible to soda ash.
Prevention: It’s best to wait at least two or three days until soap is unmolded. If your soap hasn’t fully hardened, there’s a greater chance of soda ash forming.
Soap poured at thin trace
Unless your soap recipe specifically calls for pouring at thin trace, try to avoid doing so. When soap batter is thinner, it’s more prone to developing soap ash.
Prevention: Thinner soap batter has a higher tendency to develop soda ash so aim to pour at medium trace if possible. Soap batter is denser at medium trace.
High humidity
If you live in a humid climate, the excess moisture in the air contributes to soda ash.
Prevention: Try using a water discount. Keep in mind that when you discount water, your soap batter will saponify more quickly. Just be sure to run your measurements through a soap calculator first. You can start discounting water at around 30 percent and take it from there.
Keep it warm-ish
When soaping, temperature is key. Not only do colder room temperatures increase the chance of soap ash, the temperature of your oils and lye mixture matter too.
Prevention: Try combining your oils and lye mixture on the warmer side between 100–110 degrees Fahrenheit (38–43 degrees Celsius). If your room is cold, you might want to use a heating pad under your soap mold.
Poor water quality
Do you use distilled water when soaping? If you live in an area with hard water, the water quality can affect the finished soap—you may experience soda ash plus white streaking throughout.
Prevention: Stick with distilled or bottled water. Distilled water is free of hard minerals and impurities, which makes for a better bar of soap.
Other less common factors which may contribute to soda ash
- Soaps that contain milk or sugar: According to Wholesale Supplies Plus, soda ash is more prevalent in soaps that contain milk products or sugars. I’m not entirely sure why this is, but it seems to be the case after reading about it on a few forums.
- Certain fragrance oils: Some people report soda ash upon using certain fragrance oils.
How to remove soda ash on soap
While soda ash is a nuisance, it’s fairly easy to remove. Some people have learned to embrace soda ash as a “rustic” touch to their bars of soap. It doesn’t affect the quality or usability of the soap, after all. And it washes away after you’ve first used it.
You can either join this soda-ash-acceptance group, or choose to remove it.
Here are a few ways to remove it:
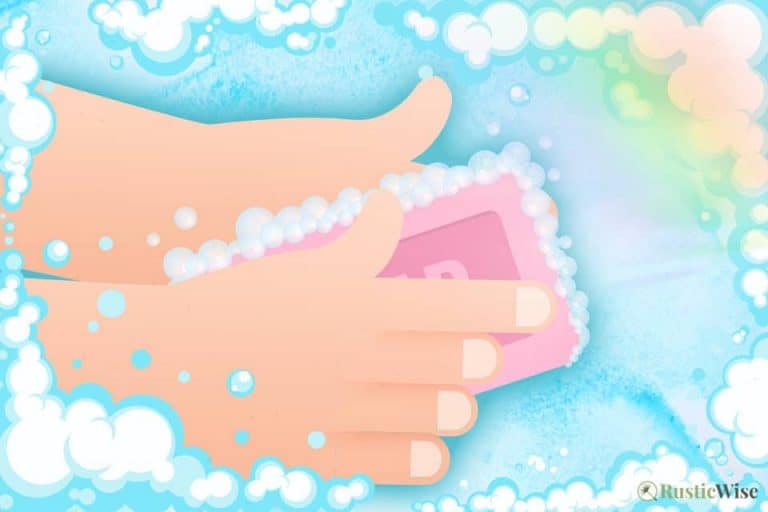
- Water: True soda ash can be easily removed with water as Modern Soapmaking shows us. Wear a pair of gloves (to protect soap from fingerprints). Take each bar of soap, and quickly dip into a bowl of water and remove immediately. Shake off excess water and place on a flat surface to dry. Speed up the drying process with heat gun.
- Steam power: A hand-held steamer (like the ones used to steam your clothes) comes in handy to quickly and effectively rid your soap bars from soda ash.
- Peel or shave: Use a vegetable peeler or a small grater to remove the affected areas.
- Scrub it off: There are a few different tools you can use to remove soda ash: a (clean) toothbrush, a soft cloth, or a pair of nylons. Just remember to gently mist your tool before gently scrubbing.
Related questions
How do you know when soap is cured?
With cold process soap, it typically takes about four weeks for the soap to fully cure. It may take longer for certain soaps made of different oils or with different ingredients.
Hot process soap should be cured for at least 1–3 weeks. This allows the soap to harden and any excess water to evaporate.
Melt and pour soaps are cured and ready to use when hardened (typically within 24–48 hours).
What do you wrap homemade soap in?
This is a good question. It depends on whether you made hot or cold process soap vs. melt and pour soap.
Hot and cold process soaps need lots of air circulation. So whether you’re planning on giving soap as a gift, or selling it, it’s best to wrap it just before you need to. A few things you can wrap cold or hot process soap include:
- Wax paper
- Uncolored tissue paper
- Cigar band (aka belly band)
- Fabric
Melt and pour soap on the other hand should be wrapped in plastic wrap as soon as it’s fully hardened to prevent the soap from “sweating.” Most melt and pour soaps contain plenty of glycerin which is a humectant that absorbs/attracts moisture in the air.


Author: Theresa Tesolin
Theresa is co-founder of RusticWise. She helps people unleash their inner DIY spirit by encouraging them to get dirty and make or grow something from scratch.