How to Remove Air Bubbles When Canning and Why You Really Should
Canning is a lot of work, but it’s worth the effort when you get to enjoy the fruits of your labor all year long. One thing that can make or break your canning experience is how well you remove air bubbles from the jar before sealing. We’ll show you how to remove air bubbles when canning to ensure a successful canning experience! The good news is, removing air bubbles isn’t difficult.
Removing these air bubbles helps prevent spoilage by leaving adequate room (headspace) for food to expand as it heats up in the jar during processing time. Air bubbles can cause a problem if they prevent your lid from getting a good seal.
How do air bubbles occur when canning?
Air bubbles may form as you’re packing jars with food. They are especially prone to forming when raw packing foods (this involves filling jars with fresh or raw unheated foods followed by adding liquid or brine to the jar). (1)
Pockets of air become trapped in the food. Sometimes air bubbles are visible just by looking at the jar; other times they’re inconspicuous.
Why it’s important to remove air bubbles
If you don’t get all the air bubbles out before processing, this may prevent your lid from getting a good seal. An improperly sealed jar invites a host of unwelcome bacteria and pathogens that may result in foodborne illnesses, or worse: botulism.
As you may know, it’s vital to get the right amount of headspace when canning to ensure a tight seal. In case you’re not familiar, headspace is the distance from the top of the food to the inside of the lid. There needs to be enough space to allow for proper expansion when processing, but not too much.
Sometimes air bubbles may “pop” after you’ve successfully processed your jars and gotten a good seal. This may occur days or weeks after canning. What happens then is that food becomes exposed to the air, and is no longer submerged in the brine, syrup, or liquid which is preserving it. That top exposed food may become discolored, or develop a funky smell.
And this is something nobody wants.
Luckily, there are tools you can use to prevent this from happening.
Canning bubble remover tools
First things first. Let’s talk about what not to use to remove air bubbles.
You should pretty much avoid using anything metal, or scratchy. Metallic utensils may nick or scratch the surface of the jar and could introduce bacteria or create other problems during processing. Sharp utensils may cause permanent scratches on your jars, which may shorten its usefulness over time.
Stick with using wooden or plastic utensils instead.
So what exactly can you use to remove air bubbles? You have some options. Pretty much anything thin enough to easily maneuver around the inside of the jar works well.
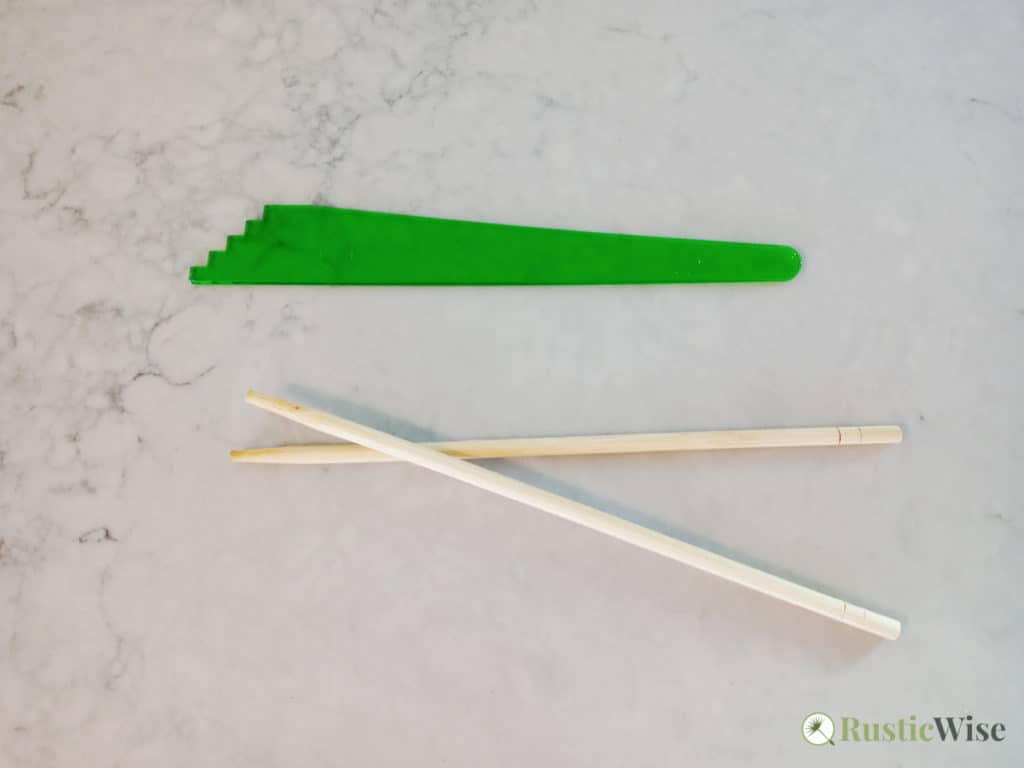
- A thin plastic spatula.
- A wooden chopstick or wooden skewer. This works surprisingly well and is something most people have around the house!
- A store-bought bubble stick/bubble remover/bubble popper. We actually have one of these at home, however a chopstick works just as well. Most of these commercially-made contraptions have a dual purpose: a bubble stick and a headspace measurer all-in-one.
While having a 2-in-1 tool sound handy in theory, in practice it’s actually kinda messy. After using the end for popping air bubbles, you’ll need to flip it around to measure the headspace. By this time the handle is already all messy from whatever you have in the jar.
But having the headspace measurer is definitely handy! Use it in conjunction with another tool (like a chopstick). Or if you’re so inclined, you can buy two.
How to remove air bubbles when canning
Okay, so this section is pretty anti-climatic. We’ve been talking about the importance of removing air bubbles, and now we’ll show you how to do it. It’s so simple.
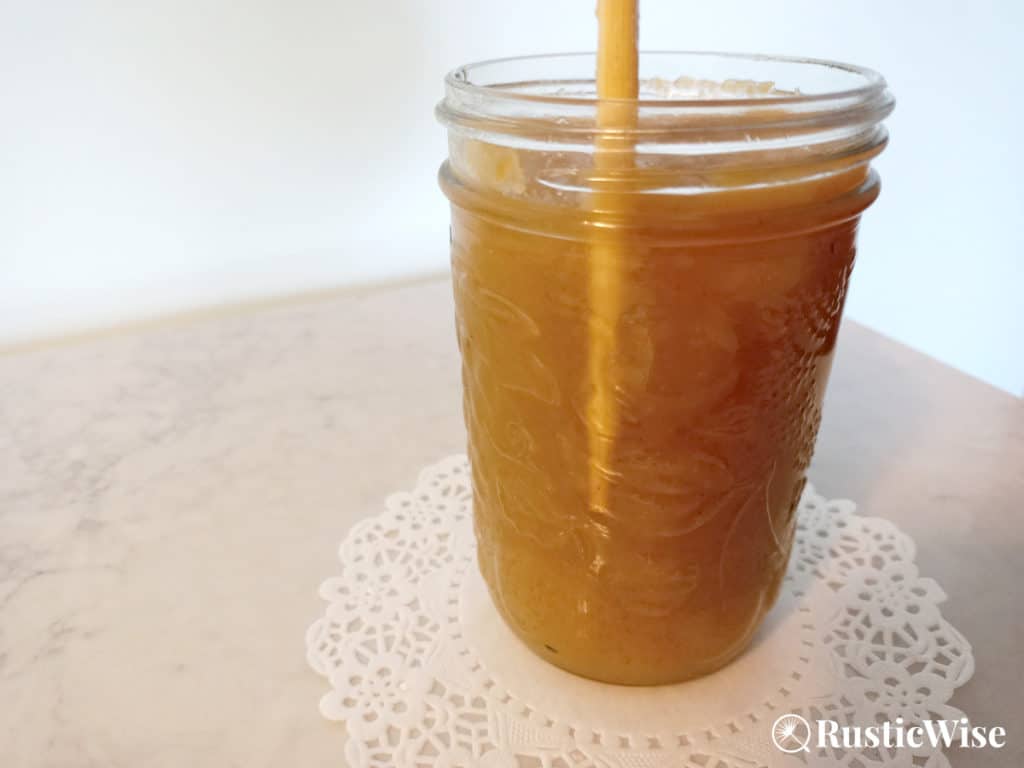
- After you’ve packed your jar with food, select a bubble removing tool of your choice and insert it into the jar along the outside edges.
- Slowly move the bubble stick along the circumference of the jar. You may need to do this several times to allow air to rise to the surface. Do not stir the contents of the jar!
- If an air bubble (or two) pops, refill with more food or liquid to ensure proper headspace.
- Wipe the rim clean. Then proceed to put the lids on and process your bubble-free jars.
That’s it!
What happens if you find an air bubble after processing?
Hey, sometimes it happens. You’ve processed your jars only to notice an air bubble or two afterwards. It’s not a big deal so long as your lid has a good seal.
A good way to test the seal is to lift the entire jar up by the lid. A properly sealed jar is one where the lid stays firmly in place.
Related questions
What is a false seal in canning?
A false seal is simply when you think you may have a good seal, only to find out after that you don’t. Or, sometimes a sealed lid becomes unsealed.
This can happen due to a number of reasons:
- Unclean jar rims: Even small grains of salt, sugar, or pepper can prevent a good seal. Ensure all jar rims are wiped clean with a damp cloth.
- Improperly processed jars: Follow all instructions carefully and use only reputable recipes.
- Follow proper headspace guidelines: Leaving the right amount of space at the top ensure a good seal is maintained.
How can you tell if canned goods have botulism?
The scary thing about botulism is that it’s colorless and odorless. Even a tiny taste of the toxin may cause illness and in severe cases, death.
According to the Centers for Disease Control and Prevention (CDC), the following are a few symptoms of botulism:
- Altered vision (blurry, or double vision)
- Slurred speech
- Droopy eyelids
- Difficulty swallowing
- Dryness in the mouth
- An odd sensation in the tongue
- Weak muscles
If you or someone you know experiences any of the symptoms associated with botulism, please seek immediate medical care.
The CDC notes that botulism often arises from improperly processed food from home canning. To protect yourself and your family, ensure you only follow up-to-date canning recipes and ensure proper processing times, especially when it comes to low-acid foods (most veggies and meat).
Always inspect canned goods before eating. To stay safe, don’t eat food from jars or cans:
- With leaks, bulges, or cracks
- With visible mold
- With unusual coloring, texture, or odors
- That spurts liquid when opened

References:
- Willis, Kimberley (2010). Canning, Pickling & Preserving: Tools, Techniques & Recipes to Enjoy Fresh Food All Year-Round. Knack / Morris Book Publishing. ISBN 978-1-59921-950-9.
- National Center for Home Food Preservation (NCHFP), Frequently Asked Canning Questions, https://nchfp.uga.edu/questions/FAQ_canning.html#4. Accessed April 2021.
- Duran, Faith (04 June 2019), “Is It OK If There Are Air Bubbles In Finished Jars? Ask the Guest Expert: Canning Questions for Marisa McClellan,” The Kitchn. Accessed April 2021.
- University of California, What Can Cause a False Seal? https://ucanr.edu/sites/mfp_of_cs/files/312293.pdf. Accessed April 2021.
- Centers for Disease Control and Prevention (CDC), Home Canning and Botulism, https://www.cdc.gov/foodsafety/communication/home-canning-and-botulism.html. Accessed April 2021.

Author: Theresa Tesolin
Theresa is co-founder of RusticWise. She helps people unleash their inner DIY spirit by encouraging them to get dirty and make or grow something from scratch.