How To Can Food: The Ultimate Guide
Chances are, you may have a grandparent or parent who knows how to can food. Maybe you too, know a thing or two about canning and preserving food. The busyness of modern life (plus the convenience of buying food at the grocery store) has contributed to the decline of this useful skill.
We gather that if you’re here reading this, you too are drawn like many others to this timeless practice. Canning food is a wonderful way to preserve the summer and fall harvest while ensuring you have food reserves all year-round. Whether you’re a complete newbie, or have a few canning projects under your belt, we’ll take you through the complete canning process from start to finish.
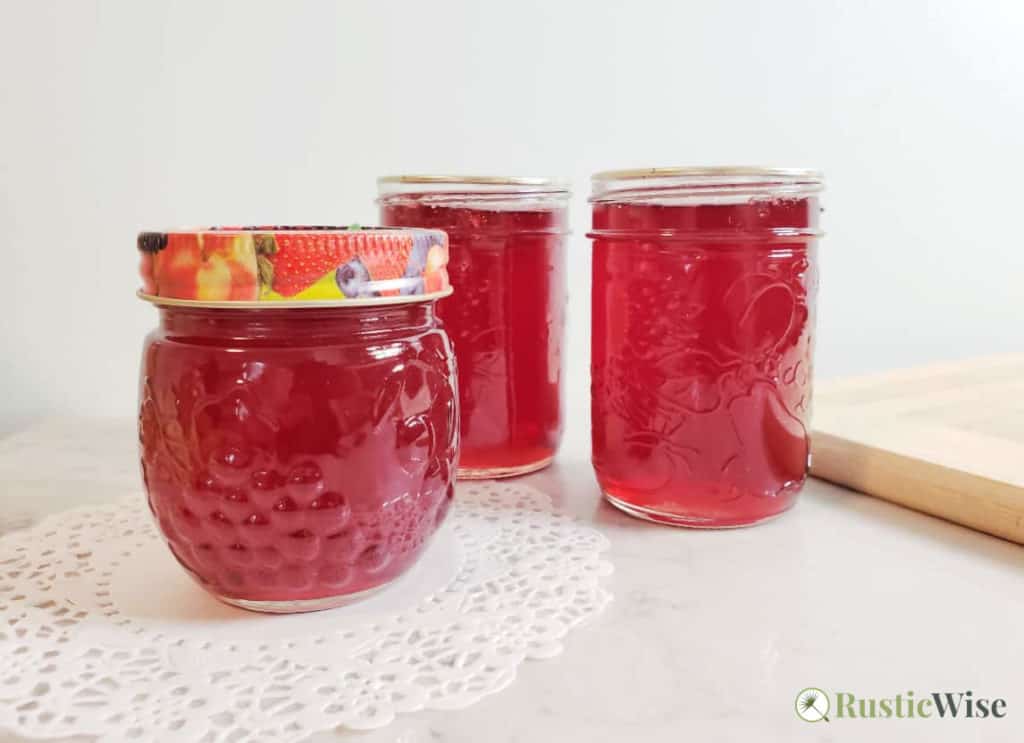
Our own experience with canning began with rhubarb. An abundance of rhubarb to be exact. Anyone who has grown rhubarb knows how quickly these plants can grow. We had planted several rhubarb plants in the garden—unaware of how large that particular variety grew. The conditions in our backyard were just right for rhubarb to thrive in—lots of sunshine and rich soil.
Soon the rhubarb began taking over the garden with its large spreading leaves. We knew we had to do something with our bountiful harvest. So we decided to learn how to can food.
The benefits of canning
There’s something very alluring about the thought of canning your own food in glass jars and having a pantry full of pickles, plums, apple sauce and garden grown vegetables-all with your own two hands (and maybe a pair of helping hands!). Here are a few benefits of canning your own food:
Canned Chutney Recipes: 10 Bold and Flavorful Chutneys You’ll Love
The perfect mix of sweet, spicy, and savory—chutney is a versatile condiment to add to your collection. Here’s a roundup of 10 canned chutney recipes plus safe canning tips.
How canning works
According to the United States Department of Agriculture (USDA), there are two main safe home canning methods:
- Boiling water method: Also known as using a water bath canner, or boiling water canner, this method involves submerging jars under boiling water for a sustained period of time. You can use a water canner, or a large stockpot.
- Pressure canner method: Pressure canning involves the use of sustained pressure (PSI) at high temperatures for a sustained period of time. Pressure canners can reach higher temperatures than a water bath canner.
Please, please, please don’t attempt to use any other methods such as microwave, crock pot, dry canning, or steam from a dishwasher. These methods don’t produce the high temperatures at sustained times needed to safely can food.
The boiling water bath method is the way most people begin with as it’s simple and the upfront cost is minimal. You probably already have canning pots for this at home. Large, sturdy stock or soup pots will do the trick.
(Note: the terms boiling water method and water bath method are used interchangeably throughout this guide and refer to the same process.)
Use this method for:
- High acid foods which include fruits such as apples (applesauce), fruit jams, jellies and preserves, tomatoes or tomato-based foods like salsas and sauces. For canned fruit, you can use water, fruit juice, or syrup depending on the recipe and your personal preference.
- Some quick process pickling recipes that call for the use of acidic ingredients such as lemon juice or vinegar.
How To Make Heavy Syrup for Peaches: Tips and Tricks
Learn how to make heavy syrup for peaches to preserve your harvest at its peak freshness—easy and delicious!
The pressure canner method is suitable for everything the water bath method can do and is the only safe way to process low acid food. Use this method for:
- Canning most vegetables, meat, fish, and poultry. Examples of low acid veggies include corn, green beans, and peas.
If you plan on canning veggies and meats, or even if you plan on canning fruits on the regular, then it’s worth investing in a pressure canner. The benefits of pressure canning is that it can sustain higher temperatures needed to kill harmful bacteria in low acid food and can reduce the processing time by several hours in some recipes.
Don’t confuse a pressure canner with a pressure cooker. A pressure cooker such as InstaPot, or Instant Pot can do many miraculous things, but a pressure canner it’s not. A pressure canner safely monitors the internal temperature to kill harmful bacteria. On the other hand, some people use an InstaPot with the lid kept open if you’re doing water bath canning. Just use a rack to keep the jars from touching the bottom. Please use at your own discretion.
Tip: The acidity or pH level of the food you’re canning plays a large role in determining whether you should use a water bath canner vs. a pressure canner. In general, the dividing line occurs at a pH level of 4.6: foods with a pH below 4.6 are acidic and can be processed using a water bath; foods with a pH above 4.6 are considered more alkaline and must be processed using a pressure canner.2
Safe home canning tips
The risk of botulism (a deadly type of food poisoning) is the greatest safety threat when canning foods. Although the risks of E.coli and salmonella are present, botulism is something to be avoided at all costs—it’s sort of the Darth Vader of bad beasties—potentially lethal.
Did you know that botulism spores are all around us? It’s found in soil and on the surface of fresh fruits and vegetables. Botulism spores in this form are harmless in the presence of air. (This is another good reason to thoroughly wash your produce before eating.)
Many types of microorganisms may give off a funny color or smell. But not botulism. It’s colourless and odourless making it extremely difficult to detect until it’s too late.
This strain of bacteria known as Clostridium botulinum thrives in low-acid environments that are moist, have little to no oxygen, and are in the “danger zone” between 40 and 120 degrees Fahrenheit (4 and 49 degrees Celsius).2
In other words, botulism thrives in botched canning jobs.
When proper canning procedures and processing times are not followed, botulinum bacteria grows in low acid environments. Its spores replicate and release deadly toxins when ingested.
But not to worry. By following a few basic safety precautions, you can keep the threat of botulism at bay.
Thoroughly wash and clean foods and surfaces
“Cleanliness is next to godliness” as the expression goes, and it sure makes the whole canning process much safer. One of my earlier jobs when I was still in school was working at a Red Lobster doing kitchen prep work (cutting veggies, mixing sauces, dealing with raw seafood). Whenever I think of food safety, I think back on my summer slaving away at a commercial kitchen.
I’m sure you already know about these safety precautions, but it’s a good idea to review them before you start canning:
- Do a good wiping and scrubbing of your work space (counters, tables, sinks, etc.) prior to canning. Even though most bacteria found on surfaces are harmless, you’ll have peace of mind knowing that you’re canning in a clean environment.
- Wash all jars and lids in hot soapy water and rinse well. Sterilize jars in boiling water for at least 10 minutes if your recipe calls for a processing time of less than 10 minutes using a water bath canner. (This typically applies to some jams and jellies.)
- Be extra vigilant when working with raw meat and use separate utensils and cutting boards for safety. Wash your hands with soap and water after touching meat.
- Always do a thorough job of washing and scrubbing produce. You should be picky when selecting the fruits and veggies used in canning. Select the highest quality produce (avoid fruits with bruises or cuts), and your reward is a pantry full of tasty homemade food.
- Cover any foods when not used.
Tip: When do you need to sterilize canning jars? According to USDA guidelines, you do NOT need to sterilize canning jars if you’re using a pressure canner, OR if you’ll be processing foods for longer than 10 minutes in a water bath canner.3 Boiling your jars is the recommended method for effective sterilization. Other methods like using a microwave, or a hot oven to clean jars are not safe. Using a dishwasher to keep jars warm is handy, but most dishwasher cycles aren’t hot enough to effectively kill all bacteria.
Keep extra boiling water nearby when using water bath method
While you’ll need a large canning pot to do your actual processing, it’s handy to keep an extra pot of boiling water in case you need to top up your water supply. This is just an extra precaution to ensure water levels and temperatures remain consistent.
Don’t use extremely large jars
As a general rule, don’t use jars larger than a quart. In very large jars, food is overcooked on the outside and undercooked at the center. The risk of botulism is not worth it.
Besides, opening huge jars of food often leads to food spoilage and waste—better to stick with standard size mason jars.
General guidelines for canning processing times
It’s important to remember that the threat of botulism occurs most often in low acid foods like meat and vegetables—be extra careful when processing these foods.
Heating filled jars at the correct temperature for the proper amount of time is what kills harmful microorganisms. While it’s tempting to cut corners, don’t for safety’s sake. Adhere to your recipe’s instructions for proper canning time.
When you’re first learning how to can food, there are so many variables involved. Adhering to proper processing times and safety procedures is the top priority.
Main considerations include:
- Acidity of food (low acid vs. high acid).
- The method of canning (using a pressure canner vs. boiling).
- The size of jars (the bigger the jar, the longer the processing time).
- How food is packed into jars (hot pack vs. cold pack).
- The density of food when it’s packed (densely packed food needs to be processed longer than loosely packed food).
- Adjust for altitude. If you’re using the water bath method, higher altitudes (those over 1,000 feet) have lower boiling temperatures and you need to add minutes to the boiling time accordingly. If you’re using a pressure canner, you need to set the time and pressure according to your altitude.
The following is a table from the National Center for Home Food Preservation.4 You can see all the different variables involved to determine processing time using the water bath method.
Table: Water Bath Processing Time by Altitude, Jar Size, and Style of Pack
| Style of Pack | Jar Size | 0 to 1,000 ft | 1,001 to 3,000 ft | 3,0001 to 6,000 ft | Above 6,000 ft |
|---|---|---|---|---|---|
| Hot | Pints Quarts | 20 minutes 25 | 25 30 | 30 35 | 35 40 |
| Raw | Pints Quarts | 25 30 | 30 35 | 35 40 | 40 45 |
Source: National Center for Home Food Preservation
Note: If you live in a high-altitude area, you’ll need to adjust your processing time. Areas at high-altitudes have lower boiling temperatures which mean you’ll need to boil for longer and/or add more pressure if using a pressure canner.
Basic temperature chart
As you can see from the chart below, canning temperatures of most vegetables and all meats require a higher temperature5. The boiling water method can’t reach temperatures high enough to kill harmful microorganisms.
Table: Basic Temperature Guidelines for Canning
| Temperature (°F / °C) | Canning Guideline |
|---|---|
| Between 240–250 °F (116–121 °C) | Canning temperature for low acidic veggies, meat, and poultry in a pressure canner. |
| 212 °F (100 °C ) | Canning temperature for acidic fruits, tomatoes, pickles, and jellied goods in a water bath. |
| Between 40–140 °F (4–60 °C ) | DANGER ZONE: Ideal temperatures for the growth of harmful bacteria, yeast and mold. |
| Between 50–70 °F (10–21 °C ) | Ideal storage temperatures for canned and dried foods. |
pH chart of food acidity
If you’re like me, you might be struggling to remember what you learned in high school science class about what constitutes a “base” vs. “acid.” Here’s a quick refresher. The pH level measures the level of acidity from 1 to 14. The lower the number, the more acidic a food is. Something with a pH of 7 is neutral.
The more acidic a food is, the less processing time is needed to keep nasty microorganisms at bay. You can see how adding acidic liquids such as lemon juice or vinegar to food can make the jar’s contents more acidic and therefore shorten processing times.
As we mentioned above, in the world of canning, any foods with a pH below 4.6 are considered acidic; foods with a pH above 4.6 are considered alkaline or basic.
| pH | Food |
|---|---|
| 2.0–2.6 | Lemon juice |
| 2.0–2.8 | Limes |
| 2.0–3.4 | Vinegar |
| 2.8–3.4 | Plums, blue |
| 3.1 | Prunes |
| 3.3 | Apricots |
| 3.3–3.6 | Sauerkraut |
| 3.4 | Apples |
| 3.5 | Peaches |
| 3.5–4.6 | Tomatoes |
| 3.6 | Sour cherries |
| 3.6–4.3 | Plums, red |
| 3.9 | Pears |
| 3.9 | Honey |
| 4.65–5.45 | Peppers |
| 5.0 | Okra |
| 5.0 | Pumpkin |
| 5.0 | Carrots |
| 5.3 | Beets |
| 5.5 | Spinach |
| 5.52–5.80 | Squash, white, cooked |
| 5.79–6.00 | Squash, yellow, cooked |
| 5.69–6.10 | Zucchini, cooked |
| 5.7 | Asparagus |
| 5.7 | Cauliflower |
| 6.0–7.0 | Olives, black |
| 6.3 | Corn |
| 6.30–6.85 | Broccoli |
| 6.9 | Peas |
The Encyclopedia of Country Living, 40th Anniversary Edition7
A note about tomatoes
Tomatoes are a common food to can, from tomato paste and sauce, to salsa, to whole tomatoes. But did you know that there are varying levels of acidity between different types of tomatoes? It’s important to be aware of whether the tomatoes you’re using contain higher or lower acidity.
Depending on the variety, the location where tomatoes grow, as well as their ripeness when picked, this can vary quite a bit. Typically non-red tomato varieties in pink or yellow have less acid than reds. If you’re going to be canning tomatoes using the water bath method, ensure you pick a recipe with added acid for safety.
The importance of following canning recipes
While you might want to make substitutions and get creative when it comes to canning, it’s best to just stick to the canning recipe—especially if you’re canning low acid veggies or canned meat. Ensure your recipe is reliable and up-to-date. That old family recipe handed down from your great-Aunt Daisy might not use modern safety practices.
As a general rule, never alter the amount of vinegar, acidic acid, or sugar in a recipe. (If you want to cut down on sugar, ensure you’re using a low-sugar recipe that takes into account the reduced sugar.)
Vinegar is an acidifier which helps to preserve foods (and their colors) and may also reduce the processing time. When you’re using a water bath canner, it’s crucial to follow the amounts of acidic elements exactly. This includes vinegar, lemon juice, and citric acid.
Sometimes you’ll use sugar as a preservative, sometimes as flavoring, and sometimes as a bit of both. Never alter the amount of sugar used in a recipe unless it states it’s safe to do so. Sugar plays a vital role in jam and jelly recipes to jell the fruit juices. It also helps to improve the color and texture of certain fruits.
Salt is a key ingredient when canning pickles—don’t skimp on the salt!
When adding spices and seasonings, it’s best to stick to whole spices. Powdered spices tend to lend the food in the jar a muddied appearance and forms sediment at the bottom. While you’re free to add spices and seasonings to taste, some spices not used in the recipe may turn bitter over time.8 For safety and simplicity, use the same jar size as stated in the recipe. Learning how to can food is tricky enough without having to do extra math and conversions.
Canning Frozen Blueberries: How To Make Blueberry Jam and Pie Filling
Don’t let those pints of fresh blueberries go bad! Freeze them first and can them at your leisure later.
Common ingredients used as preservatives and thickeners
Here are some common ingredients used in many canning recipes:
- Pectin: This helps to jell fruit juices, particularly in jam and jelly recipes. Some pectin requires sugar to work, others don’t.
- Lemon juice: Similar to the properties of vinegar, lemon juice adds acid and helps to preserve the colors in fruit.
- Citric and ascorbic acid: Like lemon juice, citric and ascorbic acid serve a similar purpose in acidifying foods and preserving color.
- Vinegar: Use vinegar with at least 5 percent acidity. It doesn’t matter too much whether it’s cider or white vinegar, although they do have slightly different tastes.
- Salt: Buy salt that’s labelled as safe for canning and/or picking as it doesn’t contain iodine and additives like most common table salts do. Using kosher salt is okay.
- Sugar: Don’t use any sugar with additives, especially artificial sweeteners (unless the recipe explicitly calls for it). Generally, cane and beet sugar is okay.
Tip: Did you know that you can make your own pectin? Pectin is a naturally occurring carbohydrate found in the cell walls of plants and fruits. Apples are very high in pectin. Check out how to make your own apple pectin using a process called pectin extraction.
Essential canning equipment and tools
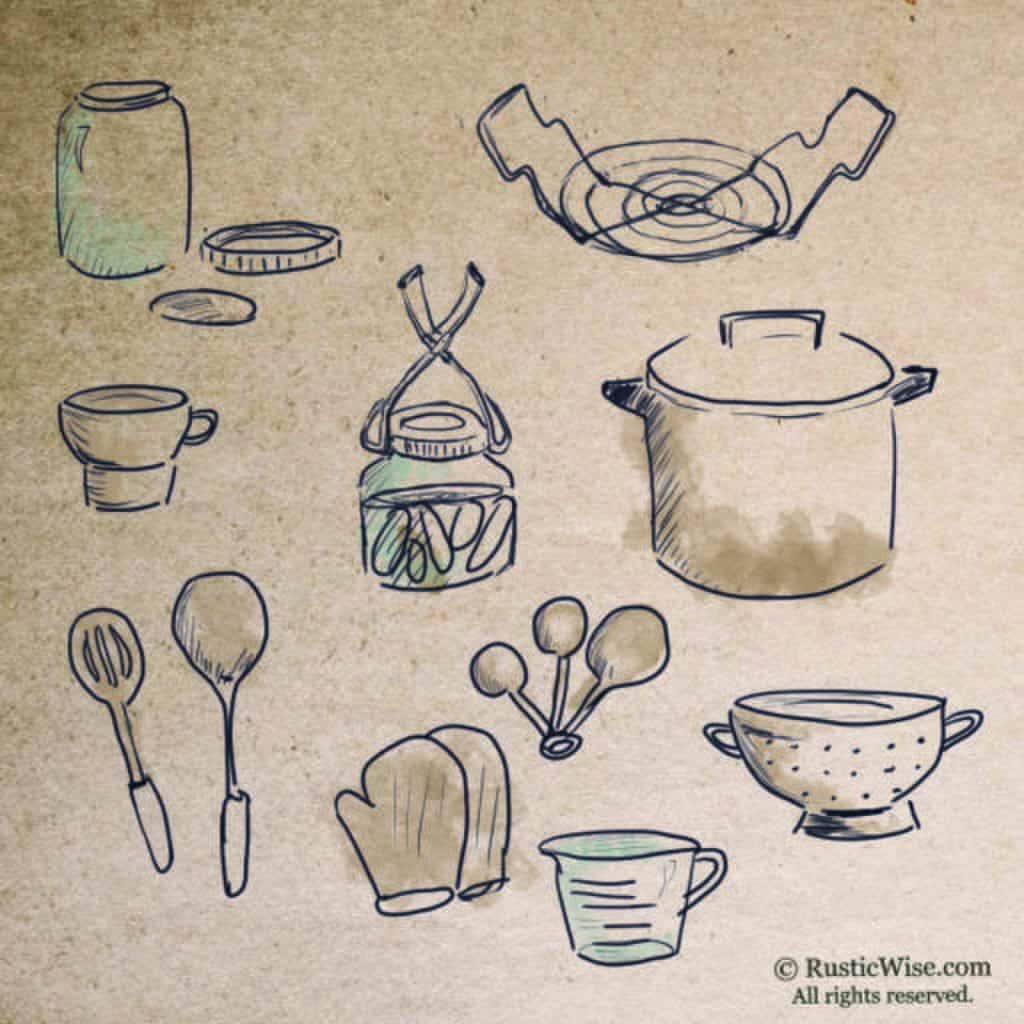
Here’s a few basic canning tools and equipment you’ll need to get started. While there is a bit of an upfront cost, you’ll more than make up for it in the money you’ll save on groceries throughout the year. Although it may be tempting to try to reuse old glass jars from store-bought jams and pickles, the lids on these types of containers will not provide an adequate seal.
Most of the following items you’ll probably already have in your kitchen:
- Oven mitts
- Measuring spoons and cups to accurately follow canning recipes
- Tea towels (because these always come in handy)
- Soup ladle for scooping and pouring
- Colander/strainer
- Slotted spoon for separating solids from liquids (like when handling fruits)

Nice to have, but not necessary:
If you’re planning on doing a lot of canning, or large-scale canning, these items might make your life easier.
- Food scale
- Food processor
- Jelly bags (these are mesh bags that separate crushed food from the juices)
- Magnetic lid lifter (makes it easy to remove lids from hot water when keeping them warm)
You can buy most of these items from your home hardware store or online. In Canada, a popular brand of canning supplies is Bernadin. Ball, Kerr, and Knack are also common, reliable brands found in most stores that sell canning supplies.
Common mason jar sizes
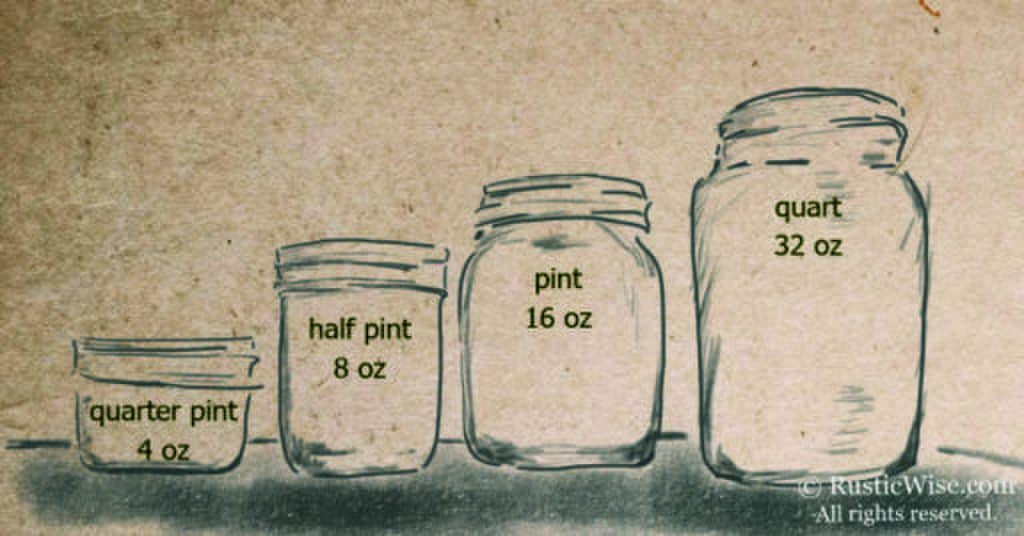
- Quarter pint (4 oz / 125 mL): These little cuties are good for jams, jellies, sauces, flavored vinegar.
- Half pint (8 oz / 250 mL): Commonly used for jams, jellies, preserves, syrups, and sauces.
- Pint (16 oz / 500 mL): Salsa, relish, pie fillings, and sauces. A pint jar is a very handy size to have.
- Quart (32 oz / 1 L): Sliced fruits and veggies, pickles.
👉 For more information about canning jars, check out Canning Jar Size Chart: Choosing the Right Jar for the Job.
What is cold pack and hot pack canning?
Cold pack canning and hot pack canning refers to the method of packing your jars.
Cold packing (aka raw pack canning) involves using fresh or raw food that’s unheated. A boiling hot liquid such as water, syrup, or juice is then added to the jar. Food that’s cold packed often shrinks which is why most recipes that use cold packing suggest densely packed jars.
However, some foods should not be densely packed as they expand when processing. Examples include corn, beans, peas, and potatoes.8
A downside to cold packing is that sometimes air in the jar will cause food discoloration in a couple of months.
Hot packing refers to recipes that call for boiling hot cooked foods. When hot packing, you’ll first boil or pre-cook the food before packing it immediately into hot jars. You’ll add hot boiling liquid to fill the jar. Hot packing helps to remove air from food which often causes food to shrink.
The upside is that you can fit more food into jars using the hot pack method. This method is better at removing air and preserving air resulting in a longer shelf life.
The takeaway: Whether you’re hot packing or cold packing, liquid should always cover the top of food and surround it as well.
What is canning headspace?
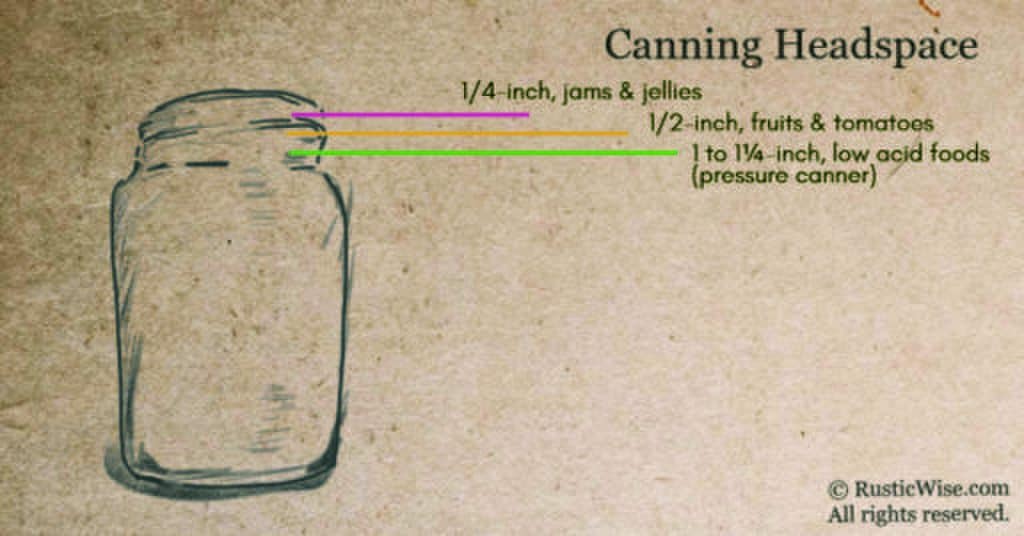
As the name implies, canning headspace refers to the amount of room left at the top of the jar between the jar’s contents and the jar lid. It’s important to leave the proper amount of canning headspace to allow for expansion during heat processing, and also to form a proper seal and vacuum when cooling.
Here’s a general guideline on canning headspace9:
- 1/4-inch headspace for jams and jellies.
- 1/2-inch headspace for fruits and tomatoes.
- 1- to 1¼-inches for low acid foods such as meat.
Before you start
So you bought all this equipment and you’re itching to dive into canning a giant batch of applesauce. Hold up. If you’re new to canning, the whole process can feel overwhelming. It takes a while to do things properly and most importantly you need to follow proper processing times and not cut any corners.
Start small, and start easy.
Set aside at least a full day from morning to evening, or preferably an entire weekend for your canning project. Heck, some homesteaders can steadily throughout the summer months when fruits are ripe! Think of it as a return to slow, mindful living. Recipes for high acid fruits are probably a good, easy place to start—think applesauce, cherries, and pears.
If you want to know how to can food properly, doing a bit of prep work can make the entire process much smoother.
Here’s a quick checklist of things to do before you start canning:
Now you’re ready to can!
How to can food: quick overview of the canning process
Here’s a real quick, high-level overview of the canning process in a nutshell:
- Clean jars, lids, and screw bands. Keep them warm until ready for use.
- Prepare food and measure dry ingredients.
- Fill jars, wipe the rims and put on the lids and screw bands.
- Process the jars using either the water bath method or pressure canner.
- Allow jars to cool.
- Label jars.
- Store jars in a cool, dark place.
Credit: RusticWise
How to can food: general canning directions
Since we’re working with large batches of food, err on the side of caution when it comes to food safety.
Step 1: Clean and inspect jars, lids, and screw bands
- Thoroughly wash all jars, lids, screw bands and other canning equipment with hot soapy water and rinse well. If you have a dishwasher, you can wash and keep your jars warm until they’re ready for use.
- Keep clean jars, lids and screw bands in a pot of hot, but NOT boiling water until ready to use.
- A note about sterilizing jars: In the past, general guidelines stated that all jars need to be sterilized in boiling water prior to use. However, The National Center for Home Food Preservation now states that sterilization is not required if you’re going to be boiling your filled jars using the water bath method for at least 10 minutes. Boiling helps to kill harmful microorganisms.
- To sterilize jars, boil for at least 10 minutes. You don’t need to sterilize lids and screw bands, but you should thoroughly wash them.
- Inspect your jars, lids and screw bands. Check for nicks and cracks along the rims of jars and lids. If there are any imperfections don’t use them. They won’t form a proper seal opening the gates for harmful microorganisms to get in.
Step 2: Prepare food
While washing, chopping, dicing, and sometimes cooking food can feel overwhelming, you’ll get faster at it as time goes on. This is also a good time to get all hands onboard. If you have little ones at home, they can help wash and peel veggies.
Food preparation tips:
- Read the recipe carefully to see how thickly (or thinly) to slice fruits and veggies as this can affect processing time. So long as you follow the recipe, you can have a little fun with the way you cut. Instead of plain old carrot or pickle slices, you could use a wavy knife to make the pieces more appealing.
- Wash certain fruits such as peaches, grapes and berries just before you use them. Washing them too early can promote bacteria growth.
- Place foods that brown quickly after sliced (such as apples) in a solution of water and lemon juice/ascorbic acid.
- Blanching is the process of dipping fruits or vegetables into a pot of boiling water for just a minute or less and then immediately cooling it by plunging it in cold water. This helps to loosen skin and deactivate certain enzymes.
- Wash fruits and veggies in small batches to ensure all dirt is safely removed. Use a brush under running water to scrub skins of potatoes and carrots.
Note: You can now begin preparing your water bath or pressure canner. If you’re using a water bath, fill your pot two-thirds full and bring to a boil as you’re prepping your food. For pressure canners, follow the instructions to fill the water level as indicated and start the preheating process.
Step 3: Pack jars
Make the food, fill the jars. Sounds pretty simple, right? Packing food is an important step as proper packing results in a good seal. And we know by now that a good seal prevents food poisoning.
While filling jars is a fairly straightforward process, it helps to keep a few things in mind.
Food packing tips:
- Keep jars warm or hot until they’re ready for use. Cold jars have the potential to crack when filled with warm food. The most common way to keep jars warm is to place them in a pot of hot (but not boiling) water. Keep lids and screw bands warm too. Some prefer to use a dishwasher with a warm cycle.
- Prep all your food before removing clean jars from a pot. Use a pair of tongs to remove warm jars and place them upside down onto a clean dishcloth to dry.
- Fill the jar according to the recipe (cold vs. hot packing; loosely vs. densely packed).
- Release any air bubbles or pockets that may have formed when filling. You can do this by gently running a small, flat plastic or wooden utensil (such as a spatula) along the side of the jar. Avoid using metal utensils that may harm the jar.
- Remember to leave the proper amount of headspace at the top. Add more liquid as needed.
- Wipe the rim of the jar with a moist paper towel or clean damp cloth. This step is crucial as a “dirty” rim won’t provide a proper seal. So make sure to get every drop of liquid, every grain of salt or sugar.
- Place a lid firmly on top of your filled jar.
- Place a screw band on while keeping the lid in place. Twist firmly (but not too firmly) as air needs to escape during processing.
- Keep all filled jars upright to prevent food spillage. When moving them to your pot or pressure canner, keep them upright as well.
Tip: Have leftovers that don’t quite fill a full jar? Never process a half filled jar, or one that’s stuffed to the brim. Use this food immediately, or freeze for later.
Step 4: Process food
This step is ultra important to prevent botulism poisoning. Please take the time to carefully read recipe instructions and stick to them.
Earlier I mentioned how you’ll need to adjust processing times according to your altitude. Higher altitudes require longer processing times if you’re using a water bath, or greater pressure if you’re using a pressure canner.
If you want to check your altitude, good ol’ Google Earth can help in a pinch. Type in your location and on the bottom right-hand corner you’ll see your altitude.
Water bath method
At this point, your water pot should be filled with water and heated. As a precaution, it’s a good practice to keep an extra pot of boiling water in case you need to add more water to your water bath. Carefully place the filled jars onto the metal rack in the water pot, making sure to keep jars upright.
- Once you place several jars in the water pot, add water as needed to ensure at least 1–2 inches (2.5–5 centimeters) of water is above the lids.
- Start timing as soon as the water begins to boil after all jars are in place. If for some reason your water stops boiling, you’ll need to restart the timer. For your first few batches, you’ll want to stick close to the kitchen to keep an eye on the water. Plan for your first canning adventure to take a bit longer than stated in the recipe.
- Set a timer to ensure food is safely processed.
Pressure canner method
- Ensure your rubber gasket is clean before use. Not all pressure canners have one, just double-check yours.
- Once your pressure canner is vented, close the vent and either wait for the proper pressure to be reached (dial gauge), or once the weights begin moving about (weighted gauge) to begin timing.
- Set a timer to ensure food is safely processed.
Step 5: Cool food
Many people mistakenly treat the cooling process as an afterthought. Cool down time is actually part of processing time and shouldn’t be rushed. Food is still cooking even when cooling.
Don’t try to rush the cooling process by placing jars under cold water. This may cause your jars to crack leading to food wastage (along with hours of your hard work!).
If you’re using a water bath, let the cans sit for at least 5 minutes after water has ceased to boil before removing. In pressure canners, wait 10 minutes after the safety lock is released, or when the dial reads zero before removing jars. But don’t wait too long. Remove jars while they’re still hot to ensure a proper seal.
Note: The typical cooling period is between 18–24 hours.
Dos and don’ts when cooling jars:
DO:
- Use a handy jar lifter to safely remove hot, slippery jars from the water.
- Position the jar lifter grips directly beneath the screw band to get the most secure grip.
- Lift jars out one by one. Jars are extremely slippery and trying to lift more than one at a time often leads to broken jars, spilled food, and frustration.
- Keep jars upright as you’re lifting them out.
- Set up a cooling place to ensure the surface is warm, not cold. Cold surfaces (particularly stone countertops) will cause jars to crack. Good items to use include newspapers, dish towels, cutting boards, and cardboard.
- Give a quick wipe with a clean towel before transferring jars to your designated cooling place.
- Place jars at least an inch apart and an inch from the nearest wall.
DON’T:
- Place jars in direct sunlight when cooling. Too much sun could harm your seals or discolour food contents.
- Touch the jars, lids or screw bands during the cooling process. Be sure that children and pets can’t easily reach your jars—it’s very tempting even for adults to touch these beautiful, colourful jars.
- Don’t tighten the screw bands. Jostling the jar could break the seal.
- Don’t push in the jar lids. As the jars gradually cool, you’ll sometimes have the pleasure of hearing “popping” sounds as the air inside the jar contracts when cooled, pulling down the lid.
Once the cooling period is over, remove the screw bands from the jars to prevent rust from forming.
So how do you know your jars are properly sealed? There are a few ways. The easiest way to tell is by simply looking at the lid. Once jars are completely cooled, it’s safe to touch them. The lid should be slightly concave. Most lids have a “button” at the centre that’s pressed down when sealed. Lids should also stay put.
Or, you can hear the difference. Get a metal fork, spoon or butter knife and gently tap the lid. A properly sealed jar will make a clear ringing sound. An unsealed jar sounds more like a low-pitch “thud.”
Step 6: Label jars
Now that you’ve gone through all the hard work of canning, don’t forget to label them before storing. Label the date, along with the contents. If you’re giving your jars as gifts, it might be nice to label the main ingredients.
Clearly labeling jars makes it easy to organize your pantry or cellar. Rotate older jars at the front for use first and put the newest ones at the back.
Are you planning on reusing your jars? If you want to avoid scrubbing off old labels on jars, try sticking them on the lids, or writing directly onto the lid. Labels are inexpensive, but if you don’t have any on hand, a piece of masking tape or even painter’s tape will do!
Step 7: How to store your home-canned foods
If canned properly, foods should last for many years. But best practices say to consume your food within one year. Besides, older jars of food lose their nutrients, texture and flavor over time, so for best taste (and safety), you’ll want to eat up sooner, rather than later.
The ideal storage place is somewhere cool, dry, and dark. The storage area should not be cold enough to freeze, nor should it go above 85 degrees Fahrenheit (29 degrees Celsius).
All those glass jars are heavy so make sure you have sturdy shelving. Otherwise, you can store your jars in cardboard boxes on the floor.
Does Pickling Destroy Nutrients? Here’s What You Need To Know
Let’s take a closer look at the pickling process and whether pickling destroys nutrients.
Safety tips before you eat home-canned foods
Before you dig in, follow these safety tips:
- Give jars and especially lids a quick rinse before opening.
- Do a quick inspection. If you see anything unusual, smell anything funky, or notice an improper seal, throw it out! There should be no leaks, nor should anything “spurt” out when opened.
Dispose of spoiled food safely so young kids or pets can’t get to it. Don’t try to boil it to salvage it. If botulism spores are present, boiling may not be enough to kill the harmful microorganisms.
However, if you’ve followed all safety procedures, you should now be able to enjoy your homemade canned foods. You’ll hopefully have enough fruits and vegetables to last you the winter, and hopefully you’ll be polishing off your last few jars just as your spring garden is starting to sprout.
Conclusion
The end of summer is a beautiful time of year. The leaves are beginning to change from green to a mix of reds, and yellows, and the air is filled with the sweet smell of harvest.
But with the harvest comes a new problem: what to do with all of the fruits and vegetables you have lying around? We all love to eat them while they’re fresh, but to have them the rest of the year you’re going to have to can them.
Canning food is a wonderful way to preserve your harvest while ensuring you have food reserves all year-round.
Learning how to can food is hard work, but well worth it. Are you ready to start your home canning adventure?
We’ve gone over the complete canning process from start to finish. In this post we talked about:
- The science of canning
- Home canning safety tips
- The two easy methods of canning (water bath canner vs. pressure canner)
- Proper processing times
- How to cool and store your jars
We hope to add more to this post as time goes on, so come back soon!
If you found this post helpful, please share the love.
Canning FAQs
Is pickling the same as canning?
These two terms get thrown around a lot and people tend to confuse them. Picking and canning have a lot of similarities, but there are also key differences.
Canning is the process of sealing food in a jar for long term food preservation. It involves processing the food in a water bath canner or pressure canner which makes the food shelf stable.
Pickling is a process of using a brine (which is a salty, acidic solution with vinegar) to preserve food. Pickled foods may OR may not be “canned”—that is, not all recipes require processing. Pickled foods that are unprocessed should be kept in the refrigerator. These types of pickled recipes are often called “refrigerator pickles.”
Some foods such as pickled eggs are not safe for processing and should be kept in the fridge.
So, the difference is purely in the preparation and the process and the end result is that you’re preserving food (with unprocessed pickled recipes having a shorter shelf life). You can use pickling and canning methods on anything from fruits and vegetables to fish and meats!
What is steam canning?
A steam canner uses hot steam to preserve foods. Some models look very similar to a water bath canner; others may have a shallow bottom to hold the jars with a large domed cover to fit on top.
Like water bath canners, steam canners are intended for processing acidic foods (those with a pH of 4.6 or lower).
The difference between a steam canner is that it uses less water than a water bath canner. This means less time waiting for water to warm up which can speed things up.
Note that the USDA to-date has not officially recommended steam canning as a safe method of preserving foods due to lack of scientific-based evidence. However, the University of Wisconsin has released some research indicating that steam canning can be safely used for some high acid foods.10
What is dry canning?
Dry canning involves placing dried food including rice, beans, or grains into canning jars and then heating them in the oven. Please note that dry canning is NOT a safe way to preserve foods.
There are a number of issues with this method of food preservation: food may not be effectively sterilized; canning jars may crack from the heat of an oven; and moisture may become trapped inside the jar’s contents causing mold or harmful bacteria to grow.
Plus, there’s little evidence to prove the safety of this method.11
So in the spirit of staying safe, and not wasting precious time, food, or resources, it’s best to avoid dry canning.
If you wish to preserve dried foods for long term storage, there are better ways to do this such as vacuum sealing.

Would you like more timeless tips via email?
Fun tips to help you live an independent, self-sustaining lifestyle. Opt-out at any time.

References
- National Center for Home Food Preservation, USDA Complete Guide to Home Canning, 2015 revision, Guide 01: Principles of Home Canning, https://nchfp.uga.edu/publications/publications_usda.html. Accessed September 2021.
- National Center for Home Food Preservation (NCHFP), Ensuring Safe Canned Foods, https://nchfp.uga.edu/how/general/ensuring_safe_canned_foods.html. Accessed September 2021.
- National Center for Home Food Preservation (NCHFP), Burning Issue: Pre-Sterilizing Jars before Canning, https://nchfp.uga.edu/how/can_01/sterile_jars.html. Accessed September 2021.
- National Center for Home Food Preservation, Selecting the Correct Processing Time, https://nchfp.uga.edu/how/general/selecting_correct_process_time.html. Accessed September 2021.
- National Center for Home Food Preservation, Temperatures for Food Preservation, https://nchfp.uga.edu/how/general/food_pres_temps.html. Accessed September 2021.
- Clemson University, pH Values of Common Foods and Ingredients: https://www.clemson.edu/extension/food/food2market/documents/ph_of_common_foods.pdf. Accessed September 2021.
- Emery, Carla (2012). The Encyclopedia of Country Living, 40th Anniversary Edition. Sasquatch Books. ISBN-13: 978-1-57061-840-6.
- Willis, Kimberley (2010). Canning, Pickling & Preserving: Tools, Techniques & Recipes to Enjoy Fresh Food All Year-Round. Knack / Morris Book Publishing. ISBN 978-1-59921-950-9.
- Zepp, Martha (21 May 2020). “Why Allow Headspace when Canning and Freezing Food?” Penn State Extension,. Accessed September 2021.
- Lambert, Abigail (11 September 2020). “Steam Canning,” South Dakota State University Extension. Accessed September 2021.
- New Mexico State University, College of Agricultural, Consumer, and Environmental Sciences (ACES), Food Safety, https://aces.nmsu.edu/covid19/canning-dried-food.html. Accessed September 2021.

Author: Josh Tesolin
Josh is co-founder of RusticWise. When he’s not tinkering in the garden, or fixing something around the house, you can find him working on a vast array of random side projects.