Essential Home Canning Equipment List: What You Need To Get Started
Canning food is a great way to preserve your harvest and enjoy some garden-fresh produce all year long. If you’re new to canning, it can be overwhelming trying to figure out what equipment you need. The good news is that canning supplies don’t have to break the bank. We’ll go over a ‘must-have’ canning equipment list, as well as a few items that are nice-to-have.
There’s something so comforting about having a pantry full of home-canned food awaiting you. Out of pickles? No problem—open a jar of homemade crunchy dill cukes! Have a hankering for peaches in the dead of winter? Your canned peaches hit the spot.
There are so many benefits to canning, from saving money on your grocery bill, becoming more self-reliant, to being able to enjoy fresh produce all year long.
We’ll go over what you’ll need for home canning and share some tips for beginners new to canning.
So let’s dive right in!
Home canning equipment list: all the essentials you need
Now after canning for several seasons, I feel I have a good grasp of what you truly need, and the nice-to-haves. Once you invest in a few essential supplies and tools, you’ll be set up for years to come.
For home canners, these are some of our favorite inexpensive tools for getting started with home canning.
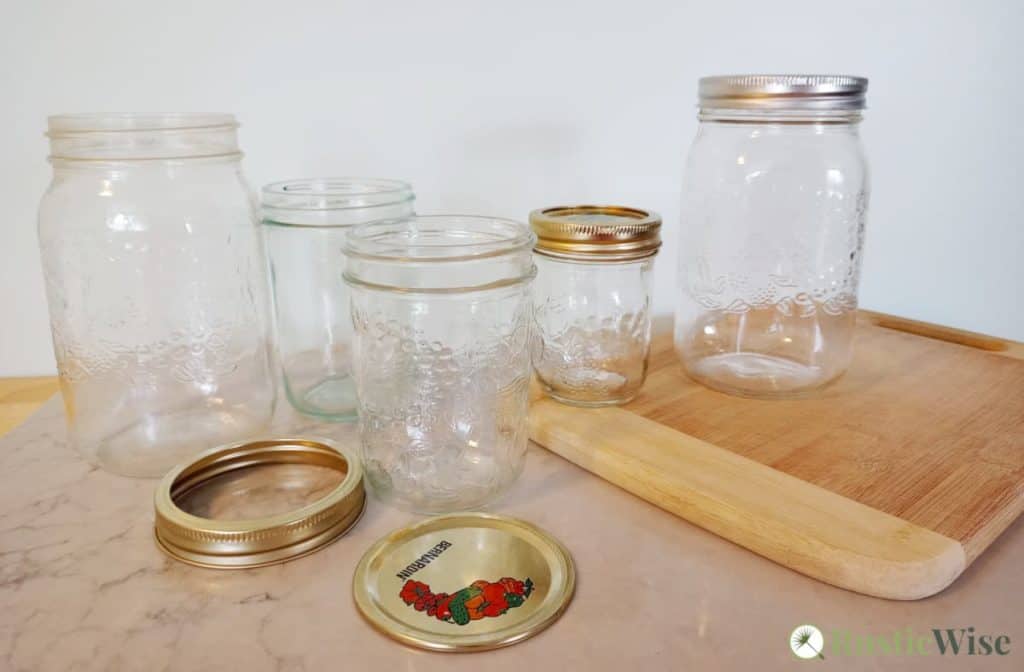
Canning jars
Canning jars are thicker than regular glass jars and are designed to withstand heat and the rigors of canning.
Only use proper canning jars (especially if you’re using a pressure canner) as normal glass jars will shatter. You may get away with reusing glass containers you have at home when using the water bath method, but why take the risk?
The good news is that glass canning jars are reusable. If you take good care of them, they should last for many years.
There are two main types of canning jars: wide-mouth and regular-mouth. Wide-mouth jars are handy for canning large fruits or pickles; you can fill them more quickly, and they’re easier to scoop from. I recommend investing in a few wide-mouthed canning jars of different sizes.
Regular-mouth jars, sometimes called narrow-mouth, are often used for salsas, jams, and jellies. But this is really a personal preference.
I say get a few jars of both styles! In terms of sizes, stick with standard size jars. Most standard canning recipes are formulated to fit evenly into standard jars:
- Quarter pint (4 oz/Half cup): These tiny jars are good for jams, jellies, sauces, and flavored vinegar.
- Half pint (8 oz/1 cup): Often used for jams, jellies, preserves, syrups, and sauces.
- Pint (16 oz/2 cups): Good for salsa, relish, pie fillings, and sauces.
- Quart (32 oz/4 cups): Larger jars are perfect for sliced fruits and veggies, and pickles.
Tip: If you have a collection of vintage canning jars, please just save these for decorative purposes and not for canning. Vintage glass is likely weakened or brittle with age, and the lids can’t provide a good seal.
Canning lids and screw bands
Standard canning tops are made of two pieces: the canning lid and the screw band. Ensure you get lids that fit the types of jars you have.
Did you know that most standard canning lids are meant for one-time use only? Luckily, canning lids are inexpensive.
Screw bands or rings may be reused so long as they’re in good shape and not rusty.
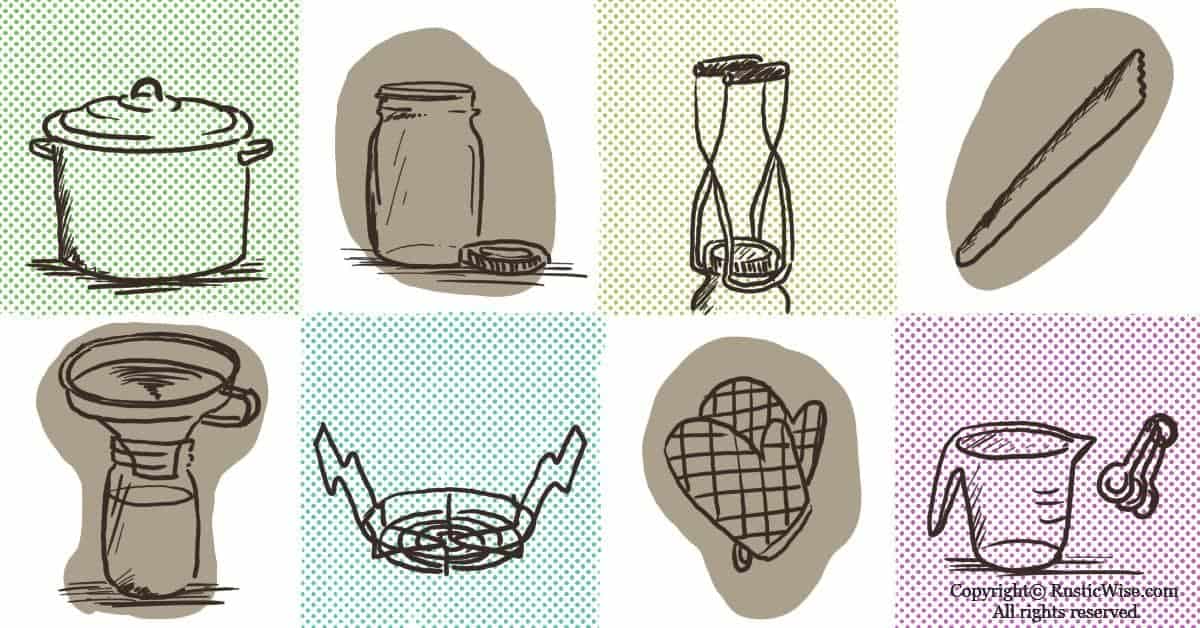
Canner
There are two main methods of canning: water bath canning and pressure canning. Pressure canners are much more efficient, but require a little more knowledge to use and are more of an investment.
If you’re new to canning, most people start with water bath canning. This involves processing jars in boiling water on the stovetop either in a canner, or a large stockpot. You can buy water bath canners of varying sizes and some come with a canning rack.
If you’re using a large stockpot, ensure it’s large enough to accommodate at least a couple inches of water above the tops of the jars, plus extra room so water doesn’t boil over.
Canning rack
This prevents the jars from touching the bottom of the canner and getting too close to the heating element. If you don’t use a canning rack, you run the risk of your jars shattering or developing cracks.

Jar lifter
I consider a jar lifter pretty indispensable: it lifts jars in and out of boiling hot water with ease with the help of rubber-coated jaws. There’s nothing else that works quite as well.
Protect yourself from hot water splashes and potential canning disasters by getting a jar lifter.

Canning funnel
Packing jars is a lot easier and tidier when you have a canning funnel. What’s the difference between a canning funnel and a regular funnel? The width.
Canning funnels, or wide-mouth funnels have a wider opening on the bottom which makes it easier to transfer thick sauces or jams into jars.
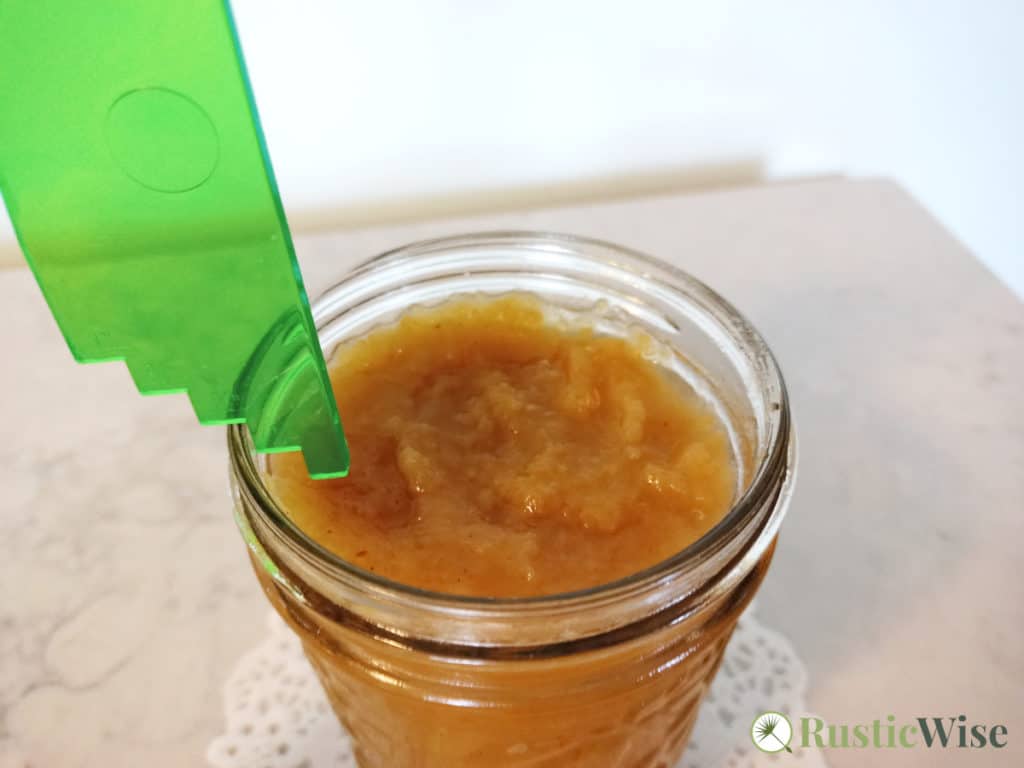
Headspace measurer
Headspace is the distance from the top of the jar’s contents and the inside of the lid. Having proper headspace is vital to getting a proper seal. You can read more about the importance of headspace here.
While some might debate the importance of having a headspace measurer vs. using a normal ruler, I feel a proper tool does a better job, especially if you’re just starting out.
Home canning equipment list: nice-to-haves
There are always a few tools that make the canning process easier—here’s a few:
- Jelly bag: Pretty darn handy if you’re planning on making any sort of jelly, but unnecessary if you’re not.
- Food mill: For finely grinding foods such as apples for making applesauce.
- Food scale: If you want very precise measurements, nothing beats a food scale.
- Magnetic lid lifter: This is essentially a magnet attached to a long stick which helps to pick up canning lids from a hot simmering pan of water. Many home canners like to use it to place lids on jars.
Stuff you’ll need but probably already have at home
Luckily, you likely have all or most of the following items at home. If you’re missing anything here, be sure to pick one up at the store before you start canning!
- Oven mitt: Protect those paws from heat!
- Tongs: For picking up hot items.
- Colander: For rinsing fresh fruits and veggies.
- Wooden chopsticks: Handy for removing air bubbles or stirring. Removing air bubbles is a vital step in successful canning. You can also buy “bubble removers” or bubble sticks, but a wooden chopstick works just as well!
- Food processor or blender: Chopping, mixing, blending.
- Clean dish cloths: Because there’s always a spill or two to wipe up.
- Wooden spoons: Essential for stirring and mixing.
- Flexible spatula: For scraping food.
- Large soup ladle: For scooping food into jars.
- Slotted spoon: For separating produce when canning.
- Knives: For peeling and slicing produce.
- Cutting boards: For preparing food.
- Timer: Use your stove timer, cellphone timer—just something to keep track of the time!
- A variety of large pots and pans to prepare food.
- Glass measuring cup and assorted measuring spoons.
Common canning ingredients you’ll need
Related questions
How do you make pickles without a canner?
If you don’t want to can pickles, you can make a batch of refrigerator pickles. Simply put, refrigerator pickles are raw cucumbers packed into jars with brine. Unprocessed pickles tend to be crunchier which some people prefer. You prepare the pickles just as you would if you were planning to process them: wash and slice the cucumbers, prepare the brine, pack the cucumbers into jars, and add the brine.
The only difference is that you can skip the processing part. The downside to skipping the processing is that of course your pickles have a shorter shelf life and require refrigeration. Of course, if your pickles are delicious, they’ll be gone before they have a chance to spoil! Check out our delicious dill pickle recipe.
What foods cannot be canned?
While most types of food are great canned, some either don’t hold up well to the heat, or can’t safely be preserved at home. According to Penn State University, the following foods should not be canned:
- Dairy (including milk, cheese, and butter)
- Eggs (you can pickle eggs and store in the fridge, but this is not technically canning)
- Foods coated in oil (oil interferes with proper food preservation and creates a favorable environment for botulism to grow)
- Pasta, rice, starches
- Very dense food purées (may not heat thoroughly)
- Bread and cakes
Can I can without a canning rack?
You don’t need a rack specific to canning, but any type of rack will work. The main purpose of a canning rack is to keep some distance between the bottom of the canner and the jars. An easy hack is to place several canning screw bands on the bottom of the canner as a substitute canning rack!


Author: Theresa Tesolin
Theresa is co-founder of RusticWise. She helps people unleash their inner DIY spirit by encouraging them to get dirty and make or grow something from scratch.