Tasty and Easy Chive Blossom Vinegar Recipe
When I think about all the times I’ve tossed chive blossoms, or snipped them off into the compost only to use the greens, I’m kicking myself! I’ve been missing out all these years. If you have a chive plant growing in your garden or on your windowsill, save those lovely pinkish-purple chive flowers.
Here’s an easy and tasty chive blossom vinegar recipe using just two ingredients: fresh chive flowers and vinegar. I’ll also show you two methods to make a herbal vinegar infusion. One requires heating vinegar and pouring over the flowers. The heat method requires a shorter steeping time. The second (and my preferred method) doesn’t require heating at all. While it requires a longer steeping time (up to 4 weeks), it’s a set-it-and-leave-it approach that allows the delicate flavorings and nutrients to remain intact.
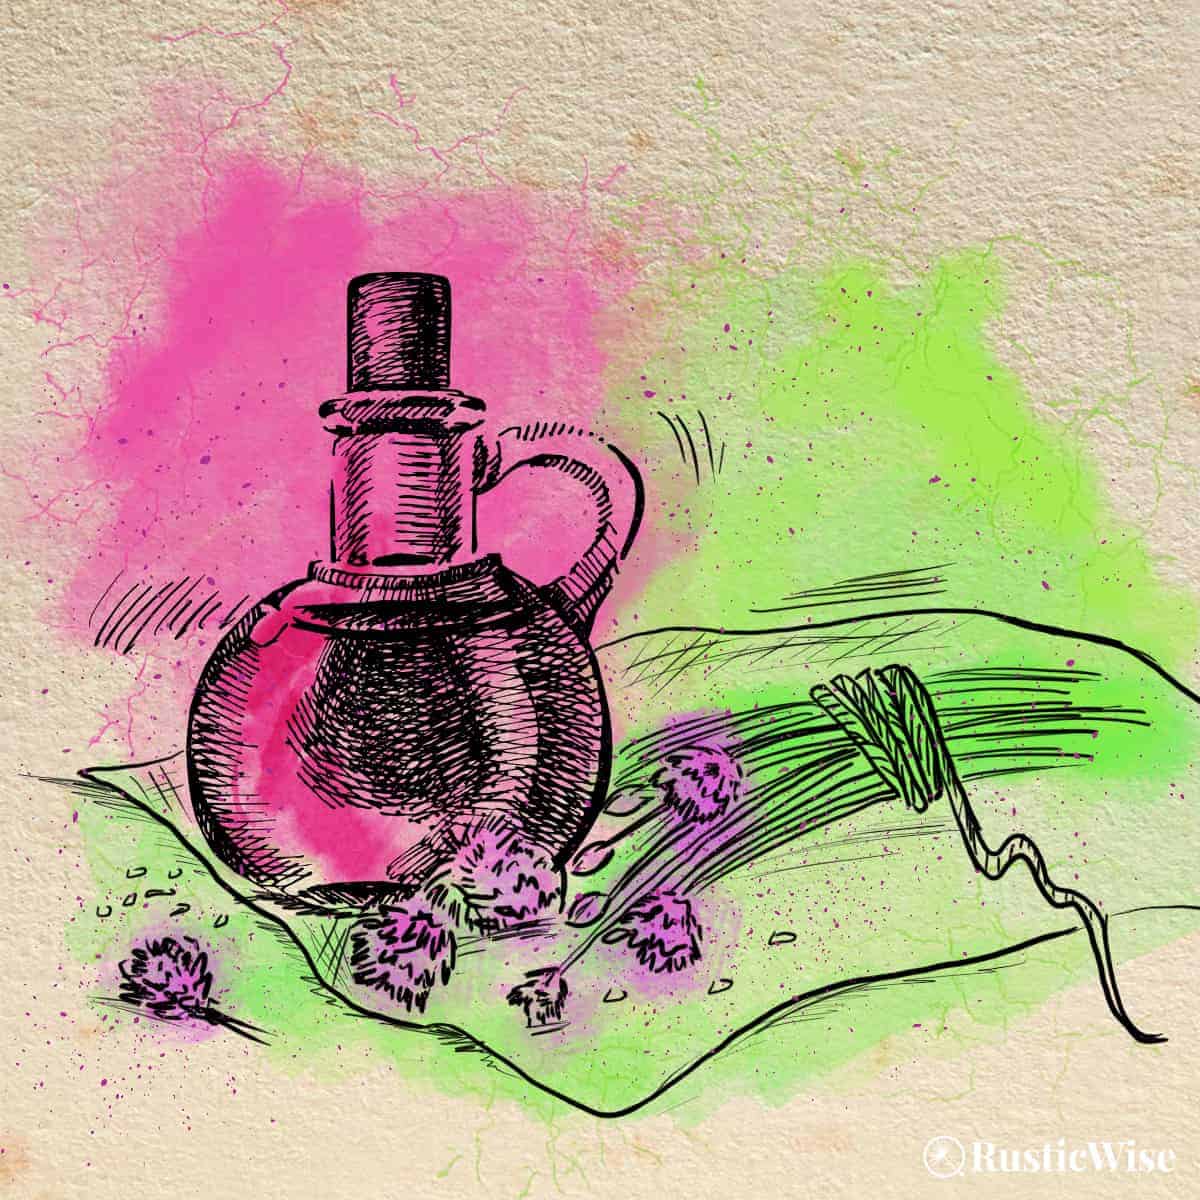
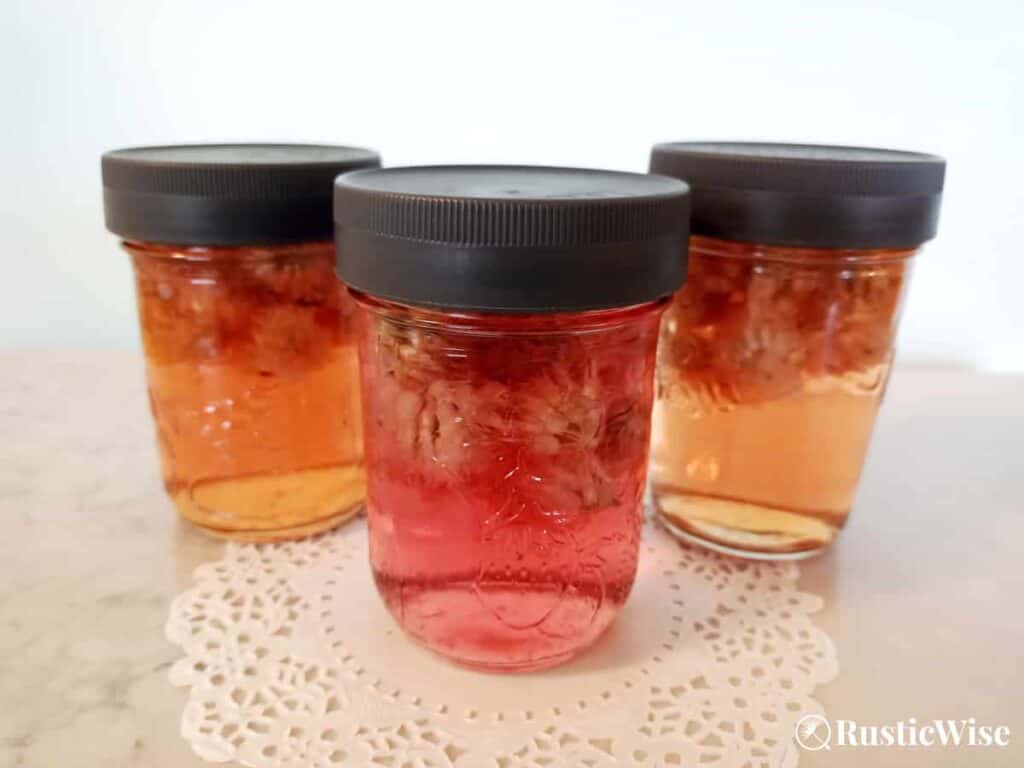
Spruce up salads with your own homemade infused vinegar. The finished homemade vinegar has a mild onion flavor with a gorgeous pinkish hue that will dress up any boring salad. The striking color of this vinegar infusion also makes a great gift idea!
What exactly are chive blossoms?
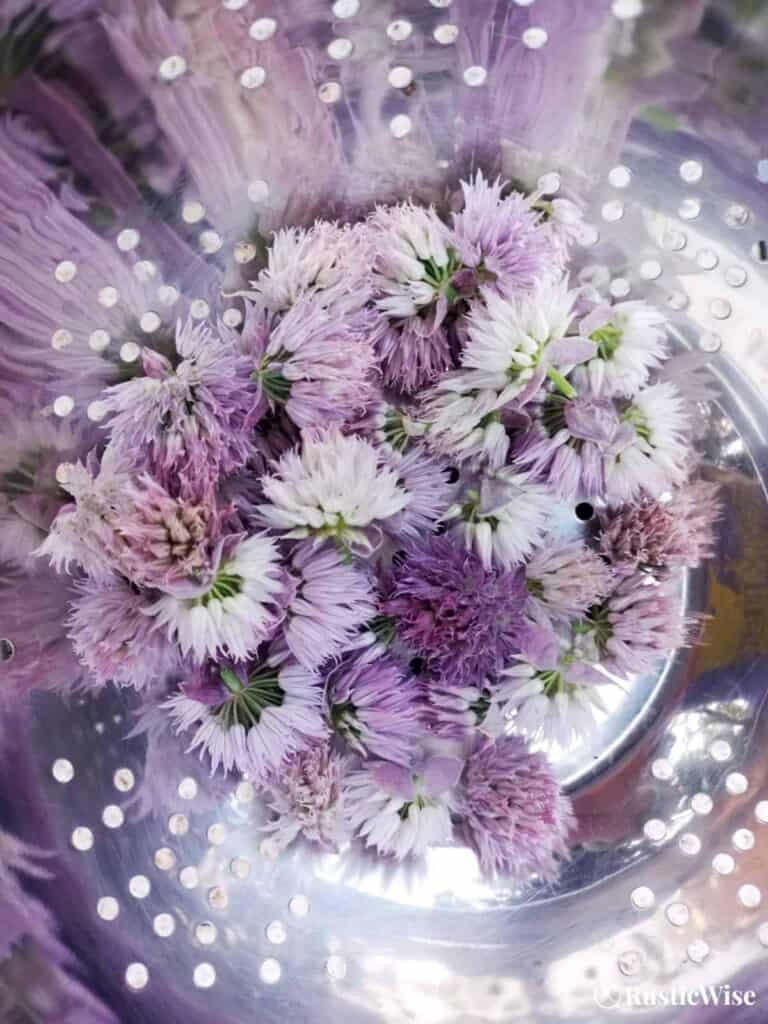
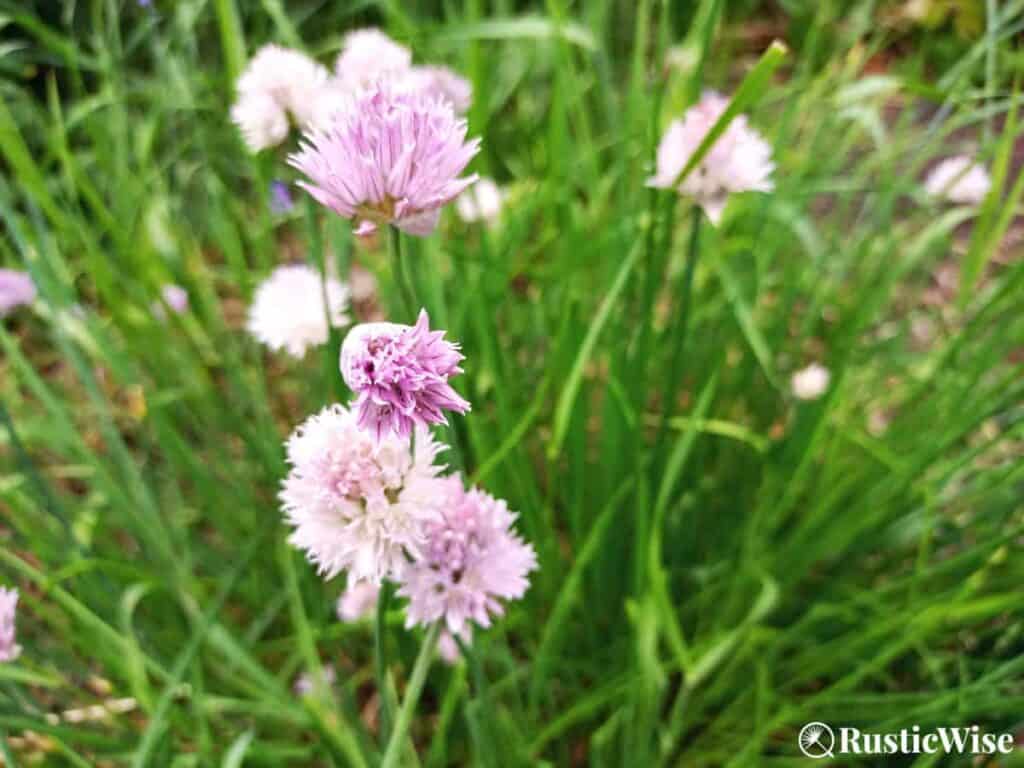
Chive blossoms are the flowers that grow on chive plants. Chives (Allium schoenoprasum) are a type of grass-like herb that belong to the allium family and are commonly used in cooking for their mild, onion-like flavor. The blossoms of the chive plant are small and round and usually appear in clusters at the top of the plant. They are typically a vibrant purple or lavender color, although they can also be pink or pinkish-white.
The tiny flowers typically appear in late spring and early summer. So this is the best time to harvest the flowers before they go to seed.
They remind me a bit of clover flowers, just more purplish. The color of the flowers imparts a light magenta hue to your soon-to-be tasty vinegar.
Are chive blossoms edible?
You betcha! Chive blossoms are completely edible and can be used as a garnish or added to dishes for a pop of color and a subtle onion flavor.
Unlike the grassy stalks of the chive plant (which has a more potent flavor), the blossoms have a mild onion-y flavor with a hint of garlic. They’re great for adding subtle notes to a dish. No need to worry about overpowering other flavors in your culinary creations.
Try adding the purple flowers to soups, salads, omelets, or even pizza!
What kinds of vinegar work best for chive flowers?
If you want to really, really see the beautiful chive blossoms in all their colorful glory, I highly recommend using a clear or light-colored vinegar. (Sorry, red wine vinegar. . . maybe next time?)
The types of vinegar that work well with this recipe include:
- White wine vinegar: Made with a white wine base, this type of vinegar is milder and smoother than regular white vinegar.
- Champagne vinegar: Made with champagne wine, this is a premium vinegar that is even subtler than white wine vinegar. The downside? It’s pricey and tough to find.
- White rice vinegar: Made of fermented rice wines, this slightly seasoned vinegar jives perfectly with the subtle notes of the purple blossoms. (Stick with white rice vinegar for best results).
- Distilled white vinegar: Very vinegary and mouth-puckering, but readily available and inexpensive.
You could also use apple cider vinegar, which would lend lovely fruity undertones to the finished product, but the color wouldn’t be as bright.
Tip: You could also try blending some distilled white vinegar (the most affordable option) with another type of flavored vinegar. I did a 50/50 blend of white vinegar and rice vinegar, which turned out nicely.
A note about acetic acid levels in vinegar
When using vinegar in preserving foods and other culinary creations, I like to stick with vinegars with at least 5 percent acetic acid content (you can look for the acetic acid level on the label). Maintaining proper pH levels is especially important when canning foods. While we’re not exactly canning foods here, I still like to abide by this guideline for safety’s sake.
Acetic acid is the stuff that gives vinegar its mouth-puckering kick. But it can also affect the shelf life and preservation properties of vinegar.
Most bottles of distilled white vinegar have at least 5 percent acetic acid. Some white wine vinegars have less.
Credit: RusticWise
How to harvest chive blossoms
The best time to harvest these beautiful chive flowers is when they just open and are in full bloom, but before they dry and turn to seed. This is typically in the late spring and early summer.
Bring a colander with you to the garden in the morning. You can simply pluck the tops of the blossoms off with your fingers. Or, you can use a pair of scissors to snip off the tops. Try to avoid adding any of the green stems to your vinegar. (A little bit won’t hurt, though).
Rinse gently under cool water and let drain.
Chive blossom vinegar recipe and supplies
Now let’s jump right to it. You’ll only need two simple ingredients for this delicious and gorgeous DIY chive blossom vinegar recipe:
- Two parts vinegar of your choice
- 1 part fresh chive flowers, rinsed
You’ll also need a few supplies:
- Sterilized glass mason jar (preferably wide-mouth for ease of use)
- Plastic screw-on lid. If you don’t have a plastic lid that fits your jar, you can use a metal canning lid plus a piece of parchment paper and rubber band.*
- Strainer
- Small saucepan (if using the heat method)
*Note: Vinegar reacts with metal lids and will corrode it. To prevent this from happening, you’ll want to secure a square of parchment paper over the jar before topping with the metal lid. You can find plastic screw-on lids that fit onto standard canning jars at most dollar stores. That’s where I picked up mine. 🙂
To sterilize a canning jar, simply submerge it into boiling water for 10 minutes. Be careful when removing the jar—use a jar lifter or tongs. Let the jar dry on a clean dishcloth.
Credit: RusticWise
How to make infused chive blossom vinegar: heat method
Now here’s how to make chive blossom vinegar using a bit of heat to speed up the infusion process.
- Measure and heat the vinegar in a small saucepan on low heat. The temperature should reach roughly 180 degrees Fahrenheit (82 degrees Celsius).
- Place the fresh and cleaned chive blossoms into a sterilized glass jar.
- Pour the warm vinegar over flowers. Leave a bit of headspace at the top (roughly ½ inch or 1.3 centimeters).
- Wipe the rim of the jar with a clean cloth.
- Let cool to room temperature before placing the lid on. Remember to add a piece of parchment paper if you’re using a metal lid!
- Store in a cool, dark cupboard away from direct light for up to 2 weeks. Remember to shake every so often.
- Strain the vinegar and discard the spent blossoms once the steeping time is done.
- Store in a clean jar in a cool, dark place.
- Don’t forget to label with the date!
Credit: RusticWise
How to make infused chive flower vinegar: unheated method
I prefer this easy method as it skips the heating step (yes, sometimes I’m that lazy). Plus, I feel like this unheated process leaves more of the properties of the chives intact. But to each their own!
The process of making unheated vinegar is much the same as the steps outlined above (minus the heating!).
- Place the fresh and cleaned chive blossoms into a sterilized glass jar. This is roughly half the jar stuffed with flowers.
- Pour room temperature vinegar over the chive blossoms.
- Wipe the rim of the jar with a clean cloth.
- Place the lid on. Remember to add a piece of parchment paper if you’re using a metal lid!
- Store in a cool, dark cupboard away from direct light for up to 4 weeks. Remember to shake every so often.
- Strain out the blossoms once the steeping time is done.
- Store in a clean jar in a cool, dark place.
- Don’t forget to label with the date!
Ways to use chive vinegar
Now that you’ve made your own lovely herbal vinegar, what exactly should you do with it? This herbal vinegar is a versatile and tasty ingredient that you can use in many ways. With its eye-catching color and herbaceous flavor, it’ll add a unique twist to savory dishes.
Here are a few ideas on how to use chive blossom vinegar in your culinary creations:
- Spice up a vinaigrette salad dressing: A splash of onion-infused vinegar will liven up fresh salads and add a pop of color.
- Use as a marinade: The subtle flavor of this vinegar pairs well with seafood, fish, and egg dishes. Get creative and mix with other herbs such as parsley, tarragon, or chervil. Chives also pair great with potatoes. Baked potatoes, potato salad—you get the picture. Just keep in mind that the vinegar may affect the final coloring.
- Drizzle over roasted veggies or BBQ: Dress up your oven roasted vegetables, or crispy BBQ dishes with a bit of pink vinegar!
- Bread dip: Instead of the usual olive oil and balsamic vinegar blend, try dipping your crusty bread with this herb infused vinegar for a fresh take.
Tips on how to store chive flower vinegar
Want to keep this tasty infusion for as long as possible? Here are a few tips on the best way to store herb infused vinegar to extend shelf life.
- Use glass: The best container to store vinegar in the long term is a clean glass container. This can be a mason jar or a glass oil or vinegar bottle. Avoid using plastic or reactive materials such as metal.
- Keep it away from direct sunlight: Bright sun or heat is the enemy of most herbs, spices, oils, and infusions. A good place to keep your bottle is in a cool, dark pantry or cupboard. This will protect the vinegar from exposure to light and heat, which can degrade its flavor and potency.
In most cases, storing at room temperature is fine. However, if the ambient temperature in your home is on the higher side, consider sticking this bottle in the fridge.
If stored properly, the vinegar can last up to 6 months.
Growing your own chives
Making this chive blossom vinegar recipe is a cinch when you have access to fresh chives. Chives are one of the easiest herbs to grow. We have a clump of chive plants in the garden which pop up every year with little to no effort on our part. They emerge each spring, even after our severe winters with temperatures that drop to 40 below.
They’re also a great indoor plant and super-handy to keep in your kitchen. They thrive in well-draining soil and prefer a sunny spot, although they can tolerate partial shade. Regular watering and occasional fertilization will help them flourish.²
You can start this herb from seed. But the quickest and easiest way is to plant rooted clumps from your outdoor garden into indoor pots with drainage holes. This way you can enjoy fresh chives year-round. Just don’t expect your plants to produce as many grassy stalks during the winter.
Related questions
Do you need to remove the flowers from the vinegar?
Yes, the spent blossoms should be strained and discarded. After they have steeped in vinegar for some time, their color and flavor will deteriorate, and some will start to look a bit gross and mushy, to be honest.
Can you preserve the finished vinegar?
Yes, if you prefer to extend the shelf life of your homemade sauce, you can use a proper canning jar with a two-piece lid. Process in a water bath canner for 10 minutes.
👉 If you like this post, see our Ultimate Guide on How To Can Food. 🍎
Would you like more timeless tips via email?
Fun tips to help you live an independent, self-sustaining lifestyle. Opt-out at any time.


References
- University of Alaska Fairbanks, Flavored Vinegars, https://www.uaf.edu/ces/. Accessed July 2023.
- University of California, Division of Agriculture and Natural Resources, Chives, https://mgsantaclara.ucanr.edu/garden-help/herbs/chives/. Accessed July 2023.

Author: Theresa Tesolin
Theresa is co-founder of RusticWise. She helps people unleash their inner DIY spirit by encouraging them to get dirty and make or grow something from scratch.