How To Clean Oil Paint Brushes Without Solvents
Whether you’re creating a masterpiece with oils, or touching up the trim in your house, oil-based paints have earned a reputation for being difficult to clean. Unlike water-soluble paints like acrylic, oil paints don’t just rinse off easily with water.
If you’re tired of using harsh solvents or turpentine, I have good news—you don’t have to! I’ll show you how to clean oil paint brushes using oil and a bar of soap. You can use regular safflower oil from the grocery store to remove the oil paint, and a regular bar of soap to finish cleaning the brush.
This trick applies to any oil-based paint and is safe for all types of brushes, from artist brushes, to standard 3-inch flat brush for painting walls.
Traditional ways to remove oil-based paint
For many people, using solvent such as mineral spirits, turpentine, or paint thinner was the default way to clean brushes.
While these brush cleaners work like a charm, they contain harsh chemicals which are harmful when inhaled, and aren’t exactly gentle on the environment either.
Exposure to turpentine, for example, has many adverse health effects: it can irritate and burn eyes and skin; may cause dizziness, or headaches; and is an irritant to the respiratory system.¹ It’s also highly flammable.
Luckily, there are non-toxic ways to clean your brush. We’ll show you how to clean your oil brush using basic plant-based oil, and bar soap.
You can also find gentler commercial brush cleaners or brush soap like “The Masters” Brush Cleaner (💖 check out our recommended products 🛍️), a non-toxic cleaning compound with a citrus scent. It works like a bar of soap and is effective on oils, acrylic, and watercolors.
Tip: If you’re using a chemical solvent, take proper safety precautions such as working in a well-ventilated area and protecting your hands with gloves.

Why isn’t water effective at cleaning oil paint?
Water is ineffective at cleaning oil paint because it doesn’t break down the molecules of the oil, which are lighter than water molecules. As a result, water cannot effectively remove the oil from paint surfaces.
If you combine oil and water in a cup, the oil would just float to the surface. Similarly, rinsing oils from bristles would just result in water beading off.
Understanding the basic principle that oil and water don’t mix is the key to effectively cleaning excess paint from brushes.
How to clean oil paint brushes without solvent
Instead of relying on harsh chemicals to dissolve paint, we turn to other non-toxic, yet effective methods using oil first, followed by soap.
We fight oil with oil. The oil molecules from safflower oil (or another vegetable oil) bond with the oil molecules in the paint to rinse away more easily.
We follow up by using the power of surfactants in a regular bar of soap to rinse away any remaining oily residues. Surfactants help reduce the surface tension of water, allowing oily particles to more easily wash away.
This method works well with both synthetic brushes and natural brushes.
Types of oil you can use
There are many types of plant-based oils you can use to clean oil paint from brushes. Choose refined oils for best results.
Some types of oil, like vegetable oil or safflower oil, can be picked up at your local grocery store. Others like linseed oil (aka flax oil) or walnut oil can be found at specialty art stores, or hardware stores.
Here are a few common types of oils you can use to clean your brushes.
- Vegetable oil: Made from a blend of vegetable oils such as canola, corn, olive, or soybean. It’s a budget-friendly option if you’re going to be cleaning a lot of brushes!
- Safflower oil: Made from the pressed seeds of the safflower plant. A moisturizing oil rich in vitamin E, safflower oil has the extra benefit of being easy on your hands and skin.
- Linseed oil (aka flaxseed oil): Extracted from the flax plant, linseed oil has many applications such as a wood conditioner, and natural paint remover. Using linseed oil not only cleans but also conditions the brush. The downside is that this oil is more costly.
- Walnut oil: A rich, natural, oil that’s great at removing oil paint, and also for mixing with artist oils for a thinner consistency. It’s also a slow drying oil which is handy for keeping brushes moist.
Tip: Keep a small jar of walnut oil to preserve your brushes during your paint session, or between paint sessions. This way you don’t need to do a deep clean of your brushes if you’re planning to paint again shortly.
What’s the best cleansing oil if you’re on a budget?
Both regular vegetable oil and safflower oil are great choices for removing oil paint from your brushes and are widely available. While there are special refined versions sold in smaller bottles, you likely won’t notice any difference for cleaning brushes when using regular, cheaper bottles from the grocery store.
How to wash oil paint brushes with oil and a bar of soap
Now that we’ve gone over the different oils you can use, let’s look at the cleaning process of removing excess oil paints from brushes from start to finish.
This is the best way to clean using simple products you have at home.
Note: This method works for cleaning artist brushes, as well as standard flat brushes used for painting walls or other DIY projects.
Supplies you’ll need:
- Oil of your choice (see above for options)
- Bar of soap (stick with a basic bar without fragrances or dyes)
- Several old rags or paper towel
- An old mug or jar for soaking brush (if you’re cleaning a large, flat painter’s brush, a shallow pan works)
- Brush out excess paint: Try to remove as much oil paint as possible from the brush. You can do this either on a scrap piece of paper, or an old rag.
- Squeeze from ferrule to tip: Next, wrap the brush in an old absorbent cloth or rag, and squeeze out as much liquid from the bristles starting at the ferrule (the metal part that holds together the bristles), to the tip.²
- Dip into oil: Pour some oil into an old container. Coat the bristles completely with oil.
- Brush out again: With your newly coated brush, continue to brush out excess color onto a scrap piece of paper or old rag. Repeat steps 3 and 4 until no color remains.
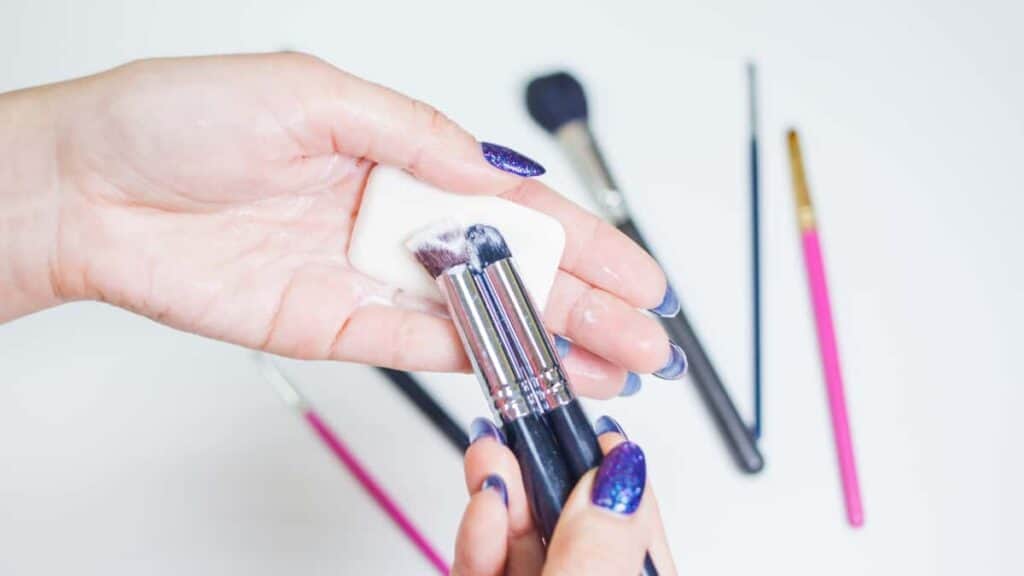
- Wash with bar soap: Now wet the brush with warm water. Gently swirl the dampened brush on the soap bar’s surface to coat with soap. Use your fingers to work the bristles into a lather. Repeat this process as needed.
- Rinse and dry: Rinse away any soapy residue with clean water. Squeeze out excess water, and let the brush dry, tip facing up.
Note: Some people prefer to use a liquid soap such as Castile soap instead of bar soap. This works fine too. Others use mild dish soap to clean the bristles.
Tips for keeping paint brushes from drying out
Painting with oils has its benefits: it dries slowly and is easy to blend. But sometimes your painting sessions get interrupted. If you need to take a break for a few hours, or even overnight, here’s how to prevent your brushes from getting dried out.
Artist brushes
If you’re planning on taking a brief break, you don’t need to do a deep clean of your brushes. Instead, use a bit of walnut oil to keep your brush pliable. Simply dip the bristles into a bit of walnut oil. This type of oil is a slow drying liquid that can keep brushes good for several days. Store flat, or with the tip up.
But, if you’re taking a long hiatus—more than 3 or 4 days—rinse off the walnut oil as it can dry and harden!
Large painter’s brushes (for DIY projects)
Whether you’re painting furniture, walls, or trim, keep your brush from drying out by using a paint brush cover, or wrap in a plastic bag.
You can find brush covers at your local hardware store. I found mine at a dollar store.
How to clean hardened paint brushes
Stiffened, paint-encrusted bristles is something nobody wants. Good old white distilled vinegar can breathe new life into brushes you’re about to toss.³
The acetic acid content in regular vinegar helps to break down hardened paint.
- Fill an old container with white vinegar. Submerge the hardened bristles.
- Let the vinegar do its magic for at least an hour. Check at this point to see if the bristles are softened. If not, you can soak overnight.
- Once bristles are softened, use your fingers to scrub off dry paint. Rinse with water.
- Follow up by doing a deep clean with oil and soap (see above).
How to recondition paint brushes
Natural bristles can tend to look a bit worse for wear after heavy use. You can spruce up dry brushes by applying a few drops of regular hair conditioner and massaging it into the bristles.
Your brush will feel instantly softer and more pliable! Don’t forget to rinse out the conditioner before you paint.²
You’ll want to save this for occasional use only as conditioner can damage delicate bristles over time.
How to care for your paintbrushes
With proper care for your brushes, they can last for years.
- Clean your oil paint brushes properly: To keep your brushes in good shape, it’s important to clean them with oil, soap, and water after each use.
- Store them upright: Store your brushes upright in a cup or container so the tips aren’t bent and avoid piling your brushes together while they’re wet.
- Avoid using hot water: Very hot water can warp the ferrule (the metal part of the brush). It can expand with heat exposure which causes the brush hairs to loosen and fall out.
👉 If you like this post, see other Timeless Cleaning Tips You Need To Know. 🌟
Would you like more timeless tips via email?
Fun tips to help you live an independent, self-sustaining lifestyle. Opt-out at any time.


References
- New Jersey Department of Health, Turpentine Hazardous Substance Fact Sheet, https://nj.gov/health/eoh/rtkweb/documents/fs/1962.pdf. Accessed March 2023.
- The Paint Spot, Oil and Acrylic Brushes – Tips, https://paintspot.ca/tips-for-oil-and-acrylic-brushes/. Accessed March 2023.
- The Home Depot, How to Clean Paint Brushes, https://www.homedepot.com/c/ah/how-to-clean-paint-brushes/9ba683603be9fa5395fab901f586e73a. Accessed March 2023.

Author: Josh Tesolin
Josh is co-founder of RusticWise. When he’s not tinkering in the garden, or fixing something around the house, you can find him working on a vast array of random side projects.

