Adjusting for Altitude When Canning & A Handy Canning Altitude Chart
Canning is a great way to preserve your harvest. But if you don’t adjust for altitude when canning, you could end up with spoiled food or even botulism. The higher up you are from sea level, the lower your boiling point will be. This means that your food might not get hot enough to kill dangerous botulinum bacteria before it’s sealed in jars. Check out the handy canning altitude charts below for water bath canning and pressure canning to help ensure that all of your home canned foods are safe!
A cautionary tale—learn from my mistake
A few seasons ago, we picked apples…lots of delicious apples that we carefully harvested from the countryside.
It was a family affair—the kids rolled up their sleeves and pitched in too. We did all the work to make applesauce: wash, boil, and mill the apples, add sugar and seasonings, process, and label.
It took all weekend, but at long last, we sat back and admired our work in the gleaming jars filled with golden applesauce.
The problem is we just followed a recipe, but forgot to adjust for altitude! We wrongly assumed we were well within the 1,000 feet (after all, 1,000 feet sounds pretty high, and we live in a flat area). How wrong we were!
We later found out we live at well over 2,000 feet. All of our jars were under-processed!
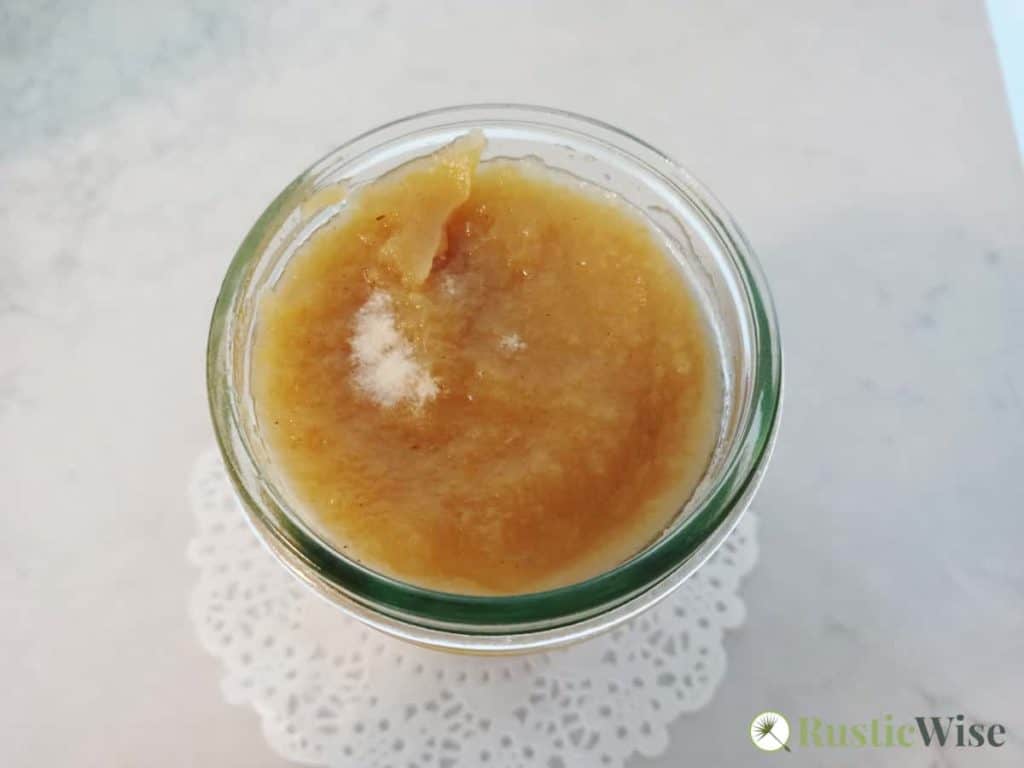
The first few jars of applesauce we ate were delicious! But before long, I cracked one open and found this: mold growing on top.
Now, maybe the mold could have been due to other reasons—insufficient headspace perhaps? But everything else seemed okay, the lids were all tightly sealed.
This is why you need to adjust for altitude when canning.
So many jars of applesauce wasted…
Why do you need to adjust for altitude when canning?
When it boils down, canning is a science. You prepare all the food by carefully following the recipe’s instructions and process the food accordingly. Processing times have been thoroughly tested by researchers and adjusted according to the acidity of the food, and altitude. High altitude canning requires a bit of adjustment to processing time.
What exactly does altitude have to do with canning?
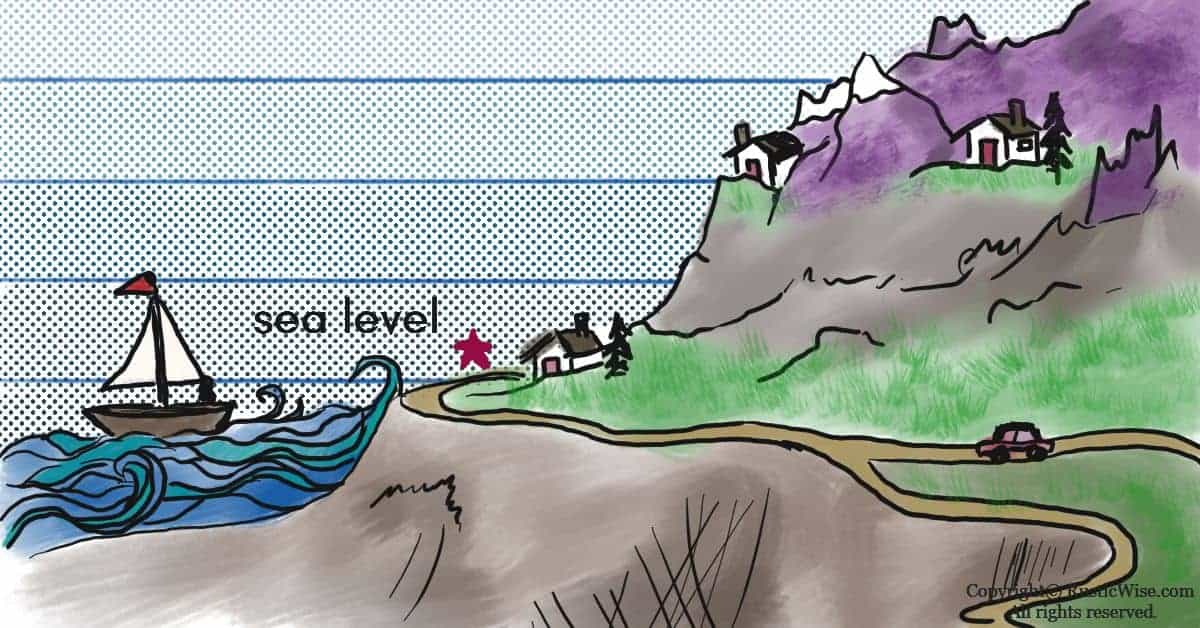
Water boils at different temperatures as elevation changes. At sea level, water boils at 212 degrees Fahrenheit (100 degrees Celsius). However, barometric pressure is lowered as the altitude increases (remember that the top of the mountain has “thinner” air).
This means that at higher altitudes, water boils at lower temperatures. If you don’t adjust for altitude, your food is processed at a lower temperature which won’t be sufficient to kill all harmful yeast, mold, enzymes, and bacteria (Clostridium botulinum).
Most recipes have recommended processing times for altitudes of 1,000 feet or less.
- For water bath canners, you’ll need to increase processing time if you live at an elevation greater than 1,0001 feet.
- For pressure canners, you’ll need to adjust the pounds of pressure if you live at an elevation greater than 1,0001 feet.
The takeaway: Water boils at lower temperatures at altitudes of 1,001 feet (or more) above sea level. Barometric pressure also decreases.
Keep botulism at bay
Botulism poisoning is a rare, yet potentially lethal form of foodborne illness that strikes fear into the hearts of home canners everywhere. Low-acid foods are especially susceptible to developing botulism if not processed at the right pressure for the sufficient time. This is why it’s vital you adjust for altitude when processing.
A strain of bacteria called Clostridium botulinum exists in soil, water, and on the surface of most foods. In this form it’s harmless.
The trouble begins if botulinum bacteria isn’t sufficiently killed during processing. Under the right environment (low acidity, anaerobic conditions, moisture, and warm temperatures), these bacteria produces spores which multiply and release poisonous toxins.
Unfortunately, home-canned foods provide the perfect conditions for this nasty bacteria to thrive in.
In order to kill off harmful microorganisms you need to reach 240 to 250 degrees Fahrenheit (116 to 121 degrees Celsius) for a sustained period of time. The only way to do this is with a pressure canner set to between 10 and 15 PSIG.
In the case of water bath canning, you need to reach 212 degrees Fahrenheit (100 degrees Celsius). Since water may boil at lower temperatures at higher altitudes, say around 200 degrees Fahrenheit (93 degrees Celsius), this won’t cut it unless you increase the length of time.
Read more about botulism poisoning here.
How to find your altitude
If you’re not sure how high above sea level you are, it’s easy to find out. There are several ways to do this.
Google search
This is probably the quickest and easiest way:
- Type in your [City, Province/State], altitude
Remember to convert to feet if your results show up in meters as mine did.
Elevation websites
A website you can check out is: https://whatismyelevation.com/
It has an easy option to convert to feet or meters.
Google Earth
This method isn’t as quick as the first two, but it helps if you want to really zoom in on your elevation at a granular level. Plus, you get to scope out your neighborhood from a bird’s eye perspective!
- Go to Google Earth.
- Click the Search button on the left menu
- Type your [Address, City, Province/State]
- Your elevation is listed on the bottom right-hand corner of the screen in meters.
Local municipal resources
Depending on where you live, you might have a city website, library, or local university extension office that could tell you your altitude.
Canning altitude chart for water bath canning
Use the boiling water method (water bath canner) when processing high-acid foods such as jams, jellies, and fruits. If you live at 1,000 feet or less, follow the recipe’s recommended processing time. Otherwise, adjust as indicated below:
Boiling-Water Canner Altitude Adjustments
| Altitude in Feet | Increase Processing Time |
|---|---|
| 1,0001 to 3,000 | 5 minutes |
| 3,001 to 6,000 | 10 minutes |
| 6,001 to 8,000 | 15 minutes |
| 8,001 to 10,000 | 20 minutes |
Here’s a chart with general guidelines for water bath canning. These are general guidelines only—it’s best to follow the instructions of your recipe.
Processing Times for Water Bath Canning
| Food | Pints (minutes) | Quarts (minutes) |
|---|---|---|
| Apples | 20 | 20 |
| Applesauce | 20 | 20 |
| Apricots | 25 | 30 |
| Berries | 15 | 20 |
| Cherries | 25 | 25 |
| Cranberries | 15 | 15 |
| Currants | 15 | 15 |
| Figs | 45 | 50 |
| Fruit Juices | 5 | 10 |
| Peaches | 25 | 30 |
| Pears | 25 | 30 |
| Plums | 10 | 10 |
| Preserves | 20 | 20 |
| Rhubarb | 10 | 10 |
| Strawberries | 15 | 15 |
| Tomatoes | 35 | 45 |
| Tomato juice | 35 | 40 |
Canning altitude chart for pressure canning
Use a pressure canner to safely process low-acid foods including most vegetables, dairy, eggs, meat, poultry, and seafood. You’ll either have a dial gauge or a weighted gauge—please refer to the owner’s manual for specific instructions.
If you live at 1,000 feet or less, follow the recipe’s recommended pressure. Otherwise, set the correct pressure as indicated below:
Pressure Canner Altitude Adjustments
| Altitude in Feet | Weighted Gauge | Dial Gauge |
|---|---|---|
| 0 to 1,000 | 10 | 11 |
| 1,001 to 2,000 | 15 | 11 |
| 2,001 to 4,000 | 15 | 12 |
| 4,001 to 6,000 | 15 | 13 |
| 6,001 to 8,000 | 15 | 14 |
| 8,001 to 10,000 | 15 | 15 |
Here’s a chart with general guidelines for pressure canning. These are general guidelines only—it’s best to follow the instructions of your recipe.
Processing Times for Pressure Canning
| Food | Pints (minutes) | Quarts (minutes) |
|---|---|---|
| Meats | 75 | 90 |
| Fish | 100 | 100 |
| Asparagus | 30 | 40 |
| Beans, snap (green or yellow) | 20 | 25 |
| Beans, lima | 40 | 50 |
| Beets | 30 | 35 |
| Broccoli | 25 | 40 |
| Brussels sprouts | 45 | 55 |
| Cabbage | 45 | 55 |
| Carrots | 25 | 30 |
| Cauliflower | 25 | 40 |
| Corn | 55 | 85 |
| Greens | 70 | 90 |
| Hominy | 60 | 70 |
| Mushrooms | 45 | Not Recommended |
| Okra | 25 | 40 |
| Onions | 40 | 40 |
| Parsnips | 20 | 25 |
| Peas | 40 | 40 |
| Peppers green | 35 | 35 |
| Peppers, pimentos | 35 | 35 |
| Potatoes, white | 35 | 40 |
| Pumpkin | 55 | 90 |
| Rutabagas | 35 | 35 |
| Squash, winter | 55 | 90 |
| Sweet potatoes | 65 | 95 |
| Turnips | 20 | 25 |
The takeaway
Canning can be a daunting task, but with the right knowledge and some helpful tools, you can easily ensure safe home canning. Don’t underestimate the importance of calculating your altitude. Forgetting to adjust for altitude if you live in an area above 1,000 feet results in improperly processed foods. Mold, food spoilage and botulism are all things we want to avoid!
Now that you know all about the importance of adjusting for altitude when canning, refer back to our canning altitude chart as needed along your canning journey!
Related questions
Why do you need to add lemon juice or citric acid to home-canned tomatoes?
Tomatoes are one of the foods that fall under the gray zone—not quite acidic, and not quite basic (alkaline) either. This can create a perfect environment for the growth of Clostridium botulinum, which is why adding either lemon juice or citric acid to home-canned tomatoes helps ensure safe preservation and flavor.
The cut-off of high acid vs. low acid foods is a pH of 4.6: anything with a pH below 4.6 is acidic, and foods with a pH above 4.6 are basic (which means they must be processed in a pressure canner).
The acidity of tomatoes typically ranges from pH 4.30–4.90. Tomatoes are acidic enough that they don’t need to be pressure canned—however, lemon juice or citric acid increases the acidity level making them safer for water bath canning.
Can I add oil to home canning recipes?
While adding a bit of oil to a canning recipe doesn’t seem like a big deal, don’t do it. Oil is one of the food items that interferes with proper processing as it coats food and creates a favorable environment for harmful botulinum bacteria to grow. Never can pesto (freeze it instead).


Author: Josh Tesolin
Josh is co-founder of RusticWise. When he’s not tinkering in the garden, or fixing something around the house, you can find him working on a vast array of random side projects.

