How To Grow Sunflower Microgreens: Tips for Success
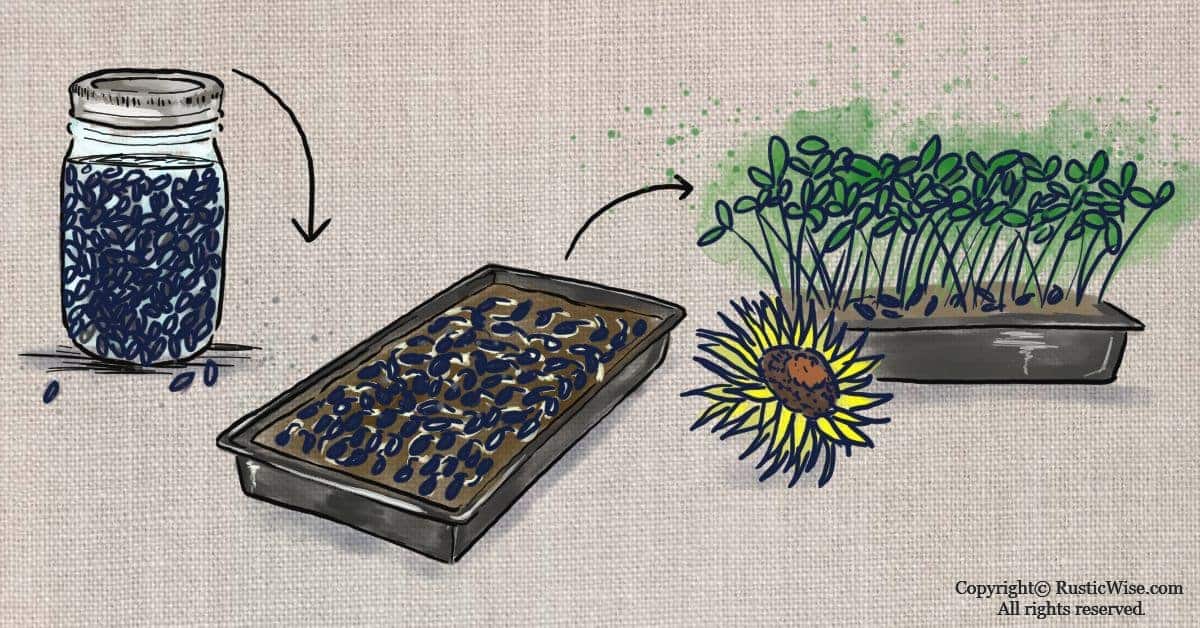
The sunflower plant provides us with so much: it’s a source of beauty in the garden; its seeds make a tasty snack; and they can be grown as microgreens. Unlike other varieties of microgreens, there are a few tricks you should know about starting your own batch of sunnies. We’ll show you how to grow sunflower microgreens from pre-soaking and pre-sprouting, to harvest and storage.
Sunflower microgreens are a great way to add nutrient-dense, healthy greens to your diet. They require little space and can be grown indoors all year-round. The key is in pre-sprouting—this helps ensure your seeds get the best start possible.
Read on to learn more tips on how to successfully grow sunflower microgreens from start to finish!
Why sunflower microgreens are a bit tricky to grow
One of the most popular microgreens to grow, sunnies are coveted not only for their flavor (slightly nutty and sweet), but also for their nutritional properties. They contain vitamins A, C, E, K, and B6 as well as folate, iron and protein. They’re a good source of healthy omega-3s and omega-6s plus amino acids.
What makes sunflower microgreens a bit different from most other microgreens is that they need to go through soaking and pre-sprouting first before growing into tiny greens.
When growing sunnies as microgreens, you’re actually doing both sprouting AND farming microgreens. (If you think sprouts and microgreens are the same thing, read up on key differences between sprouts and microgreens here.)
The hard outer shell of each sunflower seed makes it a bit tougher to grow. This is why it’s critical that you germinate the seeds in a sprouting jar first.
The shells can also cling to leaves which requires plucking off (don’t worry, this part’s easy!)
And to ensure that sunflowers develop strong, healthy roots, it’s best to apply a weighted cover to them during the growth phase.
While there are a few extra steps to growing sunnies, we think it’s well worth it!
It’s not all bad…
While some types of microgreens are more prone to mold growth due to their delicate leaves and stems that hold onto water, sunflowers don’t have this same problem. (Sunflower microgreens are actually quite substantial.)
Instead, sunflower microgreens are actually more resistant to mold growth. Their thick stems help them to grow tall. Since sunflower seeds are quite large (compared to tinier seeds like basil, for example), each seedling is spaced further apart and the canopy is less dense.
This means that you can safely top water without moisture or mold issues (more on watering tips below).
Why it’s important to pre-sprout sunflower seeds
While it’s an extra step, the germination phase in a jar is important for a number of reasons (2):
- The outer shells soften and loosen, making them easier to pluck off later;
- The sprouting jar keeps the seeds warm and moist—important conditions needed for germination;
- Speeds up growth;
- Tests out the viability of your seeds. If you have a low germination rate, you can chuck these out without wasting more time (and soil).

Credit: Yay Images
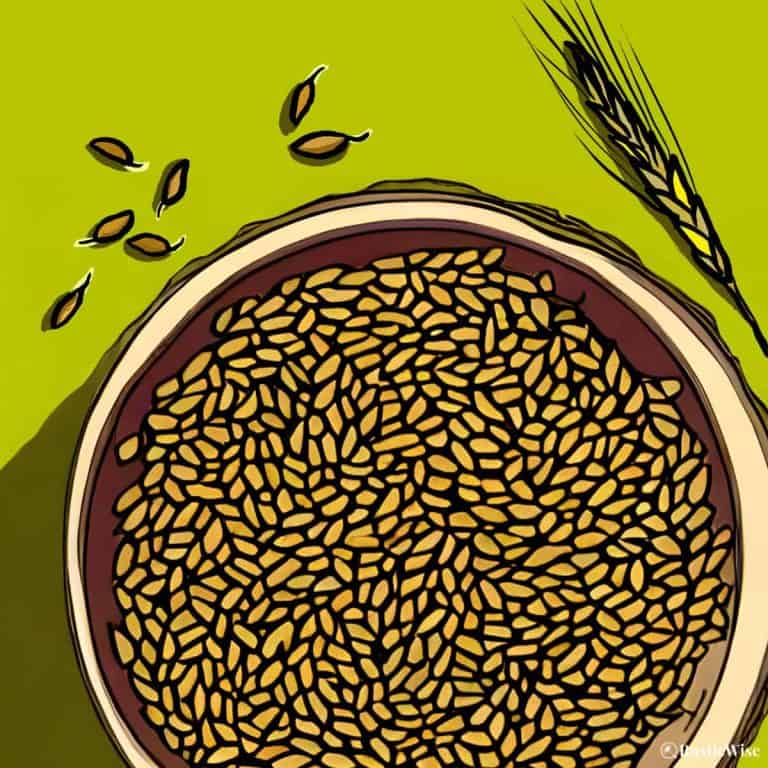
Selecting sunflower seeds
All good harvests begin with good seeds. And when growing sunny microgreens, it’s all about the black oil sunflower seeds. These seeds are smaller than striped seeds that we eat as snacks, and have a shiny, black coat.
What about the variety of striped sunflower seeds, you may be wondering (the ones that are a faded gray with a white stripe).
The striped variety of sunflower seeds is not recommended. They are larger and the seed casings tend to cling more to leaves making them more difficult to remove. Also, the packs of striped sunflower seeds sold as snacks have added flavoring, and other preservatives.
And if you’re thinking of trying to bypass the pre-sprouting phase by skipping straight to hulled sunflower seeds, don’t bother.
Hulled seeds also aren’t recommended as they’re not designed for growing microgreens and aren’t viable for very long (unless they’ve been refrigerated, and in most cases, are not).
Finally, what about seeds intended for bird feed?
This also isn’t recommended because they’re not intended for human consumption. This means they’re not food-grade. You might find all sorts of unpleasant things in there from random debris to insect eggs. You’ll spend a lot of time sifting through the seeds—time better spent gardening!
So, what type of seeds do you need? Buy black oil sunflower seeds that are labelled specifically for growing microgreens from a reputable supplier. These high-germination seeds are free of chemicals and harmful pathogens, and will help you grow the healthy and tasty greens.
Tip: If you’re not planning on growing your sunflower microgreens anytime soon, or, if you stocked up on a big batch, try storing the seeds in the refrigerator.
Credit: Deposit Photos
How to grow sunflower microgreens: step-by-step
Sunflowers, aptly named, love the sun and love the warmth. If you’re growing microgreens in the summertime, you may experience better and faster growth than during colder, wintery conditions.
Time to harvest: 8–12 days
Supplies
Step 1: Measure sunflower seeds
Since you’ll need to pre-soak and pre-sprout the seeds, you’ll want to get the amount of microgreen seeds just right.
So how much seeds do you need?
For a 5 X 5 growing tray, you’ll need about 1/4 cup.
Another way to find out how much you’ll need is to spread out a single layer of seeds into the empty grow tray you’re planning on using. Measure and record this amount.
Tip: Didn’t soak enough seeds? You can either try moving to a smaller grow tray, or fill the empty space with another type of microgreen seed with a similar grow period (and doesn’t require soaking) such as Napa cabbage.
Step 2: Pre-rinse
As mentioned, if you want to learn how to grow sunflower microgreens properly, the pre-soaking and pre-sprouting steps are vital to its success—so don’t skip this step!
Measure out your seeds and place in a glass jar. First, let’s do a pre-rinse. Fill the jar with cool water and give it a quick swirl. The water probably looks cloudy. Drain. You may need to repeat this once or twice.
Step 3: Pre-soak and pre-sprout
Next, fill with cool water and allow it to soak overnight, or for 8–12 hours.
The sunflower seeds float to the surface. If any seeds are above water, they won’t soak properly. Try keeping them all underwater by placing a lid, or a mesh screen that fits snugly inside the jar to ensure they stay underwater.
Tip: If you have a clean plunger from a French coffee press that fits inside the jar, this works like a charm!
Once the initial soak is finished, drain and rinse. The mesh lid, or cheesecloth on the jar should keep all sunflower seeds inside the jar while allowing for water to enter and drain.
Keep your jar at room temperature away from direct sunlight.
Continue to rinse and drain the seeds twice a day until you see signs of germination (you should see growth typically within 24–48 hours). A radicle (root) will begin to emerge from the seeds.
Ensure all water is thoroughly drained each time. You can do this by setting your jar upside down in a large bowl at a roughly 45-degree angle.
Step 4: Final rinse
Once most of your seeds have germinated, give them a final rinse and drain.
Step 5: Prepare the growing tray
Ensure your growing tray is clean as this prevents bacteria or mold growth. Fill the tray with 1–2 inches (2.5–5 centimeters) of moistened potting soil; or ensure the soil reaches the top of the tray for easier harvesting.
Lightly compress the soil with your hands or a small piece of cardboard.
The soil should feel moist, but not soggy.
Step 6: Broadcast seeds and moisten
Evenly spread the seeds across the surface of the growing medium in a single layer. Don’t worry if a few are touching (so long as they are not stacked atop one another).
Gently press the seeds down with your hands or a piece of cardboard so they are making contact with the soil.
Use your water mister to quickly moisten the tops of the seeds.
Tip: While some types of larger seeds do well when covered with a light layer of soil, there’s no need to do this with sunflower seeds. Sunflower microgreens actually seem to do better when not covered in a layer of soil: the seed shells seem to loosen better when left uncovered.
Step 7: Put a cover on it (along with some weight)
Now flip your cover so that the bottom is resting directly on top of the seeds. This places steady downward pressure on the roots to promote vigorous growth. If you have something slightly heavier other than a cover, such as a cafeteria tray, you could use this too.
It’s important to cover the seeds to keep the light out and moisture in. Ensure there’s adequate airflow. Place at room temperature in a low-light area.
Take a peek once a day during this time to ensure the soil is kept moist. Mist once a day if needed (but the soil and seeds should stay sufficiently moist for around three days).
Remember to place the cover back on. Check to see if the tiny roots are growing downwards. If not, try adding more weight on top of the cover such as a spray bottle, a couple of glass jars, etc.
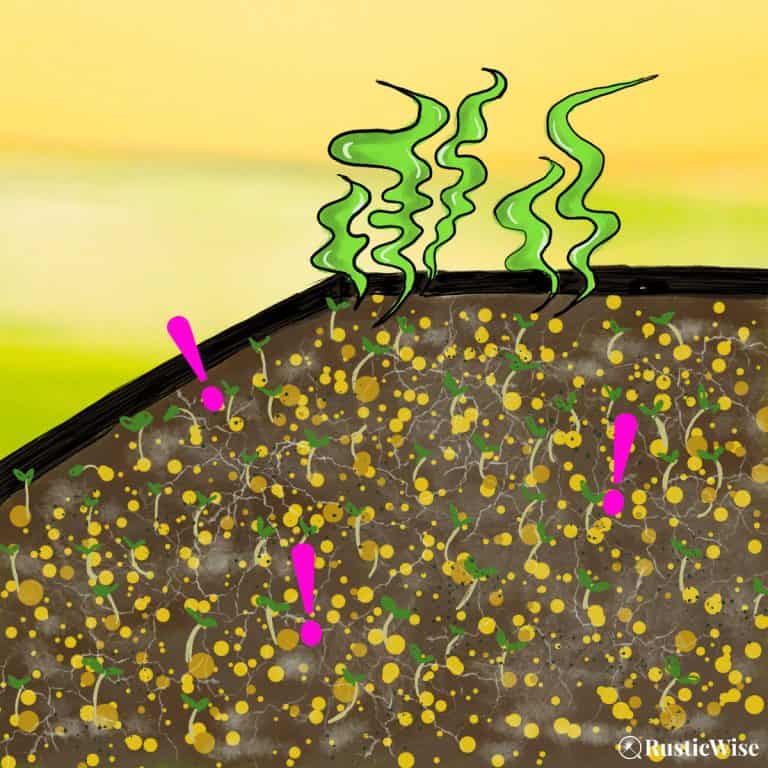
Seeds germinate around Days 3–4.
Step 8: Remove weight and remove unsuccessful seedlings
During this time, the growth from the bottom tray will begin to lift the cover up! Once the gap between the top and bottom trays is around 1 inch (2.5 centimeters), remove any weight along with the top cover.
Now it’s time to “weed out” the poor seedlings that haven’t properly taken root in the soil. Use a pair of tweezers to carefully remove any seedlings that have failed to properly take root downwards.
This helps to prevent these unsuccessful seedlings from rotting and contaminating the other successful seedlings.
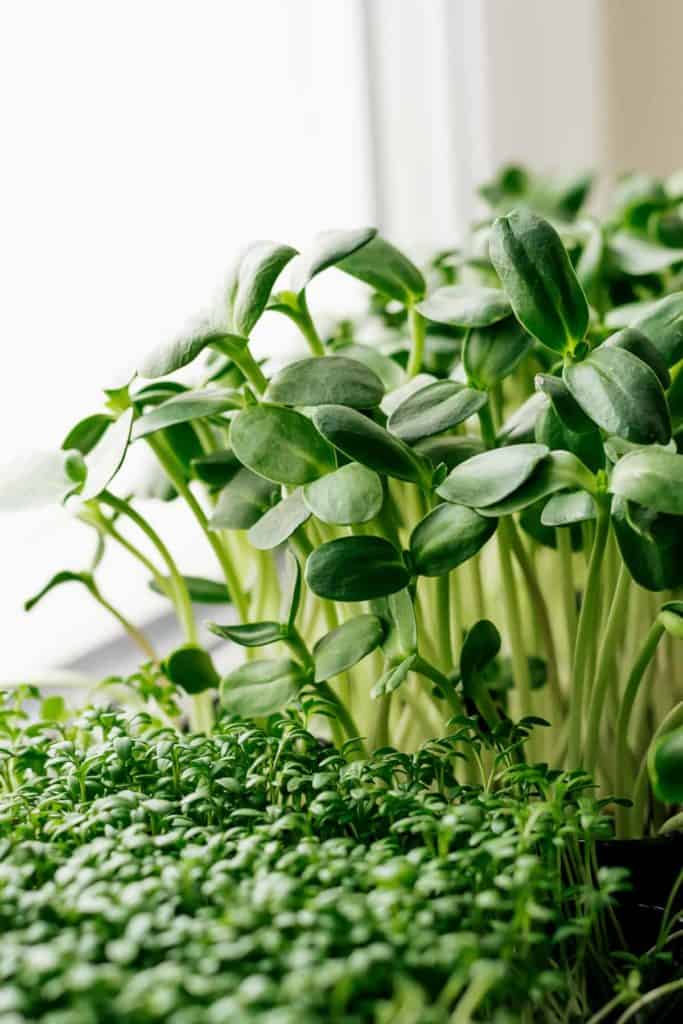
Step 9: Let there be light
By Day 4 or 5, the sunnies should show steady growth and are ready for sunlight to help them get nice and green. Remove the cover and place the sunflower microgreens in direct sunlight.
If weather permits, you could even place your tray of greens outdoors in direct sunlight for several hours. (Just protect your microgreens from any hungry backyard critters who would love a tasty snack!)
Sunlight helps the leaves to grow big, green, and vibrant. It also helps to loosen any remaining sunflower shells. Sunflower microgreens that haven’t been placed in sufficient sunlight look pale, and have lackluster flavor.
Step 10: Water from the top
Yup, you read that right—water from the top. While we usually frown upon top watering as most microgreens suffer from this method, sunflower microgreens are different.
They are strong and can withstand the force of the water (this is not to say that you should trample the poor seedlings with water). Their canopy is less dense and doesn’t hold onto water, and less prone to mold issues.
When watering, you can aim the water at any remaining seed hulls to aim to dislodge them. But avoid overwatering.
Allow water to fully drain after watering for about 30 seconds.
Credit: Deposit Photos
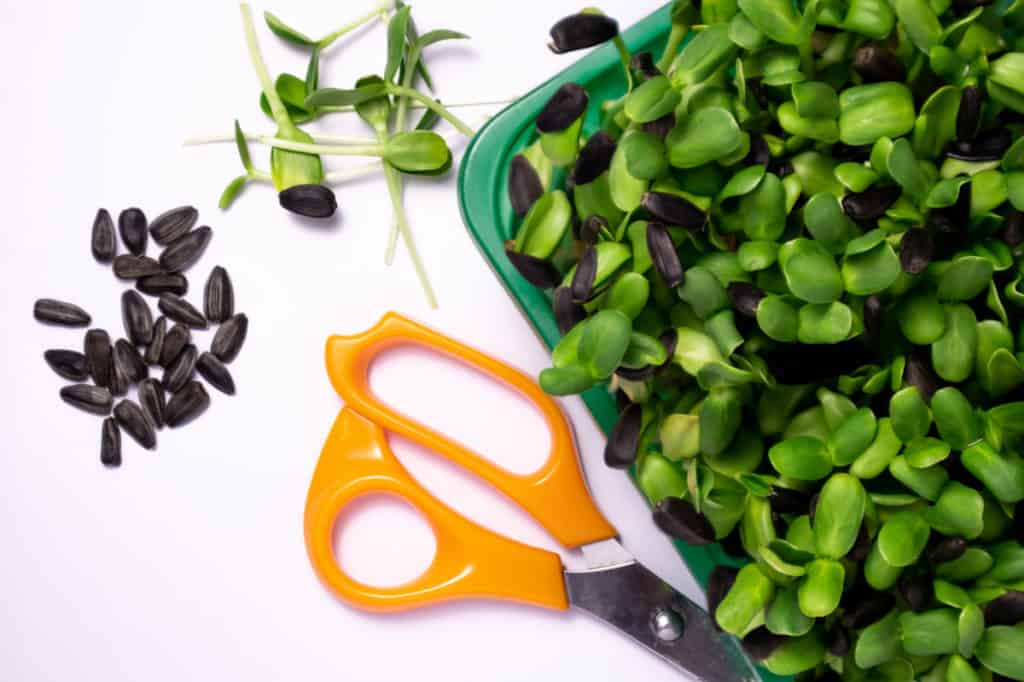
Step 11: Harvest
The ideal time to harvest sunflower microgreens is before the true leaves appear. This is when the greens are tender and sweet: wait too long to harvest, and the texture turns fibrous. Sure, you can wait longer to allow the microgreens to grow bigger, but then you’re sacrificing taste for size.
Keep an eye out for two tiny leaves to appear in the middle of the large seed leaves. This is a sign the true leaves are ready to come out.
This typically occurs between Days 8–12 or when greens are 2–4 inches (5–10 centimeters) tall.
By this point, most of the shells should have fallen off the leaves. If any remain, simply remove them by hand. It’s a good idea to remove all shells before harvesting as you’ll have a tougher time doing so once harvested.
Avoid top watering the greens the day before harvesting to avoid excess moisture which shortens shelf life.
To harvest, use sharp, clean scissors, or a knife to cut the greens just above the soil line.
Store your harvested sunflower microgreens in the fridge for up to one week.
Step 12: Enjoy the second wave
Sunflower microgreens don’t really regrow after harvesting like pea shoots do, but many growers do enjoy second, and possibly third “waves.”
This just means the greens grow at different rates, and not all will be ready to harvest at the same time.
Each subsequent wave produces less, with a loss in taste and nutrients too, as the nutrients in the soil depletes.
While you might enjoy a third or possibly fourth or fifth wave, the flavor is a pale version of its former self, and it might best be added to the compost, or fed to the birds.
So now that you know how to grow sunflower microgreens, add them to salads, sandwiches, and wraps. They are tasty and substantial enough to use as a salad base and pair well with pea shoots. Or, enjoy sunflower microgreens all on its own as a tasty and nutritious snack!
👉 Check out our article on the nutritional benefits of sunflower microgreens.


References
- My Net Diary, Sunflower microgreens, Ne Day Farms, https://www.mynetdiary.com/food/calories-in-sunflower-microgreens-by-ne-day-farms-oz-16406434-0.html. Accessed August 2021.
- Braunstein, Mark Mathew (2013). Microgreen Garden: Indoor Grower’s Guide to Gourmet Greens. Book Publishing Company. ISBN 13: 978-1-57067-294-1.
- Sprout People, Sunflower Greens, https://sproutpeople.org/sunflower-greens/. Accessed August 2021.

Author: Josh Tesolin
Josh is co-founder of RusticWise. When he’s not tinkering in the garden, or fixing something around the house, you can find him working on a vast array of random side projects.