How to Season a Dutch Oven in 5 Easy Steps
A cast iron skillet or Dutch oven is a solid kitchen essential—sturdy and long-lasting. It’s also versatile taking you from stovetop to oven, barbecue to campfire – all while cooking tasty, effortless meals.
A cast iron Dutch oven requires a bit of TLC once in awhile. Learning how to season a Dutch oven not only prevents rust from forming, it also makes clean up easier. Once your Dutch oven is properly seasoned, you’ll be able to use it worry-free. Some call it ‘seasoning,’ while others call it ‘curing’ or ‘sealing.’ It all essentially means applying a protective layer of oil between the iron skillet and food. Iron is a naturally porous metal and tends to oxidize if left untreated.
So whether you have a brand-new Dutch oven, or a family heirloom passed down through generations, you’ll want to ensure your skillet is well-seasoned, inside and out.
If you’re lucky enough to have an enameled Dutch oven, you’re good to go—no seasoning required.
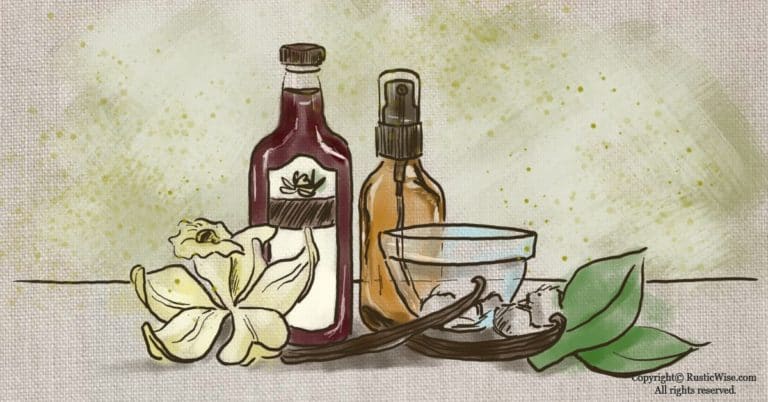
Suitable oils to use for seasoning
There’s much debate about what the best oil is to use for seasoning cast iron. I’m not going to delve into the best oil here, but I can definitely tell you which oils not to use. Don’t use butter, or coconut oil. These will burn during the seasoning process and the seasoning won’t properly polymerize.
Remember that the taste of the oil will stay with your cast iron skillet, so don’t use any old oil you have lying around. At the same time, you don’t need anything fancy or pricey, but you’ll want to use a good-quality vegetable oil. Try to select oil with a high smoke point to avoid burning and excess fumes.¹ Here are a few suitable oils for seasoning a Dutch oven:
- Vegetable oil
- Olive oil
- Sunflower oil
- Avocado oil
- Lard
- Flaxseed oil
What to do with a new Dutch oven
If you have a brand-new cast iron Dutch oven from the store, you’ll need to do an extra step first. Your Dutch oven likely has a waxy protective coating on it that you’ll need to scrub off with hot water, soap, and a stiff brush or scouring pad. You don’t want this waxy stuff getting into your food.
Once you’ve had a good go at the waxy layer and can feel the bare metal underneath, give it a good rinse and dry thoroughly.
This is the first and likely last time you’ll use soap on your cast iron skillet. If this sounds a bit gross, you’re not alone. I also found it a bit icky when I heard that most Dutch iron purists don’t use soap to clean up.
In our experience, if you soak the cast iron Dutch oven with boiling hot water immediately after use, you don’t really need soap and everything wipes clean (if you have a well-seasoned skillet).
How to season a Dutch oven: step-by-step
Set aside about an hour or more of your time for this easy, yet rewarding task. You may want to apply several layers of seasoning (three to five layers) depending on the condition of your Dutch oven.
What you’ll need:
- An outdoor gas barbecue, or an indoor oven
- Your choice of oil
- Oven mitt
- Kitchen tongs
- Paper towel or clean lint-free cloth to apply oil
- Another clean lint-free cloth to wipe down excess oil after seasoning
- Baking sheet
- Aluminum foil
Don’t be alarmed if you see smoke during the seasoning process. This is normal. Since you can expect some smoke, you may want to cure your Dutch oven outdoors on a gas barbecue if you have one. If not, your kitchen oven is still fine. Just remember to keep the room well-ventilated.
Step 1: Heat it up
Preheat oven to 400 degrees Fahrenheit (204 degree Celsius). Place your Dutch oven inside the oven or on the barbecue for a few minutes to warm up. It’s important to warm up the Dutch oven prior to sealing it as the heat helps to dry the skillet and also makes the oil easier to apply.
Place a sheet of aluminum foil on a baking sheet and place on the bottom rack (to catch any potential drips later).
Step 2: Apply oil
Use your oven mitt to carefully remove the Dutch oven and lid from the kitchen oven/barbecue after a few minutes of heating. Place the skillet on a heat-resistant surface such as your stovetop or wooden cutting board. Let your oven/barbecue continue to heat up to the set temperature.
In the meantime, apply a bit of oil to a paper towel or clean cloth. Use your kitchen tongs to evenly apply a thin coat of oil all over the inside, outside, handle, and lid. Avoid using too much oil as this results in an uneven or gummy layer. Make sure to pay extra attention to the inside (to prevent food from sticking on for future meals) and oil any crevices and pockmarks thoroughly.
Step 3: Wipe off excess oil
Since the goal is to apply a thin, even layer, you shouldn’t have too much excess oil. But just the same, it’s a good idea to give it a quick wipe with a clean, lint-free cloth before heating in the oven.
Step 4: Heat in oven to allow oil to polymerize
Place the Dutch oven upside down in the oven/barbecue alongside the lid. Let it “bake” for one hour. You can expect smoke to disperse at this time. Stay close by to carefully monitor the temperature.
Step 5: Allow to cool
Carefully remove the Dutch oven and lid from the oven and allow it to cool. Reapply more seasoning layers as needed.
How do you know when your Dutch oven is well-seasoned?
A well-seasoned cast iron skillet has a smooth black coating with a gentle luster, sort of like Teflon. The Dutch oven should no longer appear wet from the oil. When you’re cooking with it, food should slide off fairly easily.
How often to re-season a Dutch oven?
If you’ve applied several thin, even coats of oil, your cast iron skillet should be good for a long time. There’s no need to re-season it unless you notice food beginning to stick to it. Or, if your Dutch oven has been sitting unused for years, you’ll want to re-season it.
Oily or fatty foods like bacon actually help to keep the seasoning layer intact and add a nice flavor over time. Other acidic foods such as tomatoes and beans may cause the layer to eventually deteriorate. Just make sure to quickly rinse your Dutch oven after cooking acidic foods.
Happy cooking!
👉 If you like this post, see our Rustic Kitchen section. 🍽️
Would you like more timeless tips via email?
Fun tips to help you live an independent, self-sustaining lifestyle. Opt-out at any time.


References:
- Masterclass, Cooking Oils and Smoke Points: What to Know and How to Choose the Right Cooking Oil, https://www.masterclass.com/articles/cooking-oils-and-smoke-points-what-to-know-and-how-to-choose. Accessed April 2025.

Author: Josh Tesolin
Josh is co-founder of RusticWise. When he’s not tinkering in the garden, or fixing something around the house, you can find him working on a vast array of random side projects.