Growing Microgreens at Home: A Complete Guide
RusticWise is supported by its readers. When you purchase through links on our site, we may earn an affiliate commission. As an Amazon Associate, we earn from qualifying purchases. Thank You!
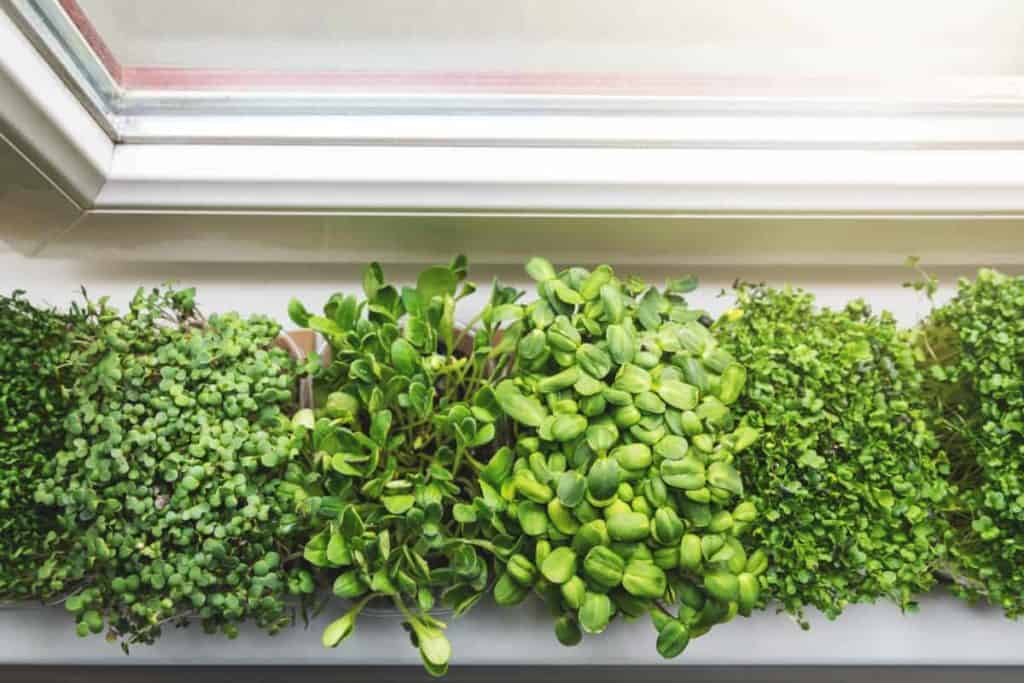
If you’re like most people, you could stand to add more healthy greens to your diet. That’s where microgreens come into the picture. These tiny, nutritious greens are harvested when only a few inches tall, but they contain more vitamins and carotenoids (antioxidants) than their mature counterparts. While you can buy microgreens at grocery stores or farmer’s markets, it quickly adds up. Growing microgreens at home is easy, cost-effective, and ensures you have fresh greens year-round!
Microgreens are a tasty addition to any diet and a great way to start growing your own food. The great thing about microgreens is that you don’t need a lot of space (perfect for urban gardeners). Most varieties are ready to eat within 1–3 weeks and can be grown indoors anytime of year.
Read on if you want to learn more about growing microgreens at home: everything from what they are, how to grow them, and how to eat them.
What exactly are microgreens?
Microgreens are often confused with their relatives, sprouts and baby greens.
While there are many differences between microgreens and sprouts, an easy way to differentiate between the two is that sprouts are simply sprouted seeds, typically grown in a glass sprouting jar without any soil. They are eaten in their entirety: root and shoot.
On the other hand, microgreens are tiny seedlings that are harvested in their infancy. They are grown in soil (or a soilless medium) and are harvested above the soil line. Microgreens contain the seed leaves, also known as the cotyledons, which are brimming with nutrients. The seed leaves are the first pair of leaves that emerge from the seedling. You can choose to harvest microgreens at this point, or wait until the first true leaves appear, which are the second set of leaves.
If you let your microgreens grow beyond the true leaf stage, some varieties can grow into the baby greens stage (which is the next stage between the microgreen and mature leaf stages).
The takeaway: Microgreens are not the same as sprouts, nor baby greens. They are grown in soil (or a soilless medium), and harvested typically when they reach 1–2 inches (2.5 to 5 centimeters) in height, depending on the variety.
Key Differences Between Pea Sprouts vs. Pea Shoots
Read up on the notable differences between pea sprouts and pea shoots. Same, same but different.
Tiny, but mighty: a few health benefits of microgreens
These tiny greens live up to all the health hype you may have heard of. While many people know of the health benefits of leafy greens such as spinach and kale, microgreens are also something you’ll want to add more of to your diet.
Let’s take a quick look at some of the health benefits of microgreens.
Contains more nutrients than their mature counterparts
While each microgreen variety is unique and contains widely differing amounts of nutrients, in general, most are a good source of vitamins A, C and K. Microgreens also are rich in calcium, iron, magnesium potassium and zinc, as well as B-complex groups (B Vitamins).
A 2012 study by researchers from the University of Maryland together with the Agricultural Research Service (ARS) from the U.S. Department of Agriculture (USDA) examined 25 commercially-grown varieties of microgreens.
They discovered that microgreens contain between 4 and 40 times the amount of vitamins and carotenoids than the same leaves from mature plants. On average, most microgreens contained five times more vitamins and carotenoids.
If you want to know which type of microgreens are healthiest according to the study, they are:
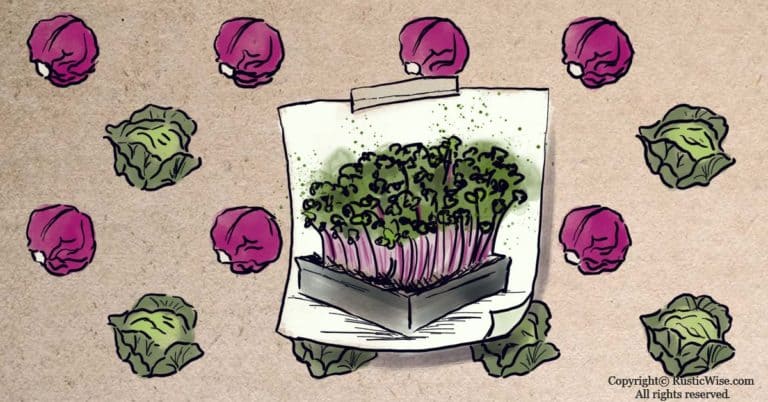
- Red cabbage
- Cilantro
- Garnet amaranth
- Green daikon radish
These microgreens contained the highest levels of vitamins C, E, and K, as well as carotenoids.
Note: Carotenoids are a form of phytochemical that gives plants their pigment. For example, carotenoids give carrots, spinach, collard greens, and red berries their color. They are beneficial for heart health, good eye functioning, and act as an antioxidant.
Rich source of polyphenols
Polyphenols are plant-based natural compounds that act as antioxidants. Microgreens contain high levels of polyphenols. Polyphenols may help fight off free radicals, may protect against certain cancers, heart disease as well as type 2 diabetes. In addition, polyphenols promote healthy digestion.
In addition, these compounds may reduce inflammation and boost immunity.
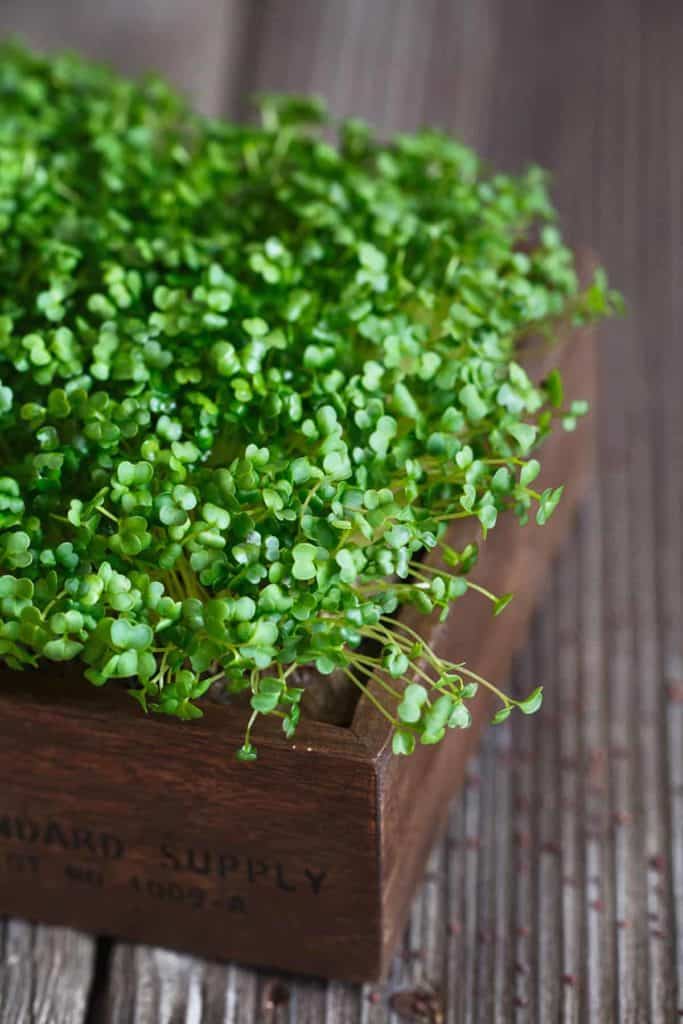
Other benefits of growing microgreens at home
Easiest types of microgreens to grow
Virtually any type of edible vegetable, herb and legume can be grown as a microgreen.
But it’s true—some microgreens are easier to grow than others. The ease of germination, time to harvest, and overall resiliency of the plants play a role in how easy or difficult it is to grow microgreens from seed.
The book, Microgreen Garden: Indoor Grower’s Guide to Gourmet Greens by Mark Mathew Braunstein has been a great resource for us in guiding us along the growing journey.
Credit: Deposit Photos
If you’re just starting out, check out the following list of easiest microgreens to grow:
- Napa cabbage microgreens: A mild cabbage flavor profile that works well in many dishes.
- Radish microgreens: If you want a flavor kick, radish brings the spice and the crunch. Colors range from green and white, to red and purple.
- Broccoli microgreens: One of the most popular brassicas to grow, broccoli microgreens are quick-growing and have a pleasant flavor that goes well with almost every dish. Watch out for overwatering to avoid problems at the roots.
- Turnip microgreens: Slightly sweet, slightly tangy, these turnip microgreens taste an awful lot like cabbage microgreens. Turnip micros do fine in indirect light.
- Bok choy microgreens: You’ll find this Asian green to be fresh, yet sweet and earthy. Bok choy also does okay in lower light.
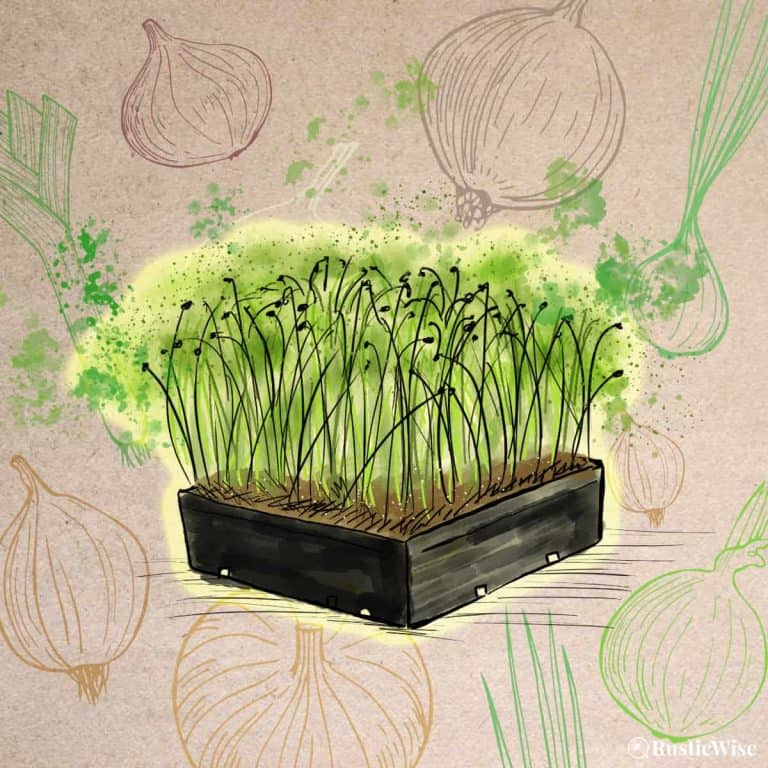
- Pea shoot microgreens: Crunchy and sweet, pea shoots make a great salad base, and pair well with sunflower microgreens. Bonus—pea microgreens regrow after harvesting.
- Cress microgreens: Cress packs a flavor punch with its spicy and peppery profile with a hint of sweetness. Best used sparingly as a garnish.
- Lettuce (romaine) microgreens: Tasting essentially like mature romaine lettuce, these microgreens are perfect in salads, wraps, and sandwiches.
- Komatsuna microgreens: Also known as Japanese mustard spinach, komatsuna has a great mild mustard taste.
- Sesame microgreens: Mild and nutty, sesame microgreens are one of the few microgreens that taste good when slightly cooked.
- Endive microgreens: A mild tasting microgreen with a slightly bitter aftertaste; grows wide rather than tall.
- Mustard microgreens: Bold and spicy, mustard microgreens taste similar to horseradish. Use as a garnish.
- Wheatgrass microgreens: Perfect for making juices or smoothies, wheatgrass is easy to grow with an intense fresh flavor.
This list barely scratches the surface of the wide variety of microgreens available. There are many other interesting varieties you might want to try growing:
- Beet microgreens have the same sweet beet flavor and ruby coloring of full grown beets—with much less work!
- Kohlrabi microgreens are an unique Brassica that tastes like a blend of cabbage and turnip.
- Orach microgreens are an ancient veggie often used as a spinach alternative.
- Red or garnet amaranth microgreens add a lovely splash of color and contain exceptionally high levels of vitamins A C, E, and K.
- Flax microgreens are packed with healthy omega-3s and protein.
Microgreens NOT to grow
While almost all edible plants are fair game as microgreens, there are some that are not safe as microgreens.
Avoid growing microgreens from seeds that are members of the nightshade family including eggplants, goji berries, peppers, potatoes, and tomatoes.
At this young stage of growth, nightshade plants contain high levels of solanine and tropanes which are poisonous when eaten.
Another microgreen to be cautious about is buckwheat microgreens. While buckwheat sprouts are safe to eat, there are safety concerns about eating large quantities of buckwheat microgreens. (If you’re confused about the difference between sprouts and microgreens, check out the section above.)
Buckwheat microgreens contain high levels of fagopyrin, a pinkish toxin which may cause a skin rash and phototoxicity when consumed in large quantities. It’s best to eat these micros in moderation, or stick with consuming either cooked buckwheat, or buckwheat sprouts.
Do you need special seeds to grow microgreens?
Not all seeds are created equal, and this especially applies to seeds for growing microgreens.
While you could try your luck at growing regular seeds, you’ll likely experience low germination rates, or lackluster results.
This is because many commercially available seed packets are treated with chemicals to protect them from pests, or may have been irradiated. While this may not be a big deal when you’re growing full-grown versions of plants, it’s not favorable if you’re growing microgreens which have a very short grow cycle.
So what type of microgreen seeds do you need to buy? Seeds designed for microgreens are often labelled “high germination.” Seeds from a reputable seed supplier are free from harmful pathogens.
It’s also best to stick with organic seeds too. When dealing with these tiny greens, you probably don’t want to consume any unnecessary fungicides or pesticides.
Check your local gardening supplier for microgreens seeds. There are also a number of online suppliers to buy microgreens from including Johnny’s Seeds, True Leaf Market, Sprout People, or West Coast Seeds (Canada).
Tricks and Tips for Growing Sunflower Microgreens
Sunnies are a bit different than other micros and require soaking the seeds. Black oil sunflower seeds grow healthy microgreens with a sweet and nutty flavor many people love.
Growing mediums for microgreens
There’s no general agreement within the microgreens community about the best type of growing media to use. Some swear by good ol’ potting mix, while others love their coconut coir.
You don’t need to spend a fortune on the best growing medium, but you also want to ensure you get something organic (free of chemicals and pesticides), and of decent quality to ensure healthy growth.
Tip: Keep in mind that the grow cycle of microgreens is much shorter than the average vegetable crop you’d grow in your garden. For example, growing cabbage microgreens won’t require nearly as perfect of soil conditions as it would to grow full-sized cabbages! So while it’s important for microgreens to have some nutrients in whatever growing medium you choose, it’s okay if you don’t shell out big bucks for something premium. Remember to use organic to protect your food source from chemicals, and you should be good to go!
Potting soil or seedling mix
Organic potting soil or potting mix is preferred for many varieties of micros, especially those that grow larger (such as sunflower microgreens and pea shoots). Potting soil is also great for greens that could possibly regrow (pea shoots).
Organic potting mix is fairly inexpensive and readily available. It also provides a good source of nutrients to support the complete grow cycle of microgreens.
Don’t confuse potting mix with topsoil you use to grow outdoor crops. While topsoil may work just fine for growing outdoor veggies, if used for growing microgreens it will produce less than desirable greens.
Why? For starters, if you use topsoil for microgreens, it will become too dense and harden. The microgreen roots won’t receive enough airflow and will suffocate.
Secondly, topsoil carries fungi spores. When growing tiny, delicate greens for a short period of time, any exposure to fungi may cause fungal issues (such as dampening off) and cause microgreens to die.
Potting mix or potting soil is ideal as it’s sterilized and free of fungi. Most potting mixes contain perlite or vermiculite which prevents the soil from becoming too compact. It may also have sphagnum moss or peat moss which gives the soil a lovely light and sponge-like texture.
Organic seedling mix or seed starter mix is also a great choice if you’re growing microgreens with a shorter grow cycle (2 weeks or less). Lighter and finer than potting mix, seedling mix is formulated to allow new seeds to germinate—perfect for tiny greens!
Seedling mix doesn’t contain as much nutrients as potting mix. So if you’re growing micros with a longer grow cycle, they would benefit from the added nutrients in potting soil to support healthy growth. However, for micros with a short grow cycle, seedling mix should provide all the nutrients they need.
Keep in mind that some larger types of microgreen seeds, or those with hard outer shells often do better when covered in a thin layer of soil. For instance sunflower seeds and pea shoots do better when grown in soil than a hydroponic grow mat.
The takeaway: Organic potting mix is sterile and fungus-free making it an ideal growing medium for microgreens. Don’t use topsoil from your outdoor garden as it contains fungi spores which could harm your microgreens. Organic seedling mix (or seed starter mix) is also a good choice when growing microgreens with shorter grow cycles of 2 weeks or less.
Soilless growing mediums
Simply put, a soilless growing medium is a growing substrate that contains no soil. Some growers wish to avoid using soil to avoid any potential soilborne diseases.
If you decide to go the soilless route, remember to add some nutrients to promote optimal growth. A good and fairly inexpensive option is liquid kelp fertilizer. You could also try mixing in a bit of earthworm castings.
Note: Microgreens that are grown in a soilless medium without added fertilizer will have lackluster or stunted growth. They also won’t taste as good. And nobody wants bitter, or bland microgreens, right? So, add some liquid water-soluble fertilizer sparingly.
Here are a few common types of soil-free growing mediums:
- Coconut coir: Coco coir is made from the fuzzy fiber inside coconut shells. It comes dried in a “brick.” It’s great for retaining moisture—you may get away with watering your microgreens less. Simply add water to the brick, mix well, and it’s ready to use.
- Perlite: Most often white, perlite is a type of volcanic rock that drains well and provides plenty of air circulation with its light texture. Perlite floats when mixed with water. It doesn’t hold water well which is why it’s often mixed with peat moss or vermiculite.
- Vermiculite: Finer and smaller than perlite, vermiculite is a type of mica that’s great at retaining water. It doesn’t have the same good aeration properties as perlite though. The mixture of perlite and vermiculite is a popular choice for growing microgreens.
- Rockwool: A growing substrate made of molten basaltic rock which is spun into fiber and formed into a block.
Hydroponics
Hydroponics in a nutshell is simply a means of growing microgreens in a solution of fertilizer, water, and a growing mat.
Some growers prefer hydroponic growing mats as they’re less messy come harvest time, or when cleaning up in general. Many types of natural grow mats are compostable.
Just like soilless growing mediums, hydroponic grow mats require some organic liquid fertilizer to provide a source of nutrients for micros.
- Hemp mats: Hemp fibers are pressed and formed into a grow mat. Moisten the grow mat before sowing seeds.
- Burlap: Made from woven jute fibers. Moisten before sowing seeds.
- Paper towel: Yes, you can grow microgreens on paper towels, but it comes with challenges. Getting the moisture level correct is tricky. Too moist and the seeds may rot; too dry and the seeds won’t germinate. Most microgreens grown on paper towel are lacking the vitality of those grown in soil.
Containers for microgreens
When it comes to vessels to grow your microgreens in, you can go the DIY route and repurpose old shallow containers you have around the house, or buy growing trays. Containers can be as big or small as your personal space allows for.
A good container for growing microgreens should have the following properties:
- Drainage holes;
- Shallow depth, ideally 2–3 inches (5–8 centimeters) deep;
- Made of food-grade material.

Repurposed containers
If you’re planning to use repurposed containers, a couple of our favorites are: plastic clamshell containers in pint or half-pint sizes (the ones that hold fruit), and a standard aluminum pie tin.
Plastic clamshell containers already come with drainage holes and can be easily doubled-up to make a sturdy grow tray. Aluminum pie tins are the perfect depth and you can quickly poke a few drainage holes at the bottom.
Grow trays
You can find microgreens growing trays at a gardening center, or online. This is basically a shallow tray that comes in a variety of sizes (most commonly 5 X 5, 10 X 10, and 10 X 20).
Some come with (or without) drainage holes at the bottom. Most grow trays come with a cover which is handy when your microgreens are in the blackout phase (germination).
If you buy several 5 X 5 -inch grow trays with drainage holes, you can then buy a 10 X 10 or 10 X 20 with no drainage holes to use as a holding tray when you’re bottom watering (more about watering below).
A note about lighting requirements
Like all plants, microgreens need light (either natural or artificial) to kickstart photosynthesis and foster optimal growth.
However, during the blackout phase (or germination stage) which occurs just after you’ve sowed the seeds, most microgreens don’t require any light. During this important stage, the seeds have everything they need to start germination: moisture, warmth, and food stores from within the seed.
Once the microgreens have established downward root growth and are steadily growing taller, it’s time to expose them to the sun. Let there be light!
How much light exactly? Well, that depends on the variety of microgreens you’re growing.
In general, most microgreens require 10 hours of light and 6 hours of darkness each day, according to Mark Mathew Braunstein, author of the book, Microgreen Garden: Indoor Grower’s Guide to Gourmet Greens.
If you’re tempted to keep your grow lights on 24/7—resist that urge. Those hours of darkness are vital for healthy growth. They mirror the natural night/day cycle of nature and helps to promote strong roots, metabolize sugars, and develop stronger stems and leaves.
Learn How To Grow Corn Shoots
Corn shoots are different from other microgreens in that they grow best without any light. This helps bring out their sweetness.
What if you don’t have enough natural light?
If you have a sunny south-facing window to place your microgreens, you’re golden. If you don’t have access to enough natural light, you’ll need to supplement with artificial lighting.
Even if you do have a sunny windowsill to grow your microgreens, you may notice that the hours and intensity of natural sunlight you receive during the winter months wane.
When you feel like your greens aren’t getting enough light naturally, it’s time to tack on a few hours of supplemental artificial lighting. Aim for a total of 10 hours of combined natural and artificial light for healthy growth.
(A few signs your microgreens aren’t getting enough light are pale and “leggy” stems and leaves, plus slow overall growth.)
Now, we’re not going to get into a full-blown discussion about the various types of lighting you can use for growing microgreens. But we will cover a few basics.
When you’re just growing micros for personal use, you don’t need to shell out a ton of cash on lighting (growing for profit is another matter). You make do with what you have.
If you have a few extra fluorescent light fixtures, these will do in a pinch (typically T5 or T8 tubes). If you feel like investing a bit more money into LEDs later, go for it.
Remember to keep the grow light several inches away from the micros to prevent scorching. You may need to experiment and adjust the height of your lighting as needed.
The University of Maryland Extension (UME) recommends that for starting plants indoors, you need lighting with light intensity (lumens rating) of 3,000+, and a brightness (Kelvin scale) of 5,000 to 6,500 (daylight).
Note: Some microgreens are fine with indirect light (also known as low to medium light). If you don’t have a sunny south-facing window, you can still grow a batch of healthy micros. A few good indirect light microgreens to try are arugula, bok choy, lettuce varieties, and mustard greens.
Watering requirements and methods for microgreens
The quality of water you use to water your microgreens is important. Water should be of at least drinking quality.
The taste of microgreens is also affected by water quality, so you’ll want to use only fresh, clean water.
For some people, tap water works fine. However, if you live in an area with heavily chlorinated water, or hard water, you may need to use distilled or bottled water.
Watering methods
The way in which you water your microgreens affects overall growth.
The delicate and fragile stems of microgreens may become damaged under the weight of water if top watered. Some varieties of micros are more prone to mold growth so any residual water on leaves and stems may cause moisture issues.
Here are a few different methods of watering microgreens:
- Bottom watering: The recommended method of watering most varieties of microgreens is from the bottom. This is where those drainage holes come in handy. Bottom watering simply involves filling a shallow basin or sink with clean water and placing your microgreens tray in. After several minutes, remove the tray from the water, and that’s it! Your microgreens have absorbed water from the roots up, and the top foliage remains dry (which prevents mold growth).
- Side watering: If you grow microgreens in a small shallow tray, you can use the side watering method. Gently brush aside the greens with one hand, and water the soil directly along one side of the tray. Do the same for the other side until your microgreens are fully watered.
- Top watering: As the name suggests, this involves watering from the top-down. The tops of the microgreens get the brunt of the water. Often there’s some backsplash involved if you’re using soil or a soilless medium which may contaminate leaves. In general, this isn’t the best way to water your micros. However, there are a few exceptions: sunflower microgreens and pea shoot microgreens both benefit from the top watering method. Sunflower and pea shoot microgreens are both larger and sturdier microgreens that aren’t harmed from top watering. Top watering seems to actually promote more vigorous growth. However, at the first sign of mold issues, switch to bottom watering.
- Misting: Use a spray bottle to mist the tops of microgreen seeds after they are sowed to encourage germination. If you’re working with unsoaked and uncovered microgreen seeds, it’s especially important to keep them consistently moist with a spray bottle. After germination, switch to bottom watering.
All About Bottom Watering Microgreens
Keep your micros healthy and happy by using the bottom watering method, a tried-and-tested technique.
A closer look at indoor vs. outdoor growing
When growing microgreens, you have the option of growing them inside or outdoors. If you live in an area with mild temperatures, you could potentially grow micros outside year-round.
There are of course pitfalls when growing outdoors, namely protecting your crop from pests. Most people seem to grow microgreens indoors and much of the information out there on growing micros is for inside growing.
I live in a cold climate, so I prefer to grow indoors and save my outdoor gardening space for growing full-grown veggies.
Even if you decide to grow indoors, you could still place a tray of germinated microgreens outside for a few hours on warm, sunny days. Just be sure they’re protected from birds, bunnies, or other pests that might enjoy a tasty snack!
There are pros and cons of each growing method as we’ll go over below.
Growing microgreens outdoors
Growing microgreens outdoors is an option during certain times of year, or if you live in a warmer climate. When growing micros outside, you can sow seeds directly in the ground.
You’ll want to ensure that your soil is not compact and has good drainage.
Pros:
- No need for artificial grow lights: Nothing beats real sunlight. Take advantage of natural sunlight to promote optimal growth and use less electricity.
- Less equipment needed: With outdoor growing, you won’t need grow trays, grow lights, and you can free up any windowsills or tabletops that might otherwise be occupied with trays of micros. All you need are some good microgreen seeds and some decent soil.
Cons:
- Lack of control: As with traditional gardening, you’re at the mercy of whatever Mother Nature decides to throw at you, be it wind, storms, or too much/not enough sun.
- Pests: Your tiny, fragile greens require some protection from hungry rabbits, birds, squirrels, and insects that could potentially harm your micros. You can try to protect them with a mini greenhouse, or some type of DIY fencing or plastic sheeting coverage.
- Longer to harvest: Since outdoor microgreens are grown in an uncontrolled environment, you can expect to tack on a few days until they’re ready to harvest compared to their indoor counterparts.
Growing microgreens indoors
The more common way to grow micros is inside. You can simply place a tray or two on a sunny windowsill, or have an elaborate grow light setup, depending on your needs.
Pros:
- More control over environment: When it comes to growing microgreens indoors, you are in complete control of the amount of light, temperature, and humidity. You can tweak and adjust conditions as needed.
- Faster harvest times: The ability to control growing conditions means that most micros grown indoors are ready to harvest several days faster than the same micros grown outdoors.
- Grow year-round: Many people don’t live in areas where crops can be grown outdoors in the winter. But with indoor micros, you now have this option.
Cons:
- Likely requires grow lights: Unless you have many sunny south-facing windows, you may need to supplement any natural light with grow lights.
- More equipment: When growing outdoors, you just need some seeds and soil. With indoor growing, you’ll need more supplies such as grow trays and covers, lights, spray bottles, etc.
The takeaway: Whether you decide to grow microgreens inside or out, aim to give them adequate lighting and moisture conditions. If you have a extra bit of space in your garden, why not try growing a batch outdoors if the weather is warm?
A guide to growing microgreens at home
If you’re ready to start growing your own microgreens, gather a few supplies and let’s get started!
Supplies you’ll need:
- Quality microgreen seeds
- Growing container and cover (You can buy grow trays, or use any shallow container such as pie plates, or clear plastic produce containers work well. Just make sure to poke a few holes for drainage.)
- Potting mix or growing medium of your choice
- Spray bottle filled with clean water
- Small piece of cardboard for tamping down soil and seeds (optional)
- Glass jar (if you’re planning to soak the seeds)
Here’s the general growing process of microgreens at-a-glance:
- Measure and soak seeds. (Soaking is optional as not all microgreens seeds need soaking—check the instructions on your seeds.)
- Moisten growing medium and fill grow tray or container.
- Sow seeds and mist.
- Cover seeds and keep warm.
- Place in the light once microgreens begin to grow upwards.
- Water as needed.
- Harvest.
Step 1: Measure and soak seeds
How much seeds do you need? As a general rule, you’ll need roughly 1–2 teaspoons for a tray that measures 5 X 5 inches.
While it’s not necessary to soak seeds before planting, it does help to speed up germination. Not all seeds should be soaked though (particularly mucilaginous seeds).
Soak seeds for 8–12 hours, or overnight.
Tip: It’s best to follow the directions on the seed packet for soaking recommendations.
Step 2: Moisten growing medium and fill grow tray
If you’re using soil or a soilless medium, the easiest way to moisten it is to portion out soil into a separate clean bucket, and incorporate water until it’s thoroughly moistened. Soil should have the consistency of a damp sponge.
Next, fill your growing trays with roughly 1–2 inches (2.5–5 centimeters) of soil. You can use either your hands or a small piece of cardboard to gently tamp down soil so it’s flat.

Step 3: Sow seeds and mist
Now that your grow tray is ready, it’s time to broadcast the seeds. While microgreens are more densely sown than other crops, it’s important not to go overboard.
So how dense should microgreens seeds be sown? Generally, it’s okay if a few seeds are touching, but your seeds should not be overlapping. Microgreens that are sown too densely are more prone to moisture and mold issues.
Seeds that aren’t making contact with the soil won’t germinate. Once seeds are sown, press down gently so that all seeds are making firm contact with the soil—you can use your hands or a small piece of cardboard to press down.
Next, give the tops of the seeds a misting with a spray bottle.
Note: Some seeds do better when covered with a thin layer of soil, particularly larger seeds. However, most seeds don’t require covering with soil. Check with the instructions on your seed packet for specific details.
Step 4: Cover seeds and keep warm
During this germination phase most microgreen seeds don’t require any light. Some refer to this phase as the blackout phase.
To help keep moisture in, place a cover over the grow tray. If you don’t have a cover, you could use either a newspaper, or a piece of clean, breathable fabric such as cotton.
It’s important to place your tray of microgreens in a room that’s at least room temperature. Seeds placed in cool rooms either won’t germinate, or will germinate very slowly.
During this stage, you can take a peek at the seeds once a day and mist if they become dry. Remember to replace the cover. Depending on the variety of microgreens, most germinate within the first three or four days.
Step 5: Place in the light
Once microgreens begin to show sturdy upwards growth, remove the cover and place in the light. This can be a sunny windowsill or under artificial grow lights if there’s insufficient natural sunlight.
It’s important to place micros under sunlight at this point to “green” them which promotes vigorous growth and enhances the flavor of the crop.
As mentioned above, most microgreens need around 10 hours of sunlight a day.
Step 6: Water regularly
Now that your tray of micros is exposed to light, you may notice that the growing medium dries out more quickly. Monitor moisture levels and keep the soil moist by watering once a day (or as needed).
Bottom watering is the recommended method for most micros.
Credit: U.S. Department of Agriculture /Lance Cheung/ Flickr
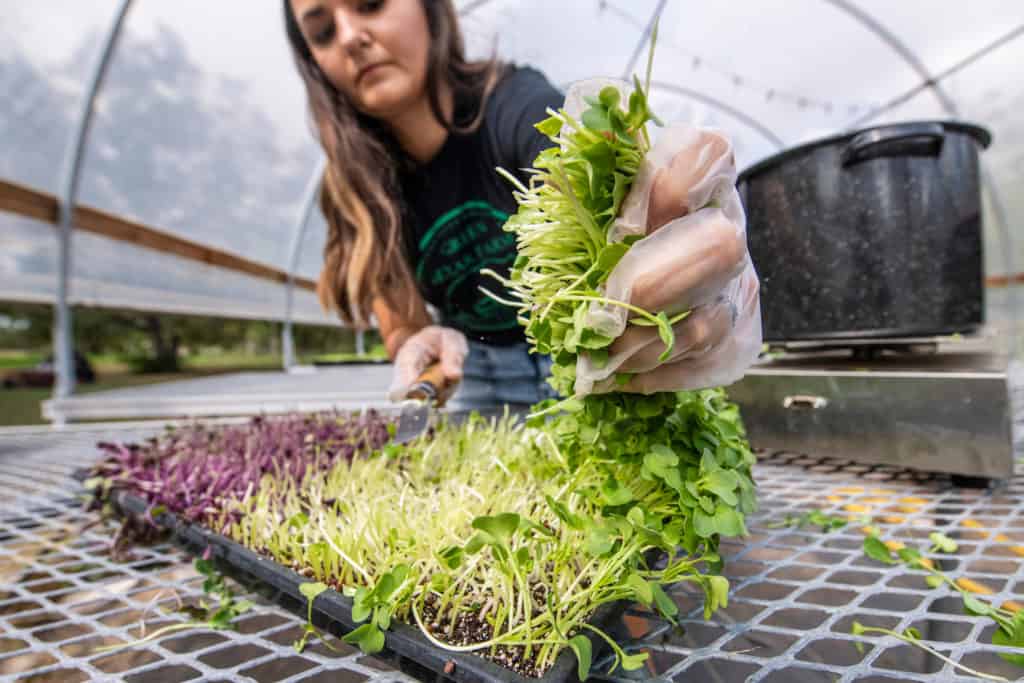
Step 7: Harvest
Some microgreens have short grow cycles and are ready to harvest in 1–2 weeks. Others may require around 30 days until harvesting.
While your seed packet will give a general harvesting timeframe, the best way to know when they’re ready is to harvest according to taste. This means you can sample a few stems and leaves throughout the grow cycle to see when they taste best.
You can also decide to harvest as soon as the first seed leaves (cotyledons) appear, or wait until the first true leaves (the second set of leaves) unfold.
To harvest, simply use a clean, sharp pair of scissors or knife to cut just above the soil line. Have a clean container or bag ready to catch your harvest of microgreens.
Note: Any moisture shortens the shelf life of microgreens. Store unwashed in the fridge, and wash just before eating. Microgreens can keep up to one week in the fridge, but are best when consumed within 3–4 days after harvesting.
👉 For more in-depth growing directions, check out our article on growing microgreens indoors.
Do some microgreens regrow?
In general, most types of microgreens do not regrow.
The manner in which microgreens are grown (think tightly-packed conditions), and the fragile nature of the greens themselves (tiny root system and stems) make them prime candidates for a one-time harvest.
On the off-chance that you experience any regrowth, the resulting greens will be less tasty and nutritious. Second harvests are also more prone to mold growth and other diseases.
There are a few exceptions of course.
Pea shoot microgreens are probably one of the best types to regrow. They grow larger than other types of micros and can usually “bounce back” more easily, You may enjoy second or third harvests. (Just remember that the first harvest will have the best tasting and most tender greens.)
Other types of microgreens that may regrow are:
- Basil
- Beans
- Coriander
- Fenugreek
- Leafy greens
- Oregano
- Sage
How to use microgreens
When it comes to using microgreens, the sky’s the limit. You can get creative and have fun incorporating different colors, textures, and tastes into your everyday diet. With so many unique flavor profiles from mild and sweet, to sharp and spicy, you can use them in a variety of savory or sweet dishes.
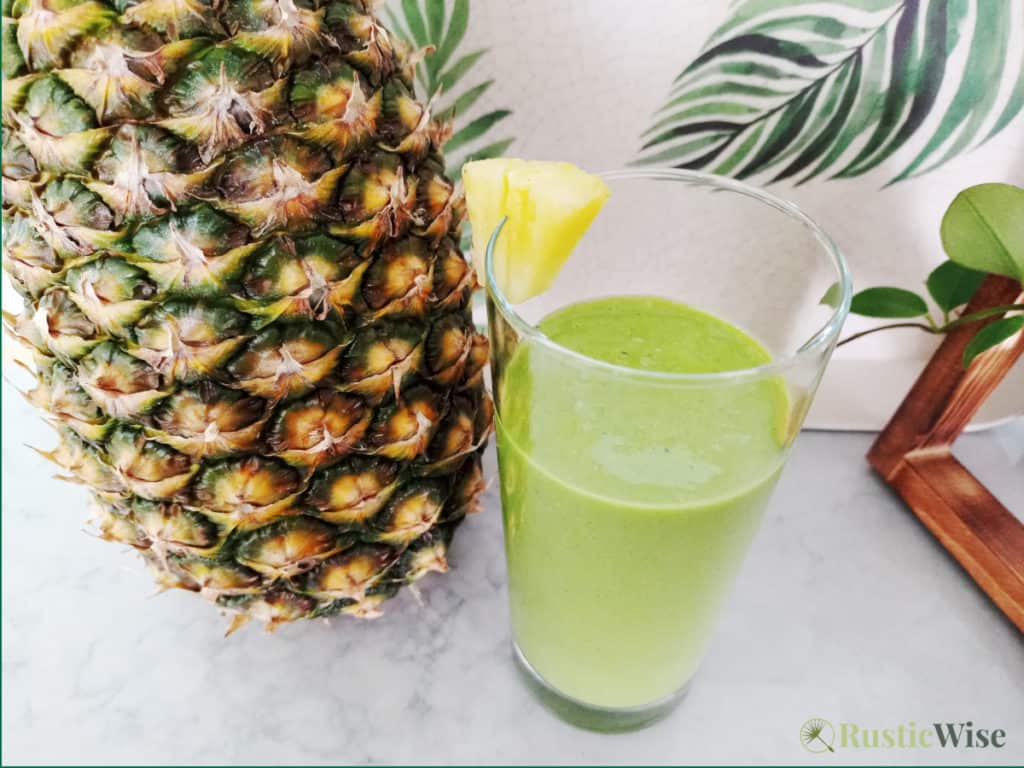
Here are just a few ways you can eat microgreens:
- Add to salads as a garnish. Or, use larger varieties of microgreens such as sunflower and pea shoots as a salad base.
- Sprinkle onto soups and stews just before serving.
- Use as part of a healthy juice or smoothie. Check out our roundup article on healthy microgreen smoothie recipes.
- Add a splash of color to savory cooked dishes with a microgreens garnish or side.
- Incorporate into omelettes.
- Use as a lettuce alternative in sandwiches and wraps.
👉 Read more about microgreens flavor profiles and pairings.
If you’re experiencing problems with growing your microgreens, check out our article where we troubleshoot 10 common reasons for microgreens falling over.
Happy growing!


👉 If you like this post, see our Complete Guide to Growing Microgreens at Home. 🌱
Would you like more timeless tips via email?
Fun tips to help you live an independent, self-sustaining lifestyle. Opt-out at any time.

References
- Britannica, Cotyledon, plant anatomy, https://www.britannica.com/science/cotyledon-plant-anatomy. Accessed September 2021.
- Lester, Gene & Xiao, Zhenlei & Luo, Yaguang & Wang, Qin. (2013). Microgreens: Assessment of Nutrient Concentrations. Journal of Agricultural and Food Chemistry. Accessed September 2021.
- USDA Agricultural Research Service (ARS), AgResearch Magaine, January 2014 edition, https://agresearchmag.ars.usda.gov/2014/jan/greens. Accessed September 2021.
- Rautio, Sarah (02 October 2017). “Food micronutrients explained — Antioxidants, anti-inflammatories and phytochemicals,” Michigan State University Extension. Accessed September 2021.
- Petre, Alina (06 March 2018). “Microgreens: All You Ever Wanted to Know,” Healthline.Accessed September 2021.
- Braunstein, Mark Mathew (2013). Microgreen Garden: Indoor Grower’s Guide to Gourmet Greens. Book Publishing Company. ISBN 13: 978-1-57067-294-1.
- The University of Arizona Cooperative Extension, Microgreens (Mountain View Garden Club), https://extension.arizona.edu/sites/extension.arizona.edu/files/attachment/Microgreens.pdf. Accessed September 2021.
- University of Maryland Extension (UME), Maryland Grows Blog, Light Choices for Starting Plants Indoors, https://marylandgrows.umd.edu/2019/01/18/light-choices-for-starting-plants-indoors/. Accessed September 2021.

Author: Josh Tesolin
Josh is co-founder of RusticWise. When he’s not tinkering in the garden, or fixing something around the house, you can find him working on a vast array of random side projects.