How To Grow Pea Microgreens: Quick and Tasty Greens That Regrow
RusticWise is supported by its readers. When you purchase through links on our site, we may earn an affiliate commission. As an Amazon Associate, we earn from qualifying purchases. Thank You!
If you like the flavor of sweet peas, you’ll also love the taste of pea microgreens (also known as pea shoots). Crunchy, sweet, and fresh, learning how to grow pea microgreens is a great way to get fresh veggies at home year-round! Pea shoots are a quick and easy variety of microgreen to grow, and are ready to harvest in 10–14 days.
The trick to growing pea microgreens successfully from seed is to pre-soak and pre-sprout the pea seeds before sowing. Did you know that pea microgreens regrow after harvesting? This makes the extra step of pre-soaking and pre-sprouting well worth it!
Read on to learn how to grow your own pea microgreens (also known as pea shoots) indoors in the comfort of your own kitchen.
What exactly are pea microgreens?
You can grow microgreens from virtually any vegetable, herb, legume, and grain. There are a few exceptions of course: members of the nightshade family (which include tomatoes and peppers), contain high levels of solanine and tropanes as young plants that are not safe to consume.
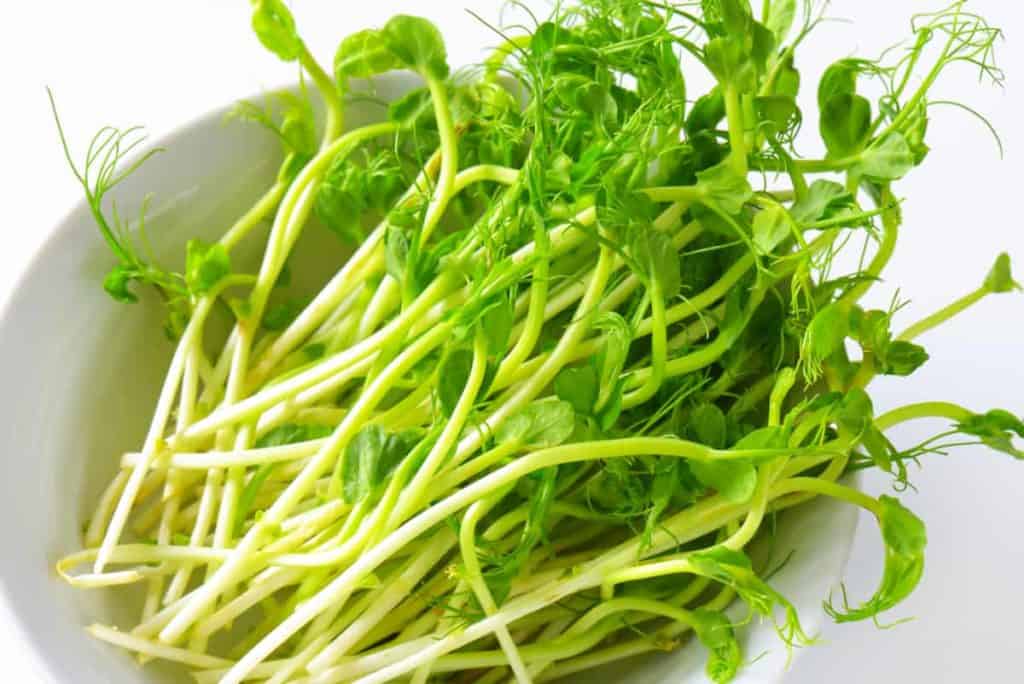
Microgreens are tiny plants that grow to be about 2 inches (5 centimeters) in height before harvested. These plants are used as garnishes or added to dishes for texture, color, and flavor.
So pea microgreens are basically tiny pea plants! While diminutive, microgreens are big on nutrients.
Microgreens contain the cotyledons (the very first seed leaves) of a plant which are packed with nutrients. In the case of pea shoots, you’ll find high levels of vitamin C, along with vitamin A, E, and B-complex vitamins. You’ll also find protein, fiber, and omega-3s.
Pea shoots are typically grown beyond the cotyledon stage, and are harvested when the true leaves appear.
Depending on growing conditions, most pea shoots are ready to harvest in 10–14 days.
Don’t confuse pea microgreens or pea shoots with pea tendrils, sometimes called pea tips. Pea tips come from the stems, vines, and leaves of full sized pea plants. Pea tips are commonly steamed or sautéed and are a mainstay in Asian cuisine.
To add to the confusion, pea microgreens are not the same as pea sprouts. Pea sprouts are simply sprouted pea seeds grown in a jar and are not planted in soil (or another growing medium).
Read up on the differences between pea shoots and pea sprouts here.
Credit: Yay Images
What type of peas are good for growing pea microgreens?
There are many cultivars of peas good for growing pea shoots including field pea, dwarf sugar pea, sugar pea, snap pea, and snow peas.
One cultivar should definitely be avoided and that’s sweet pea (Lathyrus odoratus). This variety with the sweetly-scented flowers is purely ornamental, and poisonous when ingested.
To grow pea shoots, start with a batch of good sprouting seeds (preferably organic). People often ask if you need to buy special sprouting seeds to grow sprouts or microgreens, and yes, we highly recommend it.
Normal seeds are treated or irradiated, meaning they won’t sprout. Treated seeds may have a coating of chemicals or pesticides. Good sprouting seeds from a reputable supplier are tested and free of harmful pathogens (E.coli and salmonella).
Look for seeds with the words “high-germination” or “sprouting seeds” on the label. Keep an eye out for a label saying the brand is USDA-certified organic. You can buy sprouting seeds from your local specialty food store, some gardening stores, or online through suppliers like Johnny’s Seeds, West Coast Seeds (Canada), or Sprout People.
How are pea microgreens different from other types of microgreens?
Most microgreen seeds can simply be sowed onto soil (or a growing medium of your choice), but pea microgreens are different.
They need a bit of coaxing to come out of their hard shell. That’s why they need to undergo pre-soaking and pre-germination prior to planting. (Sunflowers are another type of microgreen that also require these extra steps.)
While this is a bit more work, it’s well worth it considering you can get more than one harvest out of each tray of pea shoots!
On the flip side, there are many good things about growing pea microgreens. Unlike many other microgreens which are tiny and fragile, pea shoots grow large in comparison, and grow quickly too.
And when planted properly with a bit of space between each seed, they are fairly resistant to mold. This is due to the fact that their tall stems and thinner canopy don’t hold onto moisture like other varieties of microgreens.
This unique anatomy makes them fit for top watering during the early growth phase, according to Mark Mathew Braunstein in the book, Microgreen Garden: Indoor Grower’s Guide to Gourmet Greens (2).
While top watering isn’t usually recommended for a number of reasons (mostly due to mold issues, and delicate stems breaking), watering pea shoots from the top keeps them well-hydrated.
How to grow pea microgreens
Pea shoots—what’s not to love about them? They’re easy to grow, they taste good, and they’re even nutritious.
Let’s gather a few supplies.
Yield: 1/2 cup of pea seeds grows roughly 1 1/4 cup pea shoots
Supplies you’ll need
Step 1: Measure pea seeds
Since you’ll need to pre-soak and pre-sprout the seeds, you’ll want to get the amount of pea microgreen seeds just right.
So how much seeds do you need?
For a 5 X 5 growing tray, you’ll need about 1/4 cup.
Here’s another way to measure out the correct amount of seeds: spread out a single layer of pea seeds in the grow tray you’ll be planting your microgreens in. Measure and record this amount.
Tip: Didn’t soak enough seeds? You can either try moving to a smaller grow tray, or fill the empty space with another type of microgreen seed with a similar grow period (and doesn’t require soaking) such as Napa cabbage.
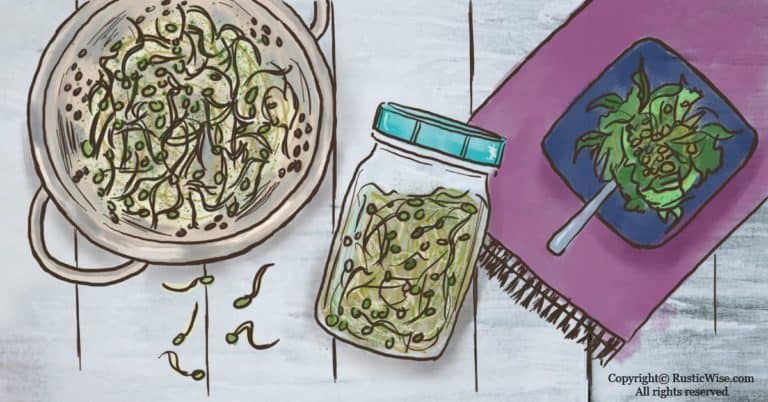
Step 2: Pre-rinse
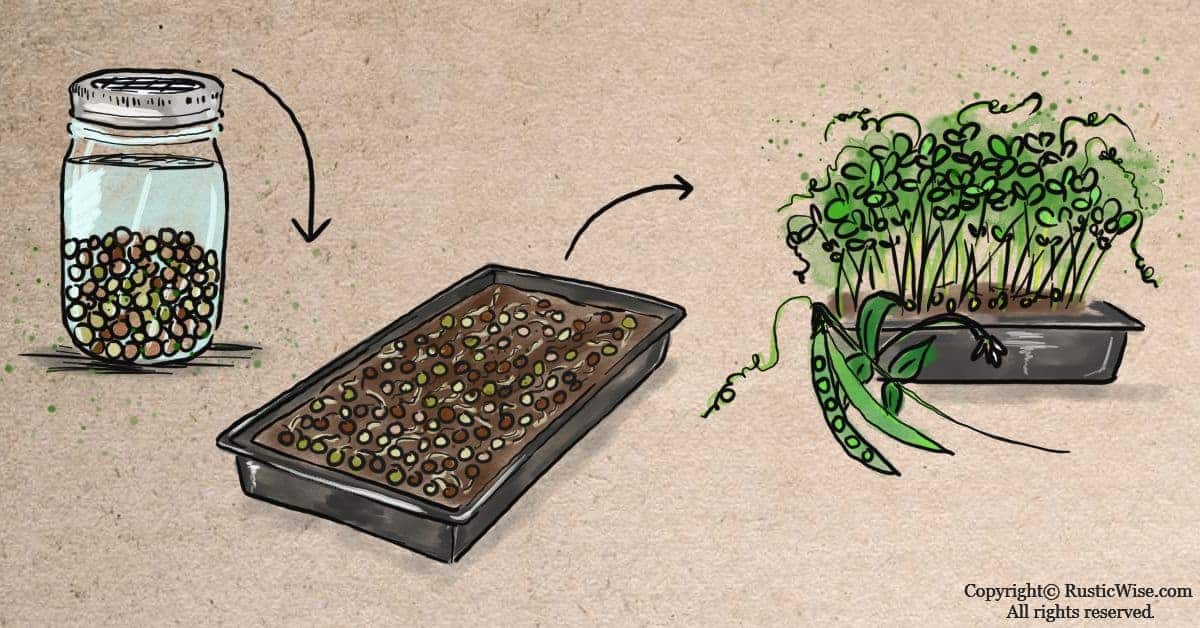
Measure out your seeds and place in a glass jar. It’s a good idea to do a pre-rinse to remove any debris and clean the seeds.
Fill the jar with cool water and give it a quick swirl. The water may look cloudy. Drain. You may need to repeat this once or twice.
Step 3: Pre-soak
As mentioned earlier, in order to properly learn how to grow pea microgreens, pre-soaking and pre-sprouting steps are vital to its success—so don’t skip this step!
Place seeds in a jar and fill with cool water. Add enough water so that seeds are fully submerged and have several inches of water on top.
Soak seeds for 8–12 hours.
Once the initial soak is complete, drain the water. Fill and rinse with clean water once more and give it a good draining.
The mesh lid, or cheesecloth on the jar should keep all pea seeds inside the jar while allowing for water to enter and drain.
Keep your jar at room temperature away from direct sunlight.
Note: During this time, the dried pea seeds soak up vital moisture needed to kickstart the germination process. The pea seeds should look nice and plump after soaking in water. If any still look small and dry after the initial soaking, remove these from the rest—these aren’t viable and aren’t worth adding to the soil. Add the “bad” seeds to your compost!
Step 4: Pre-sprout
Now it’s time to pre-sprout the seeds. Once you’ve completed the initial pre-soak, it’s time to start the rinse-and-drain cycle in a sprouting jar to germinate the seeds.
Continue to rinse and drain the pea seeds twice a day.
Keep your seeds at room temperature and out of direct sunlight. Ensure seeds have adequate airflow.
Allow all water to thoroughly drain each time. You can do this by setting your jar upside down in a large bowl at a 45-degree angle.
Step 4: Final rinse
Once most of your seeds have sprouted, give them a final rinse and drain. You should see signs of germination within 24–48 hours or so. A radicle (root) will begin to emerge from the pea seeds.
Step 5: Prepare the growing tray
Ensure your growing tray is clean as this prevents bacteria or mold growth. Fill the tray with 1–2 inches (2.5–5 centimeters) of moistened potting soil; or ensure the soil reaches the top of the tray for easier harvesting.
It’s important your potting soil is of good quality and free of any harmful chemicals or contaminants which may affect the quality of the shoots or microgreens. You can add organic compost or worm casings to boost nutrient levels.
Lightly compress the soil with your hands or a small piece of cardboard.
The soil should feel moist, but not soggy.
Step 6: Broadcast seeds and moisten
Evenly spread the seeds across the surface of the growing medium in a single layer. Try to maintain a bit of space between each pea seed to avoid overcrowding (which may potentially lead to mold issues).
Pat seeds down gently with your hands, or use a small piece of cardboard to press down. (Some people like to cover larger seeds like pea seeds with a thin layer of soil to keep them moist. This is optional, as they’ll still grow with or without a layer of soil on top.)
Use your water mister to quickly moisten the tops of the seeds.
Step 7: Place a cover on it
Cover with a lid (ensure there’s ventilation on the lid for good airflow). Place in the dark at room temperature. This keeps sunlight out, while still allowing for fresh air circulation.
Take a peek once a day during this time to ensure the soil is moist. Mist once a day if needed.
Replace the cover after each misting.
Step 9: Let there be light
After 3–4 days, the pea shoots should have taken root into the soil. They’ll begin to grow upwards. This is the time to remove the cover and “green” them by bringing them into the sunlight. A good place to put your tray is on the countertop by a window.
While pea shoots don’t need as much sun as sunflower microgreens for example, they still need ample lighting.
Occasionally rotate the tray so all pea shoots receive sunlight.
If weather permits, you could even place your tray of greens outdoors in sunlight for several hours. (Just protect your microgreens from any hungry backyard critters who would love a tasty snack!)
Sunlight helps the leaves to grow big, green, vibrant (and tasty!).
Step 10: Water from the top
Yup, you read that right—water from the top. While we usually frown upon top watering as most microgreens suffer from this method, pea microgreens are different.
Strong and able to withstand the force of the water, pea canopies are also less dense and doesn’t hold onto water, and is therefore less prone to mold issues.
Watering from the top also keeps pea shoots hydrated during the early growth stage. But avoid overwatering.
Allow water to fully drain after watering for about 30 seconds.
Keep an eye on your pea greens: if you see any signs of mold on the peas themselves, remove the infected ones, and switch to either bottom watering, or side watering (watering from the sides directly onto the soil, rather than over the green tops).
Credit: Yay Images
Step 11: Harvest
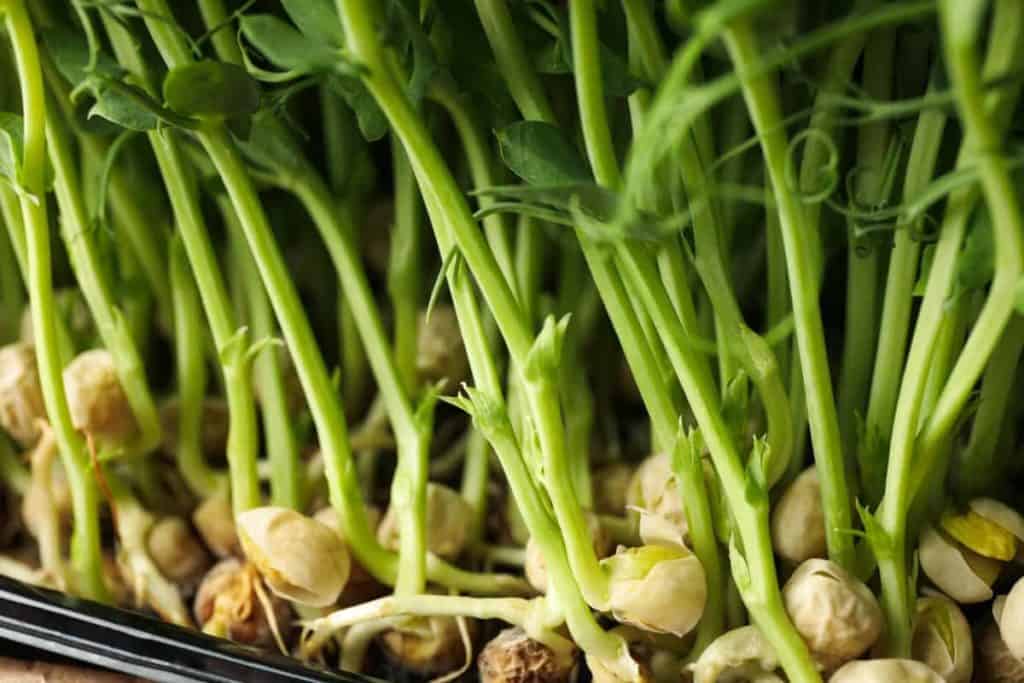
Pea shoots are ready to harvest between 10–14 days, or when they’re 3–4 inches (8–10 centimeters) tall. Most pea shoots should have sprouted tiny leaves.
Avoid top watering the greens the day before harvesting to avoid excess moisture which shortens shelf life.
While each tray of pea shoots can have more than one cutting or harvest, keep in mind that each subsequent harvest will be less abundant, and less tasty than the previous one. This is natural as the nutrients in the soil gradually deplete.
So your first harvest will be the best, the second harvest will be so-so, and if you’re lucky to have a third or fourth, well you can be the judge as to whether it’s worth eating, or just adding to the compost!
The success of multiple harvests depends largely on soil quality and whether the greens have adequate nutrients to keep them growing tasty and healthy.
Before you harvest, decide on whether you’re planning on just one cutting, or if you’ll try to regrow for multiple harvests.
If you’re planning for multiple harvests, it’s important to cut higher up each stem the first time.
Take a closer look at your tray of pea shoots. Each stem will have a pair of small leaves (the seed leaves) near the base of the stem. Further up each stem emerges the larger, true leaves.
Remember to leave a couple of leaves on the base of each stem to ensure your microgreens will successfully regrow.
To harvest, simply use a pair of sharp scissors (or a knife) to snip just the top several inches off. (The stems at the base close to the soil are bitter and chewy.)
Store your harvested pea microgreens in the fridge for up to one week.
Tip: If you’re planning to regrow a second batch of pea shoots, remember to keep watering them regularly! Each subsequent harvest should be ready in 8–10 days.
How to store pea shoots
Store pea shoots up to one week. Like all sprouts or microgreens, it’s best to use them within 2–3 days. Do not rinse before storing in fridge. Rinse just before eating.
Store your pea shoots in a loosely wrapped paper towel and place in a plastic bag or container. Store in the crisper compartment of your refrigerator.
To keep pea shoots fresh for longer, you can rinse them with cold water every 2–3 days and strain well before storing in fridge again. It’s a good idea to rinse and wipe down the bag or container before using again (4).
Do pea microgreens regrow?
Yes, pea microgreens (pea shoots) are one of the few microgreens that regrow after harvesting. You can enjoy a second harvest (and possibly a third) depending on the level of nutrients in the growing medium, as well as where you cut the stems.
How to use pea microgreens
Pea microgreens are fresh, crunchy, and slightly sweet—they pair great with the nutty flavor of sunflower microgreens to make a tasty salad base. You can also try lightly steaming or sautéing pea shoots.


References
- PBS Utah, Growing Microgreens And Sprouts Part 3: Growing And Eating, https://www.pbsutah.org/blogs/modern-gardener/growing-microgreens-and-sprouts-part-3-growing-and-eating/. Accessed August 2021.
- Braunstein, Mark Mathew (2013). Microgreen Garden: Indoor Grower’s Guide to Gourmet Greens. Book Publishing Company. ISBN 13: 978-1-57067-294-1.
- Sprout People, Growing Pea Shoots, https://sproutpeople.org/pea-shoots/. Accessed August 2021.
- Evans, Doug (2020). The Sprout Book: Tap into the Power of the Planet’s Most Nutritious Food. St. Martin’s Publishing Group. ebook.

Author: Josh Tesolin
Josh is co-founder of RusticWise. When he’s not tinkering in the garden, or fixing something around the house, you can find him working on a vast array of random side projects.