Grow Fava Bean Microgreens for a New Way To Eat This Legume
Packed with protein and dietary fiber, there are plenty of reasons we should all include more beans or legumes in our diet. If you’re not exactly a fan of eating the edible seeds from the pods in its raw or cooked form, there’s a novel and tasty way you can enjoy them.
Fava bean microgreens are a great new way to eat this legume. If you aren’t familiar with fava beans (Vicia faba), they’re a horticultural crop that’s more commonly known as broad bean. They’re also very easy to grow, with a pleasant mild and nutty flavor, and a satisfying crunch! They’re ready to eat in just 12 to 17 days.
Growing your own microgreens garden is a great way to eat more greens. Microgreens are full of vitamins, minerals and phytonutrients and are low in calories. This article will walk you through the various steps in growing this legume, so you get the best out of it for yourself and your family.
A closer peek at fava bean microgreens
The fava bean, botanically known as Vicia faba, is a plant species in the pea or legume family Fabaceae. Other common names it goes by are broad bean or faba bean.¹ It’s a widely eaten legume throughout Europe and the Middle East and is quickly gaining popularity around the world.
Microgreens are germinated, small versions of vegetables, herbs, legumes, and grains. They are tinier than “baby” leafy greens such as kale or spinach, but larger than sprouts. When harvested at this young stage of growth, the fava bean microgreen is a very rich source of nutrients.
When you grow the fava microgreens yourself, you not only get to enjoy the fresh shoots, but you also get to enjoy many other health benefits of the fava bean plant.
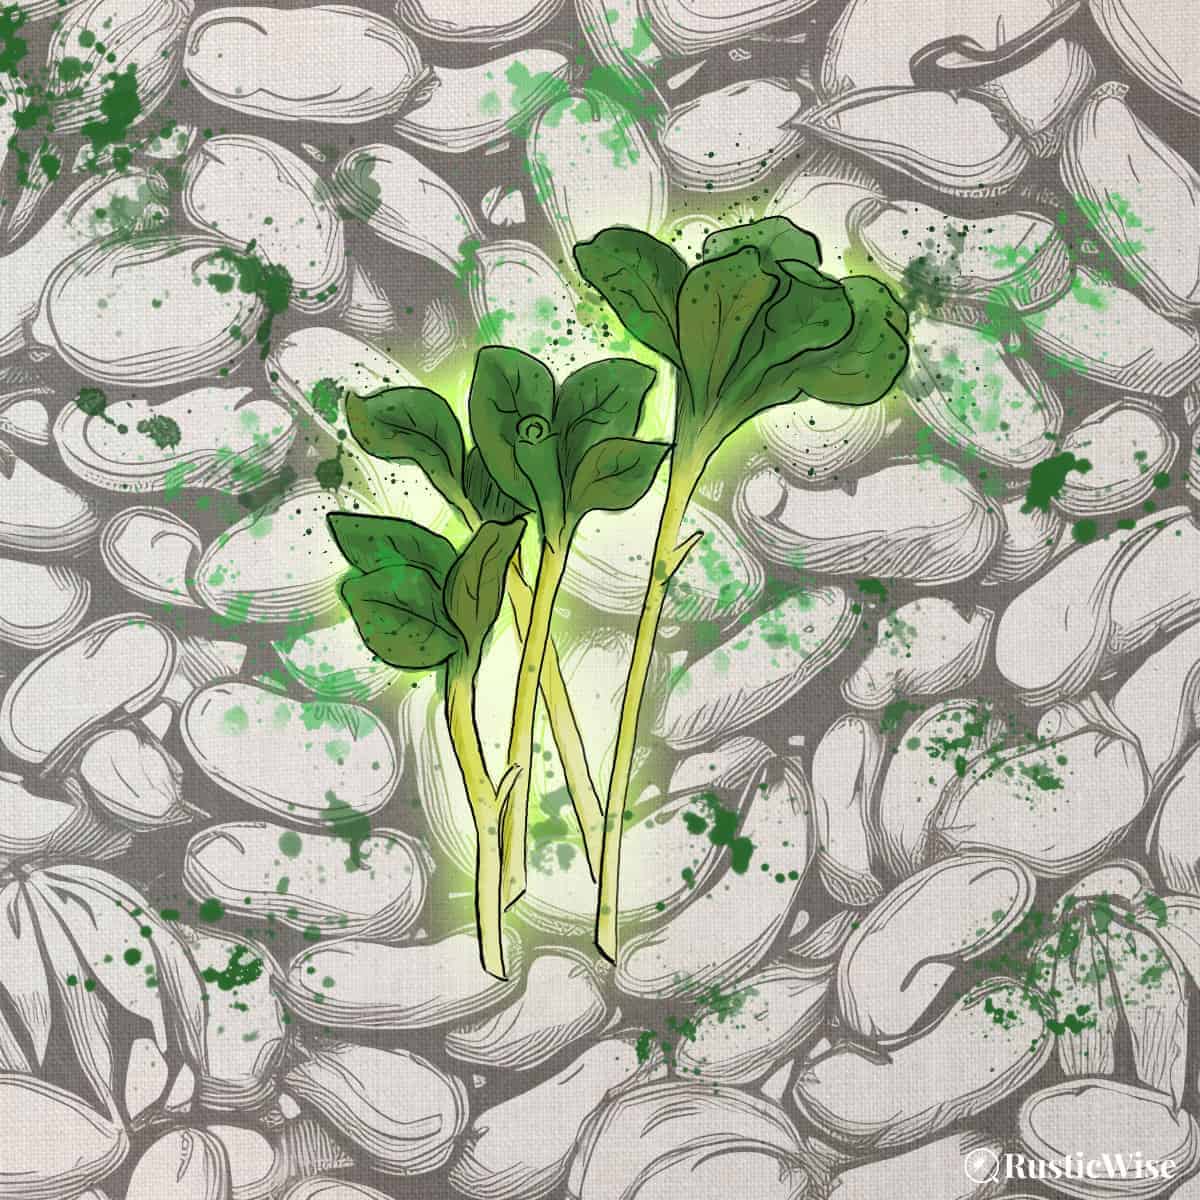
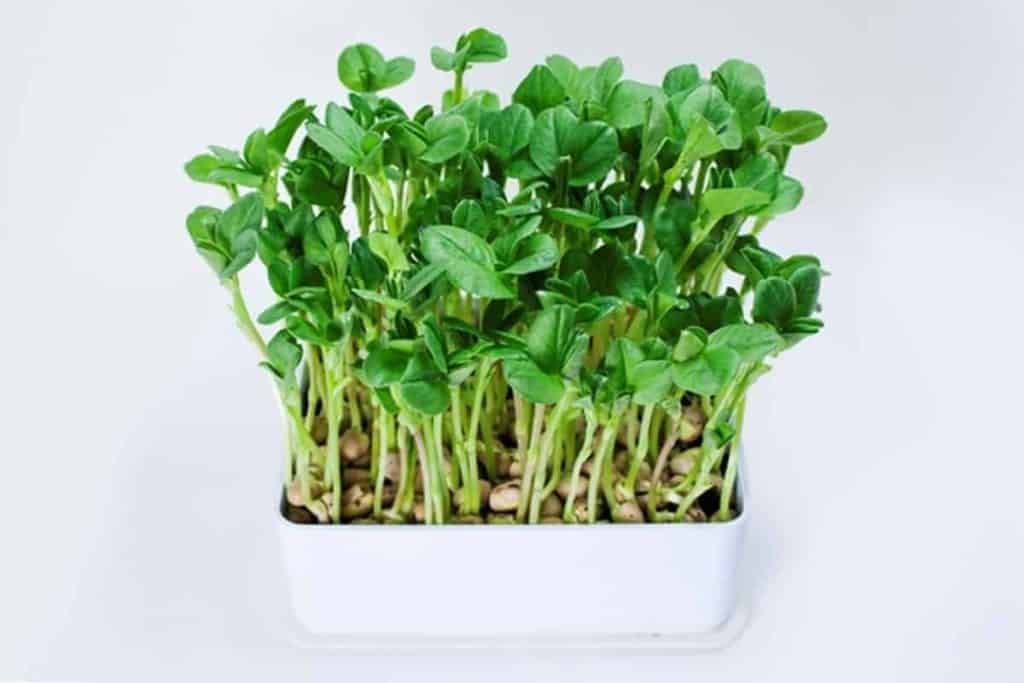
Fava microgreens have a distinct, nutty and creamy flavor. With thick, juicy stems, and lush green leaves, the seedling is large enough to use as a salad base. Fava shares a similar nutty profile to sunflower microgreens.
This is a cool-season crop that has moderate light and temperature requirements. It doesn’t do well in extreme heat, or in extreme cold.²
Tip: Fava microgreens along with sunflower and pea shoots grow larger than other micros and make excellent microgreens to serve as a salad base.
Credit: VectorState
Fava (aka broad bean) nutrition
This little bean is full of essential nutrients and fiber! It’s a rich source of protein, dietary fiber, folate, niacin, riboflavin, thiamin, copper, and manganese.
Just 1 cup of raw fava beans has 111 calories. The humble bean consists of roughly 29 percent protein!³
Let’s look at the nutritional breakdown:
- Protein: 20 percent of Daily Value
- Carbs: 7 percent DV
- Fat: 1 percent DV
- Fiber: 34 percent DV
- Sugar: 23 percent DV
It also contains a healthy dose of vitamins and minerals, such as:
- Vitamin A: 2 percent DV
- Vitamin C: 5 percent DV
- Thiamin (B1): 14 percent DV
- Riboflavin (B2): 28 percent DV
- Niacin (B3): 18 percent DV
- Folate (B9): 47 percent DV
Mineral content:
- Copper: 56 percent DV
- Manganese: 36 percent DV
- Phosphorus: 13 percent DV
- Iron: 11 percent DV
- Zinc: 11 percent DV
- Magnesium: 10 percent DV
- Potassium: 9 percent DV
- Calcium: 4 percent DV
Health warning about consuming fava bean seeds
While this broad bean is generally safe to eat for most people, there is a rare genetic enzyme disorder called favism. Those with favism may experience “acute hemolytic anemia” or a severe allergic reaction when eating fava/broad beans.¹
This disorder is more prevalent in those of Mediterranean origin.² It’s wise to eat a moderate amount first if you’re unsure if you have favism.
Growing fava bean microgreens at a glance
Here’s a quick look at what you can expect when you grow fava microgreens at home.
- Presoak: Yes! Soaking these sprouting seeds is a must before sowing. Soak for 8 to 12 hours, or overnight.
- Germination: About 3-4 days germination.
- Time to harvest: Roughly 12 to 17 days, depending on growing conditions.
- Height: Harvest when the seedling is 2 to 3 inches (5 to 7 centimeters) tall.
Credit: Mumm’s Sprouting Seeds
Equipment you’ll need to grow fava microgreens
Let’s gather a few supplies you’ll need to get started.
- Shallow grow tray: Micros only require a bit of soil to stretch their tiny roots, so any shallow food-safe tray with drainage holes will work. You can repurpose many takeout containers around the house by poking a few drainage holes on the bottom. Or, you could use any standard 5 X 5, 10 X 10, or 10 X 20 microgreen trays.
- Cover: A cover that fits over the grow tray helps block out light during the blackout/germination phase and still allows for air circulation. This helps to create a greenhouse effect. You’ll also be placing a weight on it.
- Weight: A small weight helps to promote vigorous, upward growth. Something like a large hardcover book, or a small brick will work.
- Bottom tray: Use a tray without holes to catch excess water from the top growing tray and for bottom watering. The top growing tray should fit inside the bottom tray.
- Organic growing medium: For micros with longer growth cycles such as fava, I prefer to use a quality potting soil which provides a fair amount of nutrients to sustainhealthy growth throughout the growth cycle.If you choose to use a soilless mix (such as coconut coir, vermiculite, perlite, or peat) make sure you add some water soluble fertilizer.
- Mason jar (for soaking seeds): A 1-quart glass jar is a good size for soaking seeds.
- Colander: For draining seeds.
- Organic microgreens seeds: You’ll need about ¼ cup per 5 X 5 tray.
- Misting bottle filled with clean water.
- Small piece of cardboard for tamping down soil and seeds (optional).
What kind of fava seeds can you use to grow microgreens?
The primary consideration when selecting seeds for growing micros is to look for high quality, untreated seeds. Treated seeds will not germinate. Any seeds that are treated with fungicides or pesticides is something you DON’T want as a starting point for growing healthy, leafy greens, so look for organic seeds, too.
You’ll also want seeds labelled as high-germination that sprout in high density seeding conditions. These seeds will have a better germination rate with better end results.
It’s also good to look for seeds that have been tested to be free of harmful pathogens such as Salmonella or E. coli.
Other “nice-to-haves” you may (or may not) care to look for are heirloom varieties and non-GMO types.
You can find Vicia faba seeds at many online seed suppliers such as True Leaf Market. In Canada, you can find some at Mumm’s Sprouting Seeds.
Tip: The bean seeds specifically for sprouting/micros are smaller than regular (larger) seeds for growing in the garden. The smaller seeds work better in high-density seeding sowed in growing trays, and tend to have fewer mold issues.
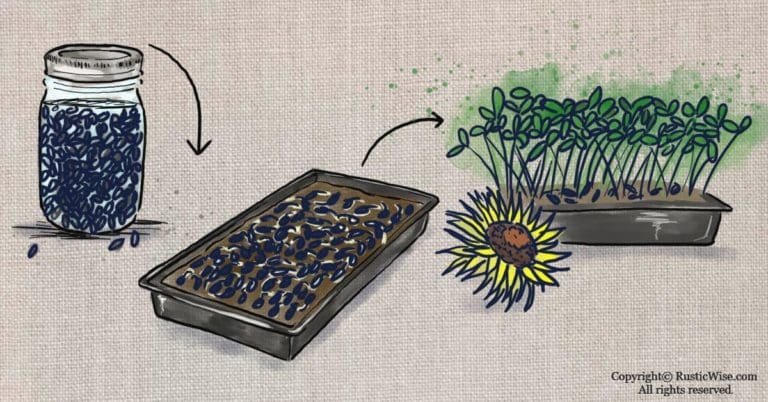
Here’s how to grow fava microgreens step by step
Growing microgreens is a rewarding, cost effective way to grow your own food. These green seedlings are easy to grow indoors, so why not try some for yourself?
Tip: Just like other larger seeds, fava bean seeds require soaking before sowing. Do not skip this crucial step! Soaking the seeds helps to soften the outer seed coat and awaken the seed from a dormant state. You will have better germination rates when seeds are soaked for a proper amount of time.
- Measure and inspect seeds: Take a quick look at the seeds and remove any debris or broken seeds. Measure seeds and set aside. Use about about ¼ cup for a 5 X 5 tray.
- Rinse, drain, rinse: Place the seeds in a colander and rinse well. Let drain. Rinse again and let fully drain. This helps to remove any dust or dirt from the seeds.
- Soak seeds: Place the seeds in a glass jar. Fill with lukewarm water. The seeds should be completely submerged with several inches of water on top. Let soak for 8 to 12 hours. Once the soaking time is up, drain seeds in colander.
- Prepare the growing tray: Using a clean growing tray, fill with 1–2 inches (2.5–5 centimeters) of potting soil. Moisten with water. The soil should feel moist, like a damp sponge, but not too soggy. Use your hands or a piece of cardboard to lightly compress the soil.
- Sow seeds: Broadcast the organic sprouting seeds evenly over the soil surface. Seed densely, but avoid overlapping the seeds as this will make it overcrowded (and may cause mold issues). Tamp down with your hands or a small piece of cardboard to lightly press seeds into the soil. Gently mist the tops of the seeds with a spray bottle.
- Cover, place weight, and keep warm: During the blackout phase,the seeds don’t need light—they have everything they need to germinate. To retain moisture, place an inverted cover over the grow tray. The cover should be resting flat against the seeds. Place your weight on top. The weight will help place pressure downwards to encourage vigorous root growth. Keep at room temperature. If you have a heating mat, this can help speed up germination. Cooler room temperatures will add a few days of grow time. If needed, mist the soil once a day (if it feels dry). Replace the lid after misting. Germination typically occurs on Days 3 or 4.
- Give it light: Once small shoots poke out, remove the cover and place in the light. Your bean shoots may look a bit pale and weak. Not to worry—they’ll grow strong and green in the sun. A sunny, south-facing windowsill works, or you might need artificial grow lights if there’s not enough natural sunlight.
- Water: You can now bottom water your micros as needed. Keep the soil moist and don’t let it dry out.
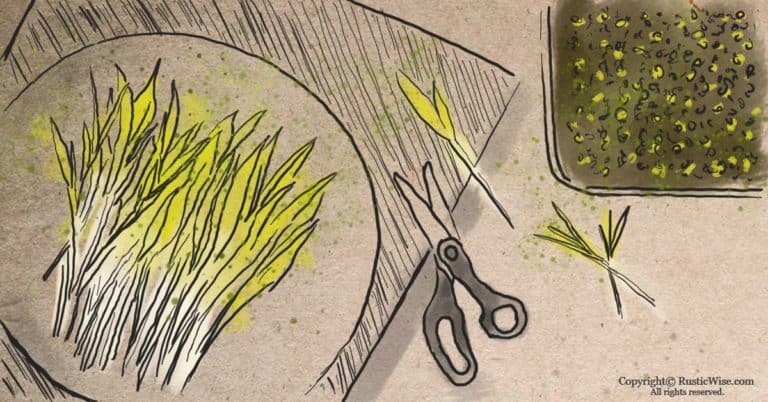
- Harvest: Once your microgreen crop is roughly 2 to 3 inches (5 to 7 centimeters) tall, and the greens look lush, the microgreens are ready for harvest. This is typically between Days 12 to 17. Use a clean, sharp knife or pair of scissors to cut the green stems above the soil line. Toss the used growing medium in a compost pile. Like pea shoots, you can grow this legume slightly longer to the true leaf stage.
Store dry harvested micros in the refrigerator. Avoid washing until you’re ready to eat to extend the shelf life.
Tip: Taste at various stages of growth to see when greens taste best. Sometimes bean varieties can develop a bitter taste if left to grow longer, so don’t wait too long!
Ways to enjoy fresh fava microgreens
With thick stems and large leaves, fava micros are great raw, or lightly cooked. It’s a more substantial green that can withstand a bit of heat, unlike some of its more delicate counterparts.
The texture is nutty and slightly crunchy, with a mild flavor that blends well with other greens and spices. Fava is a natural accompaniment to various cuisines, including Asian, Mediterranean, Italian, and Thai.
- Use as a main component in fresh salads with the raw leaves and stems. Pair with pea shoots or sunflower micros for a custom salad mix.
- Enjoy fresh leaves on top of flatbread or toast.
- Add to sandwiches and wraps just as you would other leafy greens or sprouts.
- Add to pasta dishes, sauces, soups, and stews during the last few minutes of cooking.
- Blend into hummus (fava bean hummus, anyone?).
- Lightly sauté or stir-fry.
- Enjoy as a tasty snack all on its own.
Related questions
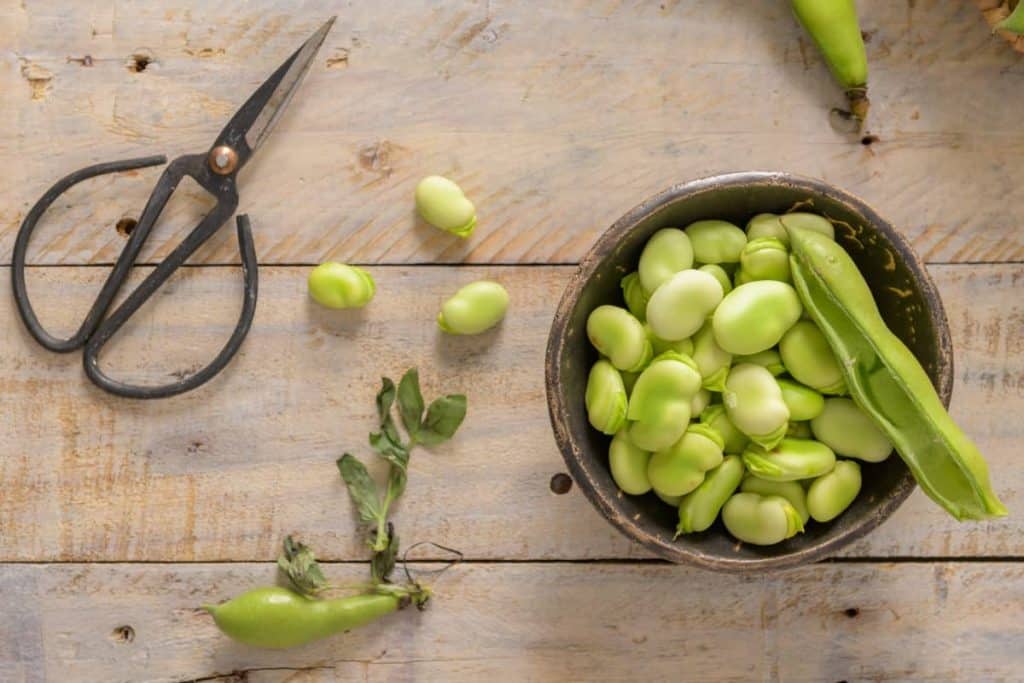
Can you eat fresh fava beans raw?
Yes, if you have fava growing in your outdoor vegetable garden, you can safely enjoy a few fresh seeds and pods raw. No need to take off the outer coating, just eat whole! Pods should look green and firm.
Can you grow fava sprouts?
Yes! These sprouted seeds are quicker to grow than a tray of microgreens and are ready to eat in just 3 to 4 days. All you’ll need is a glass mason jar, a sprouting lid, and some quality seeds to get started.
👉 If you like this post, see our Complete Guide to Growing Microgreens at Home. 🌱
Would you like more timeless tips via email?
Fun tips to help you live an independent, self-sustaining lifestyle. Opt-out at any time.


References
- Britannica, broad bean, plant, https://www.britannica.com/plant/broad-bean. Accessed January 2023.
- University of California, UC Master Gardener Program of Sonoma County, Fava Beans, https://sonomamg.ucanr.edu/Food_Gardening/Feature_Vegetables/Fava_Beans/. Accessed January 2023.
- My Food Data, Fava Beans (Raw), https://tools.myfooddata.com/nutrition-facts/168574/wt1/. Accessed January 2023.

Author: Josh Tesolin
Josh is co-founder of RusticWise. When he’s not tinkering in the garden, or fixing something around the house, you can find him working on a vast array of random side projects.