14 Ways to Repurpose Containers for Microgreens
Microgreens are all the rage—they’re delicious, healthy, and look beautiful too. Luckily, microgreens are easy to grow at home and cost only a fraction of the price of store-bought varieties. If you’re looking to grow your own greens at home, we’ll show you how to repurpose containers for microgreens that you already have around the house. The main considerations are ensuring the container is shallow, made of food-safe material, and has drainage.
Whether you’re just starting out with microgreens, or simply like the idea of being frugal and reusing household containers, there’s no need to spend a lot of money on microgreens supplies, especially if you’re growing for yourself. It’s a good idea to try out a few different containers to see what you like best.
We’ve put together this list of DIY container ideas and tips that will help you grow your own microgreens using everyday household supplies.
What makes a good microgreen container?
When selecting a container, you’ll want to look for containers that are shallow, food-safe, and have drainage. You’ll also want to consider whether you’re planning on using grow lights, or relying on good ol’ natural sunlight.
- Container depth: The depth of the container you choose to use is important because microgreens grow best in a shallow container. Typically, you plant microgreens in 1–2 inches (2.5–5 centimeters) of soil, or a soilless medium. The ideal container depth would be around 2–3 inches (5–8 centimeters) deep.
- Container size: The size of the container matters if you’re planning on placing on a sunny windowsill, and you don’t have a lot of space. Rectangular-shaped containers allow you to take advantage of every square-inch of available space and fit in more microgreen seeds than round containers.
- Container material: You’ll want to choose a container made of food-grade materials, such as food-safe plastic or aluminum. For safety’s sake, don’t use any repurposed containers that have come in contact with harmful chemicals.
- Drainage: The next consideration is drainage and whether your chosen container has any holes for water to drain out the bottom. Many types of microgreens are prone to mold growth or root rot when overwatered which is why drainage holes come in handy. If your DIY container doesn’t already have holes, it’s a good idea to poke or drill a few holes.
Tip: If you choose a container that’s too deep, you’ll have a harder time harvesting your microgreens. You want the top of the soil to be close to the top of the container so you can cut close to the soil line when harvesting.
Drainage vs. no-drainage
Having drainage holes allows you to bottom water your microgreens. Bottom watering simply involves placing your microgreens tray into a basin of water and allowing the roots to absorb water from the bottom-up. This allows you to keep soil moist without overwatering.
Bottom watering is the preferable method of watering microgreens for a number of reasons. First, microgreens are particularly delicate things. Top watering often leads to stem damage, backsplash from the soil, and getting the tops too wet.
Luckily, drilling or poking a few drainage holes is easy.
What if you have a container that you don’t want to poke holes in?
If you have a favorite ceramic bowl or similar container that you want to use for microgreens that doesn’t have drainage, just be careful to avoid overwatering as this leads to mold issues. And, avoid getting the tops of the microgreens overly wet.
How to prepare containers for microgreens
If you’re anything like me, you might have a mishmash collection of saved takeout containers, yogurt tubs, glass jars, and the like. (If you don’t have a container collection, now’s a good time to start saving a few!)
While there are many types of containers you can repurpose for microgreens, our two favorites are: plastic clamshell containers (the ones you buy your fruits in); and the humble aluminum pie plate.
For starters, we like these two types of containers because they’re readily available. The plastic clamshell containers already come with drainage holes—bonus! And, the pie plates are sturdy, just-the-right depth, and easy to poke holes in.
When it comes to the plastic clamshell containers, the pint and half-pint containers work great.
The pint-sized boxes are the ones that you’ll find cherry tomatoes in, along with blueberries and cherries. The half-pint containers usually hold raspberries, gooseberries, and blackberries.
The larger quart-sized containers that house strawberries are a bit too large—you’ll end up using more soil than needed.
Once you’ve gathered a few containers, it’s time to prep them for microgreens!
Step 1: Clean
Wash all containers with warm, soapy water, and rinse well. Allow to air-dry, or dry with a clean dish rag.
Step 2: Remove lids
If your container has a lid, now’s the time to break out your scissors, and snip it off. Don’t use the same pair of scissors for cutting your containers and harvesting your microgreens; cutting plastic will only dull the blade. The best harvesting scissors (or knife) should have a sharp blade.
Step 3: Poke holes
Depending on your container, you might need to make a few drainage holes. There are a number of ways to do this: use a sharp knife or box cutter; use a hammer and a nail to make pinholes; or, break out the drill.
Step 4: Double up or reinforce
If you’re working with plastic clamshell containers, using only one bottom portion is rather flimsy.
While this might not seem like a big deal, having a flimsy container makes it harder to transport your microgreens for watering, and just makes it easier to spill. (And nobody wants to clean up unnecessary messes, right?)
So, the easy solution is to double up the clamshell bottom by nesting it inside another container of similar size.
Doubling up the bottom also provides extra protection for the delicate roots of microgreens by preventing them from getting crushed.
Step 5: Line with paper (optional)
This next step is optional, but it’s a smart idea I discovered from the book, Microgreen Garden: Indoor Grower’s Guide to Gourmet Greens by Mark Mathew Braunstein.
If you’re working with plastic clamshells (which tend to have rather large drainage slits), or some other container with large drainage holes, Braunstein recommends lining the inner container with white printer paper (or something similar).
The paper has two main purposes:
1) It prevents soil from spilling out each time you bottom water; and,
2) It protects microgreen roots from getting tangled at the bottom of the container’s drainage holes.
To line the interior container with paper, flip over the container and trace the top. Cut the paper to size, making sure to cut a little larger, outside the lines. Insert the paper into the container by ensuring it comes up along the sides for better coverage.
For a better fit, make four diagonal cuts from each corner of the paper towards the center.
Tip: Most varieties of microgreens benefit from a blackout phase. You’ll need to find something to cover the top of your DIY microgreen container during the blackout phase (germination). This can be something as simple as a piece of fabric, newspaper, or piece of cardboard. Ensure your seeds still get plenty of air circulation—avoid covering too tightly.
A note about plastics
We know, we know—not everyone is a fan of plastic. You might be wondering, are plastic containers safe for microgreens?
On the bottom of each container, you should see a number inside the recycle symbol. Most plastic containers have a number from one to seven.
Each number indicates a different type of plastic used to make the container (along with its recyclability).
Most clamshell containers that hold store-bought fruits are made of #1 plastic which stands for PET (polyethylene terephthalate) and PETG (polyethylene terephthalate glycol). The FDA has approved both PET and PETG for use in food packaging.
This is also the same kind of plastic used to manufacture plastic water bottles.
While safe to use for food, you should know that if PET plastics are exposed to heat, the phthalates may migrate to the container’s contents.
However, when used at average room temperatures, these types of plastics should be fine.
Most yogurt or sour cream containers are made of #5 plastic polypropylene (PP).
Tip: If kept in good condition, plastic clamshell (and other plastic containers) should be safe for reuse multiple times. However, it’s always a good idea to inspect the plastic for cracks, or signs of damage after each harvest. When the containers look worn out, recycle them!

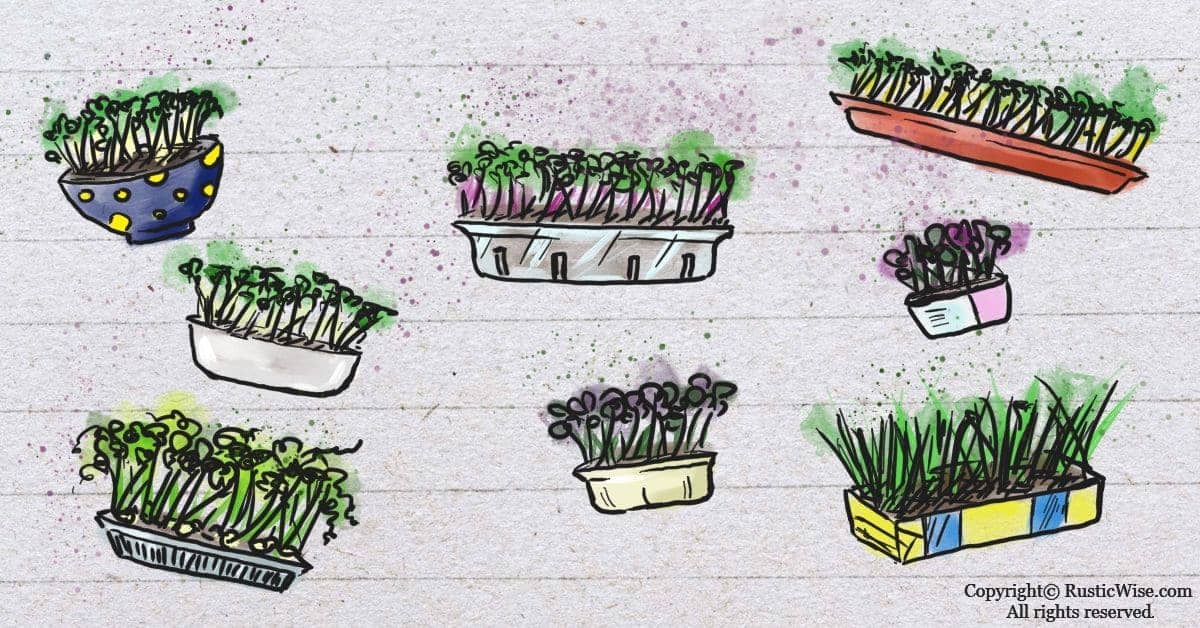
Roundup of repurposed containers for microgreens
With these 14 clever repurposed containers, growing microgreens has never been easier!
Some containers that might be good options include:
- Plastic fruit clamshells: With built-in drainage holes, and fitted lids you can use if you want to create a mini greenhouse, these containers make ideal repurposed containers for microgreens. Look for the pint and half-pint sizes (see above for more info).
- Pie tins: Sturdy, the right depth, and not too big, aluminum pie plates are great microgreens containers. Remember to poke a few drainage holes along the bottom.
- Salad box containers: If you eat a lot of store-bought greens, these can make great starting containers. For deeper salad containers, you might want to trim down the top to make it more shallow, and thus, easier for harvesting time.
- Tupperware bottoms: If you have a few old Tupperware containers (the sandwich-sized ones have a good depth), these can easily accommodate microgreens.
- Juice boxes: The rectangular 1-liter juice boxes make good containers. Just lie it flat, and cut off one side.
- Milk cartons: When cut down to size, the base of 2-liter milk cartons makes an easy microgreen grow tray.
- Milk jugs: If you have a few leftover 4-liter plastic milk jugs, cut the tops off, leaving a shallow grow dish. You can easily poke a few drainage holes too.
- Food trays: Remember the food trays from your school days you used in the cafeteria to carry around whatever the lunch lady served up? Ensure the material is food-grade safe: polypropylene, or fiberglass are good choices. Avoid ones made of polycarbonate as this contains BPAs which will eventually migrate to your food. If you have two trays, use one as a cover.
- Plant plates or saucers: You’ll find plant saucers and plates in a variety of sizes and materials, most often plastic or terracotta. You can easily drill drainage holes in plastic varieties.
- Rotisserie chicken containers: The depth of the bottom compartment from store-bought rotisserie chicken containers is great for growing microgreens. Bonus—it comes with a matching cover!
- Yogurt or sour cream containers: While you won’t be able to grow a lot of microgreens in these types of containers, these can make good vessels when you’re just getting started. You might want to trim off the top few inches to make it easier to harvest and avoid wasting soil.
- Tofu containers: We like the rectangular shape of tofu containers which saves space and allows for more surface growing area.
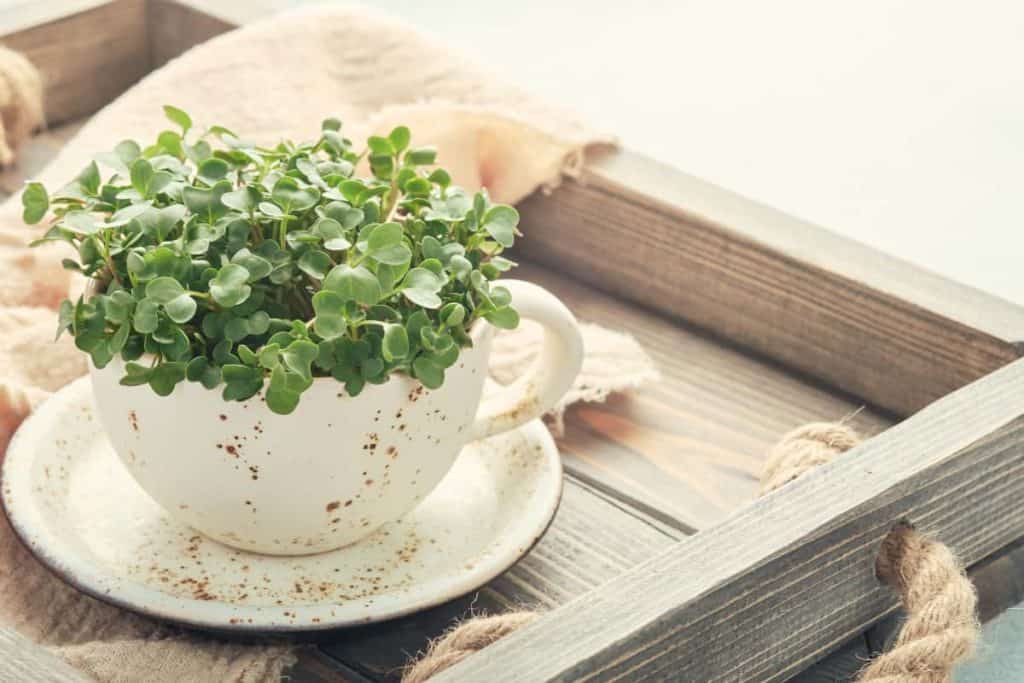
- Ceramic bowls: If you’re looking to create an attractive centerpiece, a colorful bowl filled with microgreens spruces up any kitchen. Just remember not to overwater!
- Shallow glass jars: Small, shallow glass jars can work in a pinch. If you’re lucky, you might catch a glimpse of the microgreens root system— a bonus of using a clear container. As with other containers with no drainage, go light on the watering.
So now that you’ve rounded up a few containers, check out How To Grow Microgreens Indoors.
👉 If you like this post, see our Complete Guide to Growing Microgreens at Home. 🌱
Would you like more timeless tips via email?
Fun tips to help you live an independent, self-sustaining lifestyle. Opt-out at any time.


References
- Braunstein, Mark Mathew (2013). Microgreen Garden: Indoor Grower’s Guide to Gourmet Greens. Book Publishing Company. ISBN 13: 978-1-57067-294-1.
- Chemical Safety Facts, Types of Plastic Food Packaging and Safety: A Close-Up Look, https://www.chemicalsafetyfacts.org/types-plastic-food-packaging-safety-close-look/. Accessed July 2021.
- Indepak, Clamshell Packaging: Which Plastic Is The Best Fit?, https://www.indepak.com/clamshell-packaging-plastic-best-fit/. Accessed July 2021.

Author: Theresa Tesolin
Theresa is co-founder of RusticWise. She helps people unleash their inner DIY spirit by encouraging them to get dirty and make or grow something from scratch.