Bottom Watering Microgreens: 10 Good Reasons To Do This
In the world of microgreens and growing small organic produce, there’s a tried-and-tested technique that has been gaining popularity over the last few years. This technique involves bottom watering microgreens to keep them healthy and happy. It’s not hard to do, and it may help to reduce mold growth.
Bottom watering, as the name implies, involves watering microgreens from the bottom-up, instead of using traditional methods like overhead watering or misting.
In this article we’ll go over ten good reasons why you should consider bottom watering your young greens. We’ll also go over what you need to know for successful bottom watering and share some tips on how to do it properly!
You can have fresh greens year-round with just a little bit of effort
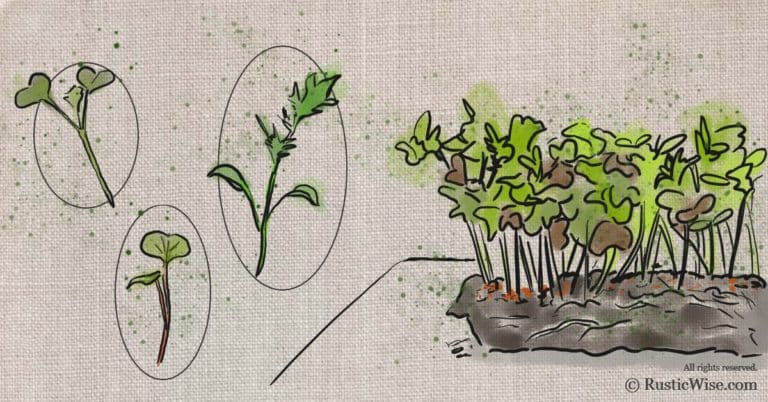
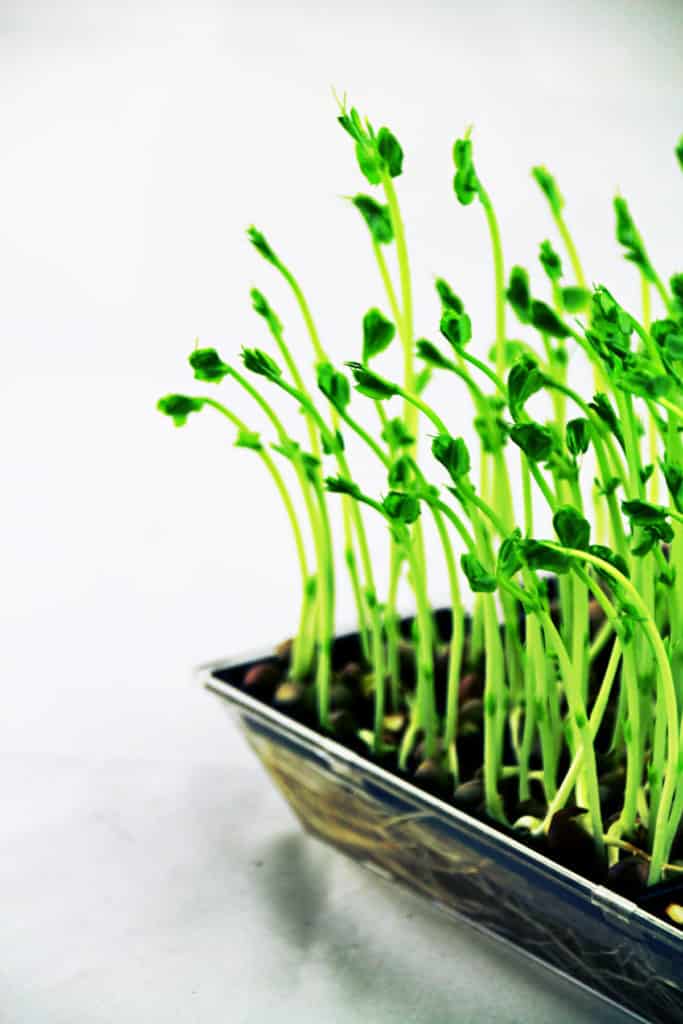
If you’re new to growing microgreens, welcome! Microgreens are tiny greens which are harvested when only a few inches tall. They contain the plant’s cotyledons (seed leaves) which are packed with vital nutrients.
The great thing about microgreens is you don’t need a ton of space, or fancy equipment when starting out. A growing tray, good seeds, potting soil (or another growing medium of your choice), clean water, and access to sunlight are all you need to get started.
Microgreens can be grown year-round indoors. You’ll get garden-fresh greens straight from your countertop (even during the coldest winter months)!
Microgreens are a great way to grow your own food in an environmentally friendly manner. They take up less space than traditional plants and require little maintenance, which means they’re perfect for small spaces or urban gardens.
Who should consider bottom watering microgreens?
Normal watering methods for microgreens include watering from the top, either using a mister or watering can. While this works for some people, others experience moisture or mold issues. You’re a good candidate for the technique of bottom watering if you experience difficulties keeping your microgreens healthy:
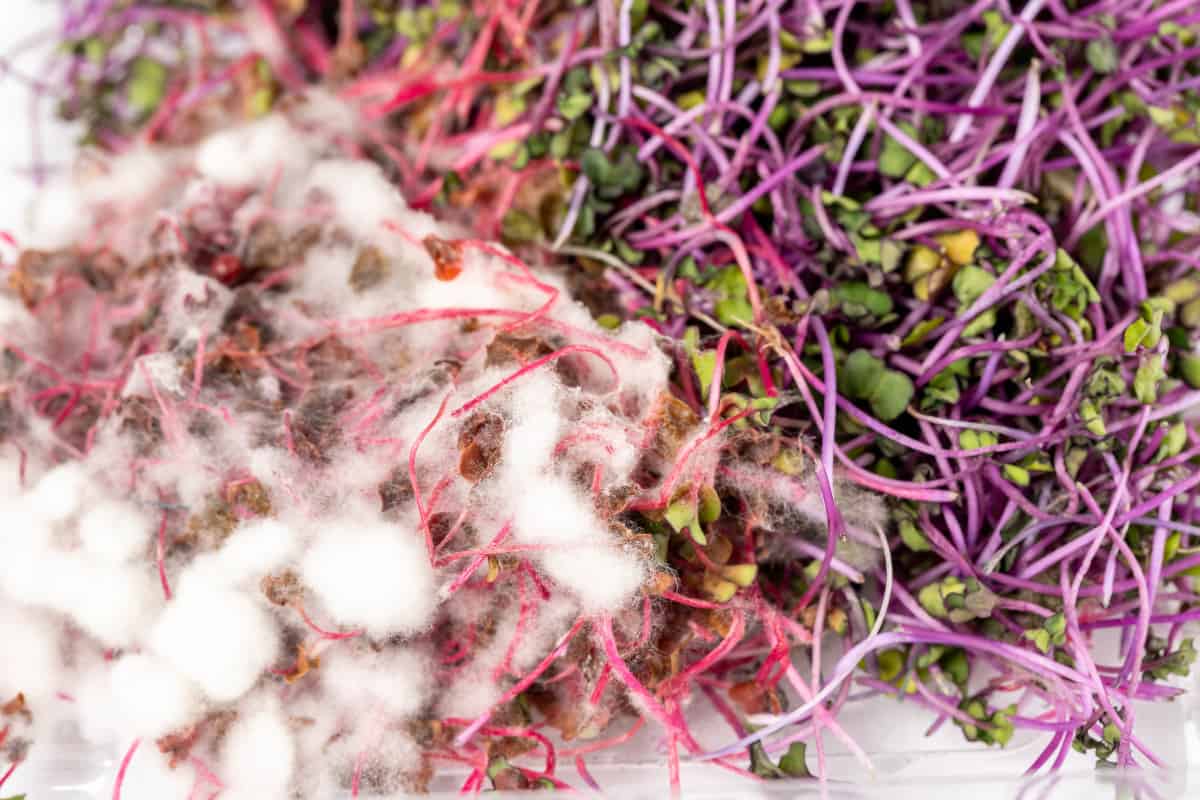
- Your tray of microgreens often grows mold;
- You tend to water your microgreens too much, or too little;
- You live in a humid and/or hot environment (this contributes to mold problems); or,
- You just want to try a different technique of watering microgreens that’s (slightly) easier, and produces a good, strong yield.
Credit: Marco Verch / Flickr
What are the benefits of bottom watering?
Bottom watering is one of the best ways you can ensure that your microgreens remain healthy and strong. There are a few good reasons why you should consider bottom watering your microgreens.
- Protects fragile stems and shoots: With top watering, it can be difficult to control the amount of water pressure. Sometimes a simple mist of water is enough to damage delicate stems, shoots, and cotyledons.
- Prevents clumping: Some types of thin stemmed microgreens are more prone to clumping, especially when top watered.
- Ensures more even watering: Even with diligent watering or misting, it’s difficult to ensure every square inch is evenly covered. Bottom watering allows microgreens to soak up moisture uniformly.
- Prevents moisture buildup from overwatering: Sometimes with top watering, it’s easy to get carried away. You might see small puddles forming at the surface, or pooling below at the roots. Bottom watering reduces the level of moisture build up at the surface. When watering from above, sometimes it can be hard to tell how much water is actually reaching the soil.
- Prevents mold development: Some leading causes of mold are excess moisture and poor air circulation. By having less sitting water due to overwatering, you’re less likely to experience mold issues.
- Deters pests and other diseases: Less moisture buildup at the surface helps to deter common pests and other diseases from getting a foothold. Common microgreens pests include aphids, whiteflies, and thrips. A few pathogens that microgreens are prone to include Phythium and Phytophthora which causes damping off.¹
- Less chance of contamination: When top watering, you tend to touch the microgreens more to get between the shoots and leaves. This may lead to possible contamination. When top watering, water may cause soil to splash onto the greens which may cause contamination.
- Saves time: Okay, so this point is debatable. Some would argue that giving your microgreens a quick mist is quicker than filling up a tray of water, then letting it sit for several minutes. The counter-argument would be that bottom watering cuts down on the amount of active work—you just place it in water and leave it. Just set a timer, so you don’t forget to take it out!
- Promotes healthy root growth: As microgreens are coaxed into soaking up water from the bottom, this encourages healthier root growth downwards.
- Promotes healthy (healthier?) overall growth: If everything works out when bottom watering (the elimination of excess water, mold, and potential damage to greens), you’ll reap the benefits of a stronger microgreens yield.
Are we saying that you should never top water your microgreens? Absolutely not! If you’ve had success with growing healthy microgreens when using top watering, then by all means continue to do so.
Top watering is actually an effective way to keep seeds moist, especially during the germination phase.
We just want to introduce a different watering system if you’re experiencing problems with mold or moisture.
We live in a cold, dry climate, and still occasionally top water our microgreens. It’s really a matter of knowing your own climate, and getting familiar with different microgreens seeds and growing mediums.
Over at Thistle Downs Farm, they conducted an experiment comparing the growth of microgreens using the bottom watering method vs. top watering. After eight days, they concluded that both trays looked healthy, and there really wasn’t much difference between the two trays in terms of yield.²
They did note that the roots on the tray of bottom watered microgreens looked amazing. They also mentioned it was less work using the bottom watering method (they didn’t need to avoid watering the leaves and stems).
How exactly does bottom watering work?
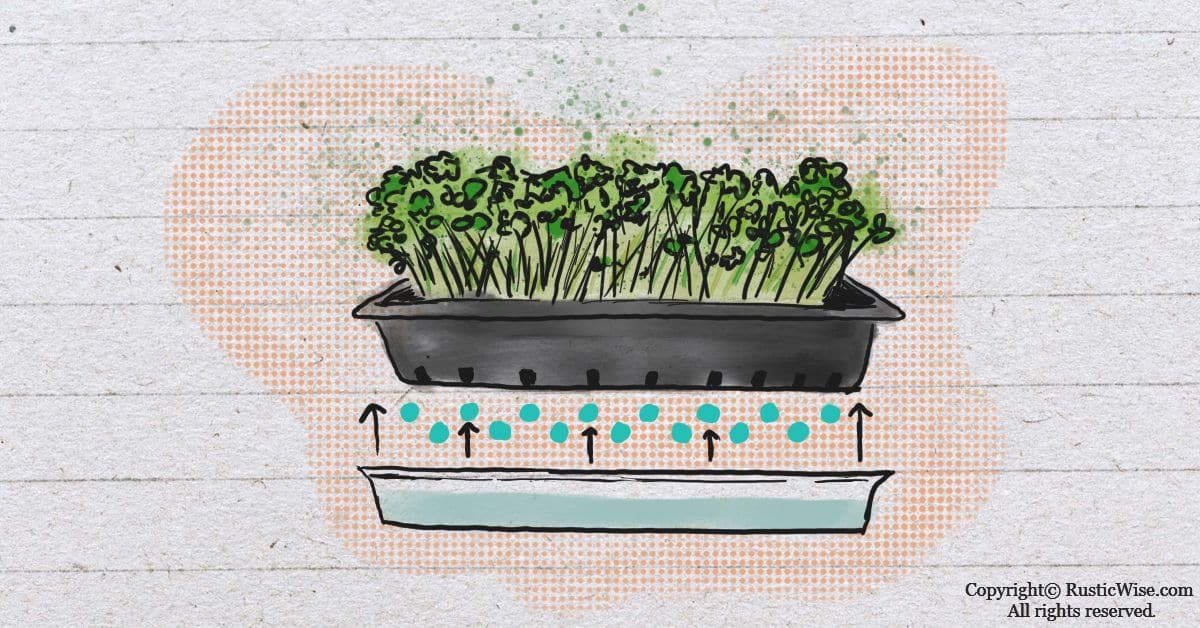
Bottom watering is a technique that allows plants to soak up moisture from the bottom-up. Your microgreens tray should have drainage holes on the bottom to use this method.
To water from the bottom of the tray, place your microgreen planter inside a second tray or sink. Most 1020 grow trays come with a tray with holes, and one without. To bottom water, simply fill the second tray with no holes with about half an inch (1.3 centimeters) of water. Place the tray of microgreens inside the one with water.
Let the water do its magic. Allow the microgreen roots to soak up moisture from the bottom of the grow tray. After several minutes, feel the top of the soil—it should feel moist, but not overly soggy.
After watering your tray of microgreens, remember to dump out any leftover water (you can use it to water any houseplants).
Tip: Remember to check on your tray of microgreens after several minutes to prevent overwatering. It’s a good idea to set a timer!
What supplies do you need to bottom water?
To bottom water, you just need a growing tray with drainage holes, a second tray with no holes, plus clean water.
The second container or tray you choose needs only enough space for your microgreens tray to fit inside. This can be a larger tray, shallow basin, or even a clean sink to fill with water. The bottom container should be about at least a couple inches deep so it doesn’t overflow when watering your seeds from below!
While not necessary, it’s pretty handy having 1020 growing trays. These trays come with or without drainage holes. The 1020 tray with drainage holes fits perfectly inside the tray with no holes.
If you’re growing with 5 X 5 inserts, you can fit eight of these inside a 1020 tray, and water multiple trays at once.
If you’re growing microgreens at home, you don’t need any fancy supplies. You can plant microgreens using a variety of containers you have around the house: plastic clamshell containers (from store-bought fruits), shallow pie or casserole tins, or takeout containers. Just remember to poke a few drainage holes in them first!
Bottom watering tips for microgreens
- Use room temperature water: Water that’s too cold, or too warm may damage delicate young stems.
- Remember to start with clean water: While some people can use regular tap water, others may have tap water that’s heavily chlorinated, contains fluoride, or other contaminants. If this describes your tap water, you may have better luck using distilled or bottled water.
- Remember to remove microgreens after several minutes: Is it possible to overwater microgreens using the bottom watering method? Absolutely! Remember to check in on your microgreens tray after several minutes.
- Dump out any leftover water afterwards: Start with a fresh batch of water each time you water your microgreens.
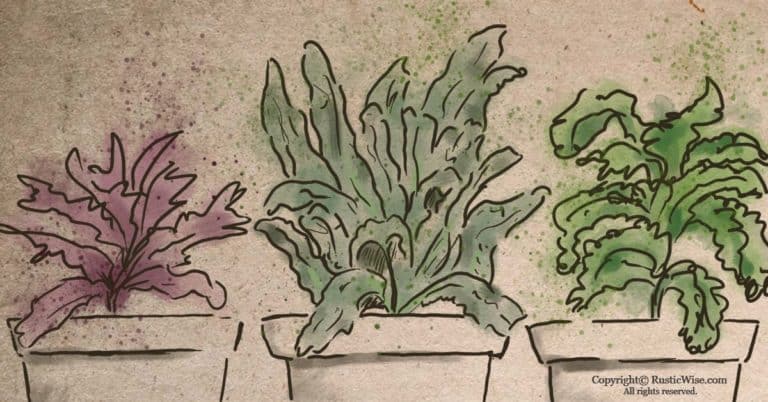
Microgreens that are more prone to mold growth
Not all microgreens are easy to care for. In fact, there are some divas in the crowd. Here are a few microgreens that may especially benefit from bottom watering.³
There are mixed reviews about how easy (or difficult) broccoli microgreens are to grow. Some claim they’re easy-peasy, while others experience moisture problems. They are more sensitive to moisture issues (too much or too little), so getting the humidity just so takes a bit of trial-and-error. They shrivel when too dry and because they tend to have thinner stems and tend to grow more densely packed, they can be prone to mold issues.
Amaranth has mucilaginous seeds plus smaller stems to boot. This makes them more prone to clumping when watered overhead.
Basil microgreens also have mucilaginous seeds and tend to grow slowly. They’re also prone to pests such as whiteflies or fungus gnats. Their slow growing time means more time for pests and other diseases to kick in, which is why bottom watering may be beneficial.
How often should I water my plants with this method?
It really depends on your individual growing medium and type of microgreens you’re growing. Other factors that affect how often you water are your household temperature and humidity levels.
Normally, you would water your microgreens when the soil or growing medium feels dry. Typically once a day, or every other day. Depending on your individual growing needs, you may find that bottom watering reduces the need for more frequent watering.
A final word on bottom watering microgreens
Bottom watering microgreens is a good method to add to your gardening toolkit. Microgreens are delicate and are prone to damage or clumping from top watering. Bottom watering reduces excess moisture by allowing your microgreens to drink their fill. Give it a try and you might be pleased with the results!
Other questions
Why are my microgreens wilting?
If your notice your microgreens begin to wilt and start to dry out, it’s likely a sign they need more water. Feel the soil—is it dry?
Bottom watering your microgreens is a good way to revive a dried out tray by giving it a good drink of water.
Another common reason why your microgreens are wilting is too much direct light. Your microgreens may just have too much heat.
With a little bit of TLC, hopefully your wilting microgreens can spring back!
Can you use bottom watering for all microgreens?
Generally, yes, this technique can be used on all different types of microgreens that are grown in a tray with drainage holes.
Do you need to worry about flushing out salt buildup when bottom watering?
Normally with houseplants for example, it’s a good idea to top water periodically to flush out any accumulated salt at the soil level. However, since microgreens are harvested within 2 weeks or so, this isn’t much time for sufficient salt buildup. You can safely bottom water your microgreens throughout the growing process.
👉 If you like this post, see our Complete Guide to Growing Microgreens at Home. 🌱
Would you like more timeless tips via email?
Fun tips to help you live an independent, self-sustaining lifestyle. Opt-out at any time.


References
- The University of Tennessee Extension (Institute of Agriculture), The Tennessee Vegetable Garden: Small-Scale Microgreen Production, https://uthort.tennessee.edu/the-tennessee-vegetable-garden-small-scale-microgreen-production/. Accessed April 2021.
- Thistle Downs Farm, The Best Way to Water Microgreens, https://thistledownsfarm.com/the-best-way-to-water-microgreens/. Accessed April 2021.
- Lafreniere, Alex (03 May 2020). “Hardest Microgreens to Grow & Secrets to Success,” Plant Hardware. Accessed April 2021.

Author: Josh Tesolin
Josh is co-founder of RusticWise. When he’s not tinkering in the garden, or fixing something around the house, you can find him working on a vast array of random side projects.