What Are Orach Microgreens? How To Grow and Eat Them
If you’ve never heard of orach before, you’re not alone. While orach has been cultivated for centuries, it’s (slowly) earning a spot in the pantheon of healthy greens. Did you know that orach microgreens are easy to grow? They only take two weeks from seed to harvest, and they’re chock-full of nutrients too! Read on to learn more about orach, how to grow it as a microgreen, and why it’s good for you.
One thing you should know about these tasty greens is they have high concentrations of vitamin K, which helps strengthen bones and prevent osteoporosis.
Orach microgreens are an excellent addition to any diet because they’re high in protein, low in calories and packed with vitamins. “Micro” is the key word here because these greens are very small and usually only reach a couple inches in height before harvesting. We’ll show you how to grow your own orach microgreens step-by-step so your meals will never be boring again!
What exactly is orach?
You may not have even seen orach before. It’s a small, bushy green that can grow to about three feet tall and two inches wide (depending on the variety). You’ll typically find it sold at farmers’ markets as leafy greens in bunches of stalks.
Orach (Atriplex hortensis) is a member of the Chenopodiaceae family, of which amaranth belongs. It’s an annual plant that’s often grown as a spinach alternative. Spinach tends to bolt in the hot summer months, while orach is less likely to do so.
Orach is an ancient vegetable native to the Mediterranean and Siberia. Nowadays, it’s found growing in many parts of North America.
Orach goes by many names: French spinach, mountain spinach, sea purslane, or giant lambsquarters. It’s sometimes spelt as “orache.” Others refer to orach as saltbush because it’s sometimes found growing in alkaline soil.
Orach foliage comes in a variety of colors including red/purple, yellow, and green.
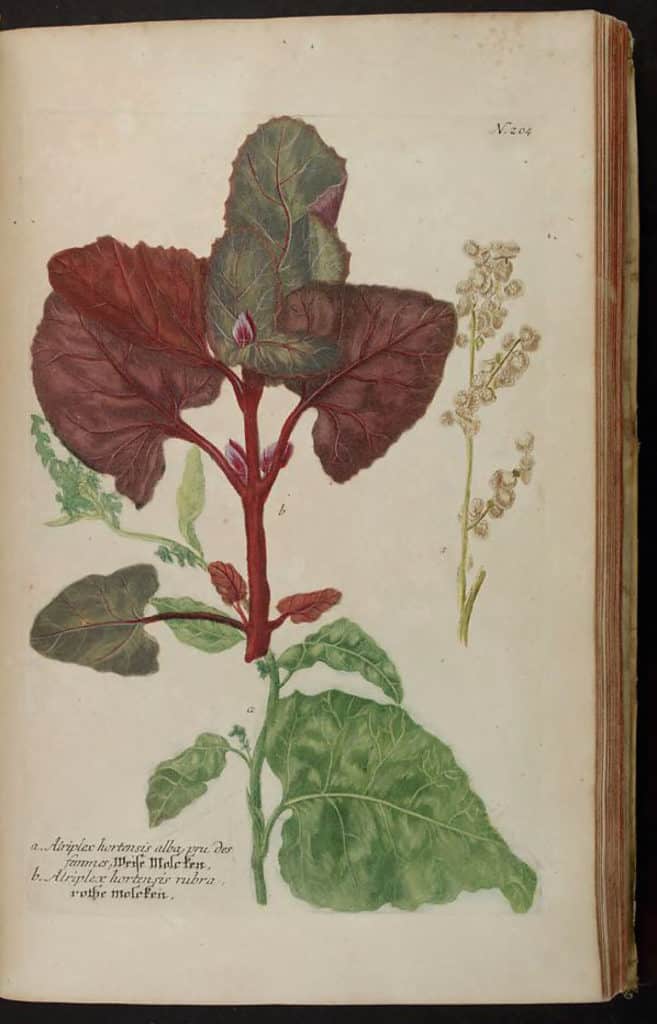
Credit: Swallowtail Garden Seeds / Flickr
Health and nutrition of orach
Like spinach or kale, orach is a leafy green you should consider adding to your diet for its nutritional content. Orach is a good source of fiber, calcium and potassium. Other minerals and nutrients that orach contains include: magnesium, vitamins K, E, and C, protein, iron, and beta-carotenes.
Let’s take a closer look at a 100 gram serving of orach.
- Great source of calcium: Who would have known that this leafy green provides so much calcium? A 100 gram serving provides roughly 200-percent of your daily calcium requirements. You may know that calcium is an essential nutrient for maintaining healthy bones and teeth.
- Rich in dietary fiber: Give a boost to your digestive system with 11 grams of fiber per 100 gram serving. Foods rich in dietary fiber help to keep blood sugar at healthy levels and may help to (slightly) lower cholesterol.
- Packs a potassium-punch: Each 100 gram serving contains 800 mg of potassium. Potassium improves heart health by regulating blood pressure while maintaining a healthy heartbeat.
And if you’re planning on growing a red or purple variety of orach, you’ll benefit from a natural compound called anthocyanin. Anthocyanin is what gives colorful fruits and vegetables their red, purple, or blue color. This flavonoid is know to have anti-inflammatory properties and may help prevent heart disease. Other foods that contain anthocyanin are red cabbage, blueberries, blackberries, cranberries, cherries, and purple kohlrabi.
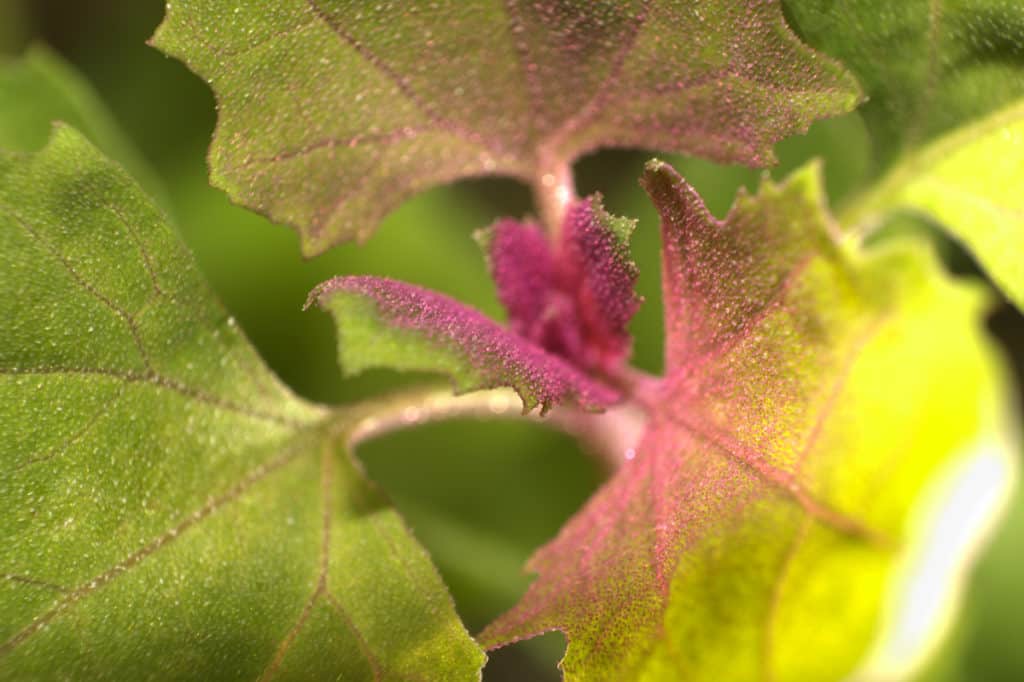
Credit: Yay Images
Why you should try eating microgreens
Microgreens are tiny plants that are perfect for eating. If you’re new to microgreens, read up on some microgreens facts here.
Microgreens are harvested at their peak nutrition level—when only a couple inches in height. At this stage, they contain the cotyledons (seed leaves) which are packed with concentrated nutrients and vitamins.
There are many studies that examine the bountiful health benefits of microgreens. One study conducted by the USDA Agricultural Research Service (ARS) together with the University of Maryland found that microgreens have higher nutrient levels than the leaves of the same mature greens—about five times the amount of vitamins and carotenoids.
They are also great for growing in small spaces such as a windowsill or even on your kitchen countertop! Most varieties of microgreens are ready to eat within two weeks of planting (although there are some slower growing varieties as well).
How to grow orach microgreens
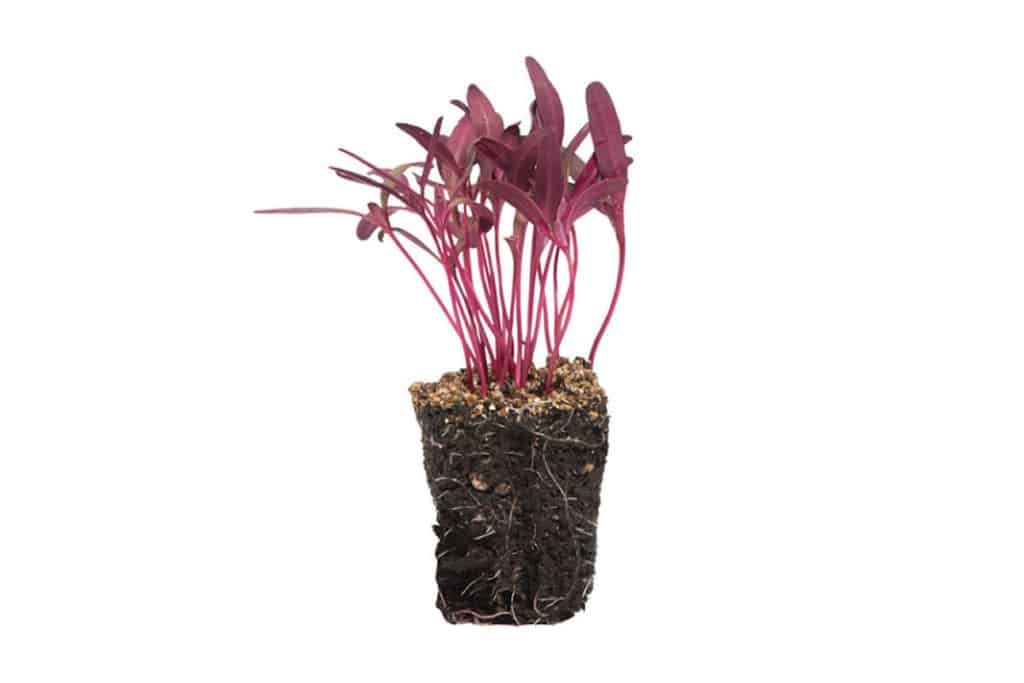
Orach microgreens are truly a sight to behold. These tiny plants have brightly-colored leaves that range in color from vibrant red, to deep purple. Characteristic of orach, the microgreens also have a shimmery underside on each leaf.
You can buy orach microgreens seeds online. Check out Ruby Red Orach from Johnny’s Seeds, or purple orach from True Leaf Market.
If you’re new to microgreens, check out our intro to growing microgreens indoors.
Ready to begin growing your own orach microgreens? Let’s gather a few supplies!
You’ll need:
- Grow tray and cover. A popular tray size is 10 X 20 inches, but you can also use almost any shallow container you have around the house. Just ensure the tray you are planting in has a few drainage holes. You’ll also need a cover that fits over the bottom tray. Optional: A third tray that is slightly larger than your growing tray can be used to bottom water your microgreens. If you don’t have one, you can also use your (clean) sink!
- Growing medium. This can be organic potting mix, or a soilless medium such as coconut coir.
- Orach seeds. Use about 10–20 grams for each 10 X 20 tray.
- Water mister
- Small trowel
- Sunlight (during the last growing stage)
- Prepare growing medium. Start with a clean growing tray. Fill your growing tray with 1–2 inches (2.5–5 centimeters) of soil. Ensure you remove any debris, small rocks, etc. Soil should not be too firmly packed. Use your water mister to thoroughly moisten the growing medium. It should be moist, but not overly soggy.
- Scatter seeds. Broadcast the seeds evenly across the top of the growing medium. (Optional: some people like to cover their seeds with a thin layer of soil. You can do this if you like, however the seeds will also grow fine without soil on top).
- Mist the seeds. Give your seeds one quick even mist with water.
- Place the cover over the seeds. Now it’s time to begin the blackout period. During this time, the seeds begin to germinate. The cover helps to keep light out (the seeds don’t need sunlight at this point), and keep moisture in. Some seeds do well when put under slight stress—orach is one of them. Instead of putting your tray cover on “properly” place it upside down so that the surface of the lid sits directly on top of the seeds.
- Continue to mist. During the first three days or so, remember to keep the seeds moist but misting once or twice a day. Remember to place the cover back on when you’re done!
- Uncover and place in the light. By day three or four you should see signs of growth. Now you can remove the cover and place those beautiful greens into a sunny area, or under grow lights. Give it a quick mist.
- Continue watering twice a day. Now that your orach microgreens are growing nicely, you want them to continue on their healthy path by bottom watering them. Bottom watering just involves filling a clean tray or basin (or even a clean sink) with about 1/2-inch of water. Place your tray with microgreens into the water and allow them to soak for several minutes. This ensures nice even watering from the bottom-up.
- Harvest. The best way to harvest is according to taste. That means you should try tasting your orach microgreens throughout the growing process to find when they’re most tasty to you! Generally, this is between 10–14 days, or when the cotyledons are fully developed. Some varieties of orach may be slower growing and take up to three weeks to fully grow. To harvest, just take a pair of sharp scissors or a knife and make a clean cut just above the soil line.
Ta-dah! That’s it! You can store cut microgreens in the fridge for up to one week. Rinse just before eating.
What do orach microgreens taste like?
It tastes like a cross between spinach, watercress and celery. While some varieties have a slightly bitter taste upon first bite, this gives way to a more earthy flavor similar to mild spinach. As orach is also known as “saltbush,” perhaps it’s not surprising that it has a slightly salty flavor profile.
Get creative with your orach microgreens! Try using them fresh in:
- Salads
- Sandwiches
- Wraps
- As a garnish on top of cooked dishes
- As a crispy snack all on its own!
Related questions
Can you eat tomato microgreens?
No, don’t grow or eat tomato microgreens. Tomatoes are members of the nightshade family. When tomatoes and others within this family (peppers, potatoes, eggplant, and goji) are young shoots, they contain solanine and tropanes which may cause digestive issues, vomiting, or fever.
Are lentil microgreens edible?
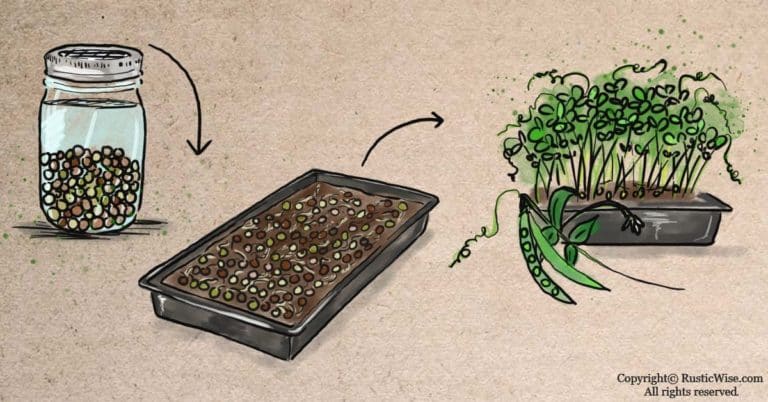
Lentils are a legume and are not generally grown as a leafy vegetable. Instead of eating lentils as microgreens, most people prefer to sprout them. Lentils are easy to sprout in a mason jar. Unlike microgreens, you don’t need any soil to sprout. Check out our article about sprouting your own lentils at home.

References:
- University of Florida IFAS Extension, Minor Vegetables Handbook | Orach, https://edis.ifas.ufl.edu/mv103. Accessed April 2021.
- Posluns, Ashley (10 May 2016). “Orach is the New Kale! 5 Reasons to Eat More of This Healthy Green,” Canadian Living. Accessed April 2021.
- USDA, AgResearch Magazine, “Specialty Greens Pack a Nutritional Punch.” https://agresearchmag.ars.usda.gov/2014/jan/greens. Accessed April 2021.
- Hart, Jane (7 February 2014). “Solanine poisoning – how does it happen?”, https://www.canr.msu.edu/news/solanine_poisoning_how_does_it_happen. Michigan State University, MSU Extension, Accessed April 2021.

Author: Theresa Tesolin
Theresa is co-founder of RusticWise. She helps people unleash their inner DIY spirit by encouraging them to get dirty and make or grow something from scratch.