
How To Grow Lettuce Microgreens: Fresh, Affordable Greens Indoors
Growing lettuce microgreens at home is an easy and rewarding way to bring fresh, nutritious greens into your home. Not only are they a great way to add flavor and texture to salads and other dishes, but they are also packed with vitamins and minerals.
Growing lettuce microgreens is a relatively simple process that requires minimal effort and resources and can be done in a small space, making it an excellent option for beginner gardeners or anyone who wants to grow their own food. Best of all, lettuce micros are ready to harvest in roughly 2 weeks!
With the right supplies and a few key steps, you can easily grow your own delicious lettuce microgreens in just a few weeks.
An overview of lettuce microgreens
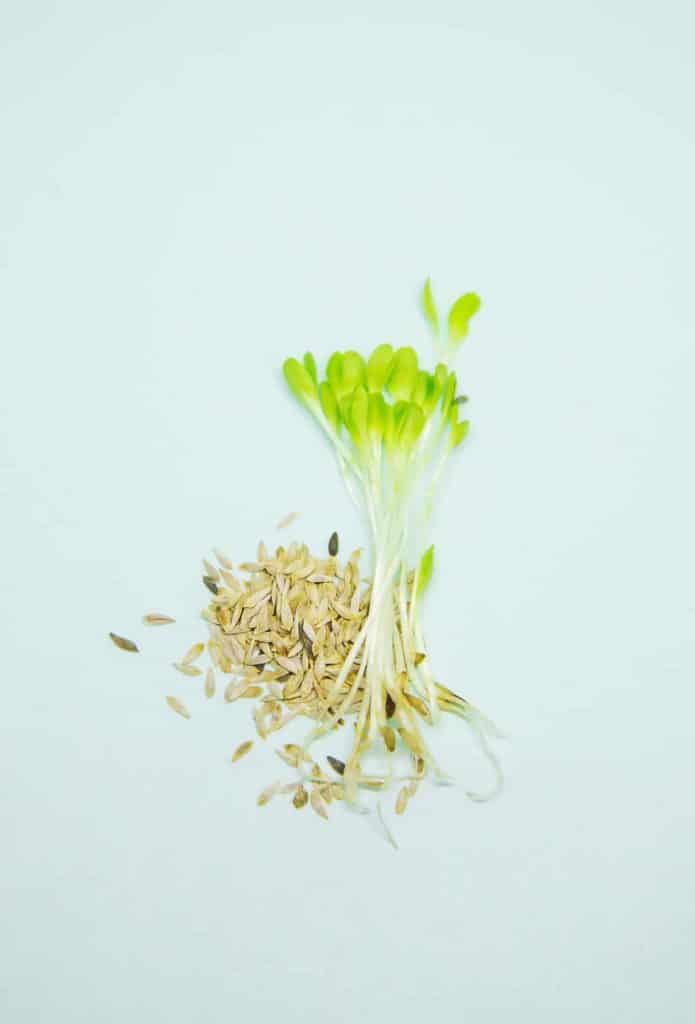
What exactly are lettuce microgreens? In the world of salad greens, microgreens are smaller than “baby” salad leaves, but larger than sprouts.
Lettuce microgreens are the young lettuce plants that are often grown indoors. Harvested when only an inch or two tall these tiny greens are quick and easy to grow.
Lettuce microgreens are a type of leafy vegetable that are harvested shortly after germination. It can take just 2 to 5 days for lettuce microgreens to germinate, and only 2 weeks until harvest, depending on your growing conditions (more on this below!).
Lettuce microgreens are packed with nutrients such as folate, making them a great addition to any healthy diet. Not only do they add flavor and texture to meals, but they also provide essential vitamins and minerals that the body needs.
These crispy greens are often used in salads and as garnishes because they have a slightly sweet, mild taste and a crunchy texture.
Lettuce microgreens are easy to grow and require minimal effort, making them an ideal choice for anyone looking to get into gardening or just wanting to add some extra nutrition to their diet.
Credit: Yay Images
Benefits of growing lettuce microgreens
Why bother growing these tiny greens? Here are a few good reasons:
- Cool-season crop: If your indoor temperatures run a bit on the chilly side, or if you’re growing micros in the cold winter months, lettuce seeds can handle it. This cool-season green is hardy enough to withstand a few drafts.
- Requires little space: Lettuce microgreens are easy to grow virtually anywhere. All you need is a sunny windowsill.
- Nutritious: Microgreens are an excellent source of vitamins, minerals, and antioxidants.
- Quick harvest time: They are very low cost to grow and can be harvested in as little as 2 weeks. Or, you can let them grow to the baby leaf stage for an extra week. Compare this to a mature head of lettuce, which can take 45 to 55 days to grow.
- Versatile flavor: Its mild taste and crisp texture make it a great addition to sandwiches, and wraps. It also brightens up a boring salad bowl as a garnish or a salad base.
- Fresh greens: Get easy access to fresh produce year-round indoors.
Equipment you need to get started growing lettuce microgreens
Here’s what you’ll need to get started growing microgreens indoors.
- Growing space: You don’t need much space to grow a tray of micros. If you have a south-facing windowsill that gets roughly 10 hours of sunlight a day, you’re golden.
- Grow light (optional): If you have insufficient sunlight, you might need a grow light to supplement any natural light you have.
- Trays or shallow containers: You’ll need a small growing container that has holes for drainage. You’ll also need another tray (without holes) that fits below the top grow tray to catch water. Some common sizes are 5 X 5, 10 X 10, or 10 X 20 inches. You can also repurpose food-safe containers you have around the house.
- Cover: Whether you use another grow tray, or a piece of cardboard or breathable fabric to cover the seeds, you’ll need something to block out light and keep in moisture.
- Growing medium: An organic and nutrient-rich potting soil. You can also use a soilless growing substrate like coconut coir, but you’ll need to add an organic water-soluble fertilizer if you go soilless.
- Water mister: Something to mist the seeds with.
- Small piece of cardboard (optional): You can use this to gently tamp down the soil as you’re preparing the tray.
- Lettuce microgreen seeds: Use only quality, untreated seeds for sprouting microgreens. There are many varieties of lettuce seeds to try growing.
Lettuce microgreen varieties
Some varieties of lettuce are better suited for microgreen cultivation than others.
There are many different types of lettuce microgreens to choose from. Some popular varieties to use for growing lettuce micros include: Crisphead, Lollo Rosso, Oakleaf, and Romaine.
Each type has its own unique flavor profile and nutritional value. Many microgreen seed sellers have salad mixes of lettuce varieties that work well together.
Tips for growing lettuce microgreens
- No need to presoak the seeds.
- Avoid high heat or too much humidity. Keep moisture levels right to keep this cool-season crop happy.
- You can choose to harvest when the micros are around 2 inches tall as the true leaves appear. This generally takes about 2 weeks, depending on the variety of lettuce and growing conditions. Or, you can grow them for another week to the baby leaf stage.
- Lettuce seeds have a quick germination rate. Once germinated, keep the soil moist and consistently watered. Lettuce microgreens require a moderate amount of water, so you should keep the soil moist but not over-saturated. Keeping the soil consistently moist will help the microgreens grow quickly.
General growing instructions for the lettuce microgreens
Ready to grow your own source of fresh produce on your countertop? Let’s get started!
Tip: For a 10 X 20 inch grow tray, you’ll use about 1 ounce (roughly 6 teaspoons) of dry seed. Adjust slightly as needed.
- Measure and look over seeds: Do a quick inspection over your lettuce seeds and remove any debris or broken seeds. Measure seeds and set aside.
- Fill the growing tray with soil: Using a clean growing tray, fill with 1–2 inches (2.5–5 centimeters) of potting soil or soilless growing medium. (If you’re using a soilless grow media, add your fertilizer now). Moisten with water. The soil should feel damp, but not overly soggy. Slightly compress the soil with your hands or a piece of cardboard.
- Sow seeds and mist: Spread 1 ounce (roughly 6 teaspoons) of lettuce seed evenly over the surface. Avoid overlapping the seeds as this will make it overcrowded (and may lead to mold issues). Tamp down with your hands or a small piece of cardboard to press the seeds lightly into the soil. Gently mist the seeds with a spray bottle, if needed.
- Cover and keep warm: During the germination phase, the seeds don’t need light—they have everything they need to germinate. To retain moisture, place a grow cover over the tray. If you don’t have a cover, a newspaper, or a piece of clean, breathable cotton cloth works too. Keep at room temperature. The lettuce seedlings typically germinate between Days 2 and 5, depending on your indoor temperature.
- Give it light: Once small shoots poke out, remove the cover and place the lettuce seedlings into the light (for many people, this is on Day 4). Don’t worry if your plants look yellowish, the sun will green them up! A sunny, south-facing windowsill works, or you might need artificial grow lights if there’s not enough natural sunlight. Sunlight helps promote vigorous growth and greening.
- Water: You can now bottom water your micros as needed. Keep the soil moist and don’t let it dry out.
- Harvest: Once your shoots have at least two leaves, the lettuce microgreens are ready for harvest. This is typically between Days 14 and 16. If you prefer to grow longer for 3 weeks, you’ll have baby leaf lettuce! Use a clean, sharp knife or scissors to cut the microgreens above the soil line. Toss the used growing medium in a compost pile.
Harvesting the lettuce microgreens
The great thing about growing lettuce micros is that you can choose to harvest them earlier, or later, to the baby leaf stage. Do a quick taste test during various stages of growth to see what you prefer.
Lettuce microgreens are easy to harvest as they don’t have large seed hulls like other varieties, which can cling to the shoots and leaves.
The best way to determine when to harvest is by looking at the leaves. Harvest microgreens when they are young, crunchy, and vibrant. Harvesting when microgreens are young will allow you to enjoy their best flavor and nutrients.
Enjoy your fresh lettuce micros in a delicious salad, sandwich, or wrap!

Credit: Deposit Photos
Storing lettuce microgreens
For longer shelf life, it’s best to store lettuce microgreens dry in the fridge immediately after harvesting. Avoid washing before storing as any moisture will drastically shorten shelf life. Regular lettuce is prone to wilting and the microgreen version is no different.
Use your refrigerators crisper to ensure that your lettuce microgreens stay fresh and delicious for as long as possible.
Nutritional facts of lettuce microgreens
Looking to introduce a new green to your diet?
While a regular head of leafy lettuce isn’t exactly as jam-packed with nutrients as other leafy greens such as spinach, these tiny greens still contain essential vitamins and minerals.
While there are many varieties of lettuce seeds to choose from, let’s look at a common variety: romaine lettuce.
Romaine is a good source of dietary fiber, Vitamins A, C, K, folate (Vitamin B9). It also contains trace minerals such as copper, iron, potassium, magnesium, and manganese.¹
- Vitamin K helps to promote healthy bones and blood clotting.
- Folate helps to support the body’s metabolism and energy production.
- Lettuce microgreens also contain high levels of antioxidants, which can help protect against free radical damage.
Additionally, they are low in calories and fat, making them a great choice for those looking to maintain a healthy weight. With all these nutritional benefits, lettuce microgreens are an excellent addition to any diet.
Simple ways to use lettuce microgreens
Ready to try your hand at growing lettuce microgreens and incorporating them into your dishes? Here are a few ways to use lettuce microgreens.
- Mixed lettuce salad: Lettuce micros are unsurprisingly a great addition to salads as a base green, or as a garnish. A light and refreshing salad is perfect for lunch, or dinner. Prepare a simple vinaigrette with lemon juice and olive oil, and top it with a lettuce mix, avocado, and toasted pine nuts. Add a tropical twist by adding mango slices and citrus.
- Use as a garnish on savory dishes: Sprinkle a handful of lettuce micros onto omelets, baked fish or poultry, or Asian lettuce wraps.
- Spruce up sandwiches and wraps: An easy way to enjoy this micro is by incorporating it into sandwiches and wraps. Try it on tuna or egg salad sandwiches, turkey, or avocado!
Conclusion
Growing lettuce microgreens is a great way to add fresh, nutrient-rich greens to your diet. They are easy to cultivate and are a tasty addition to salads, sandwiches, and other dishes.
Lettuce microgreens can be grown indoors almost year-round, making them a great option for those who don’t have outdoor space or want to grow their own food. With the right supplies and a few key steps, you can easily grow your own delicious lettuce microgreens in just a few weeks.
👉 If you like this post, see our Complete Guide to Growing Microgreens at Home. 🌱
Would you like more timeless tips via email?
Fun tips to help you live an independent, self-sustaining lifestyle. Opt-out at any time.


References
- My Food Data, Romaine Lettuce, https://tools.myfooddata.com/nutrition-facts/169247/wt1/1. Accessed February 2023.

Author: Josh Tesolin
Josh is co-founder of RusticWise. When he’s not tinkering in the garden, or fixing something around the house, you can find him working on a vast array of random side projects.