How to Germinate Seeds in Paper Towel: A Fast Way To Jumpstart Your Garden
Growing plants from seed is a great way to save money and get healthy, organic food. Starting your own plant from seed can seem intimidating at first, but germinating in paper towel will make the process much easier and quicker! We’ll explain step-by-step how to germinate seeds in paper towel, plus go over optimal temperatures for common crops.
If you have access to germination mats where you can control moisture and temperature, then this is a great way to start your seeds. However, many gardeners don’t have germination mats, which is where a simple paper towel (or paper coffee filter), and a plastic bag come in handy. Find out more below.
The 4 factors seeds need for successful germination
Inside each individual seed is an embryo plus enough food reserves to help fuel the germination process. A seed coat neatly covers the outside of each seed.
A gardener’s job is to coax the seed out of dormancy. All seeds need the right combination of the following four factors to germinate:
- Temperature: While most seeds will germinate at room temperature, achieving the optimal temperature ensures your seeds get off to a good start (see optimal temperature chart below).
- Moisture: The right amount of moisture (not too much, not too little) is needed to activate and bring seeds out of a dormant state.
- Air: All seeds require air to breathe. A lack of air may cause seeds to suffocate, or rot (if moisture levels are too high).
- Lighting conditions: Most seeds germinate fine in the dark. However, certain seeds require light to germinate such as species belonging to the Begonia, Primula, and Coleus families.
Table of Optimum Temperatures
| Optimum Range (Fahrenheit) | Optimum Range (Celsius) | |
|---|---|---|
| Beet | 50 to 85 | 10 to 29 |
| Cabbage | 45 to 95 | 7 to 35 |
| Cauliflower | 45 to 85 | 7 to 29 |
| Celery | 60 to 70 | 16 to 21 |
| Chard | 50 to 85 | 10 to 29 |
| Cucumber | 60 to 95 | 16 to 35 |
| Eggplant | 75 to 90 | 24 to 32 |
| Lettuce | 40 to 80 | 4 to 27 |
| Melons | 75 to 95 | 24 to 35 |
| Onion | 50 to 95 | 10 to 35 |
| Parsley | 50 to 85 | 10 to 29 |
| Pepper | 65 to 95 | 18 to 35 |
| Pumpkin | 70 to 90 | 21 to 32 |
| Spinach | 45 to 75 | 7 to 24 |
| Squash | 70 to 95 | 21 to 35 |
| Tomato | 70 to 95 | 21 to 35 |
What happens when seeds germinate
If you’re interested in the science behind how exactly seeds germinate, here’s the process in a nutshell, in three steps:
- Imbibition stage: The process of quickly absorbing water. The seed coat softens. An example is a pea seed that becomes wrinkly and softer after being exposed to water.
- Lag or interim stage: The internal processes of the seed are switched on—the cells respire and the seed makes good use of its food reserves.
- Emergence stage: The radicle (the part that later develops into the root) emerges from the seed.
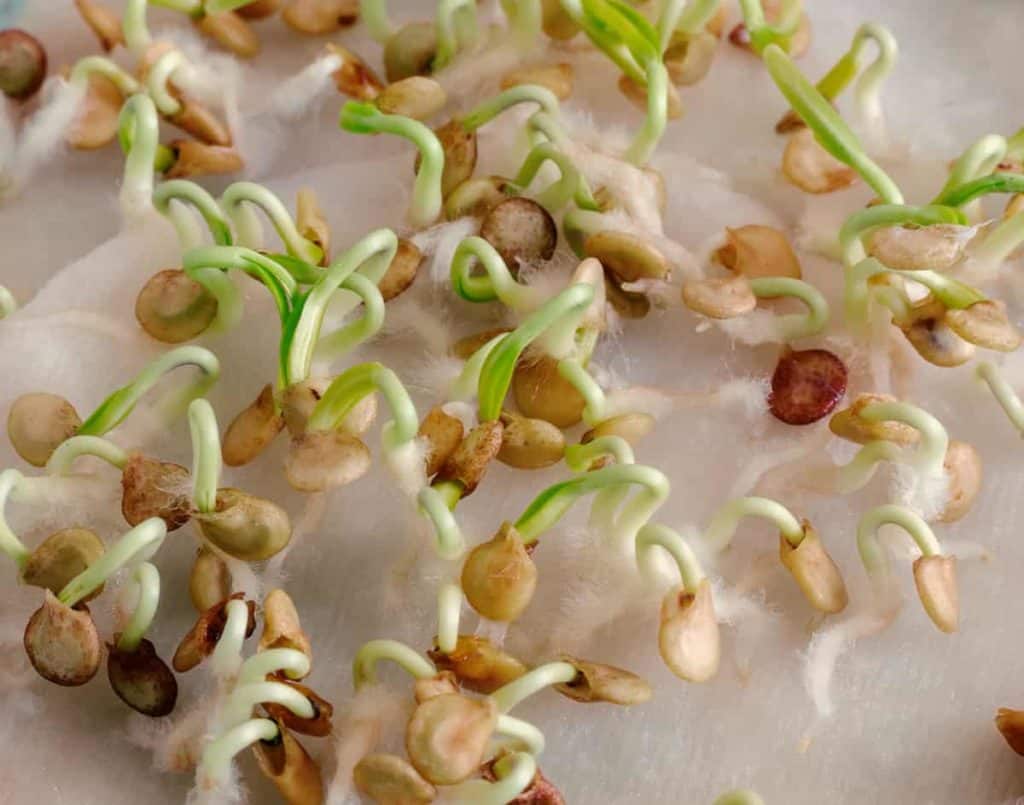
Credit: Yay Images
What types of seeds can you germinate in paper towel?
Most types of vegetables, herbs, and flowers can be germinated in paper towel. As a general rule, larger seeds are easier to germinate using this method.
However, there are always exceptions to the rule.
Seeds NOT to germinate in paper towel are carrots, celery, and radishes. Carrots and radishes do better when seeded right into the garden, while celery seeds are best sprinkled atop soil.
The University of Florida provides the following lists of plants based on their “transplant ability.”
Some seeds transplant easily including:
- Arugula
- Beets
- Broccoli
- Brussels sprouts
- Cabbage
- Cauliflower
- Chinese cabbage
- Collard
- Eggplant
- Endive/escarole
- Kale
- Kohlrabi
- Lettuce
- Peppers
- Sweet potatoes
- Strawberries
- Swiss chard
- Tomatoes
Some plants require a more delicate touch and require transplanting with care:
- Mustard
- Potatoes (Irish)
- Spinach
These plants require a strong root system before transplanting:
- Beans
- Cantaloupe
- Corn
- Cucumber
- Okra
- Onion
- Peas
- Pumpkin
- Radish
- Squash
- Turnip
- Watermelon
How long does it take for seeds to germinate in paper towel?
While the time to germination differs based on the type of seed, quality of seed, as well as temperature and moisture, most seeds germinate within a matter of several days, generally 4–7 days.
Peppers (capsicum) have a longer germination period: up to 10 days.
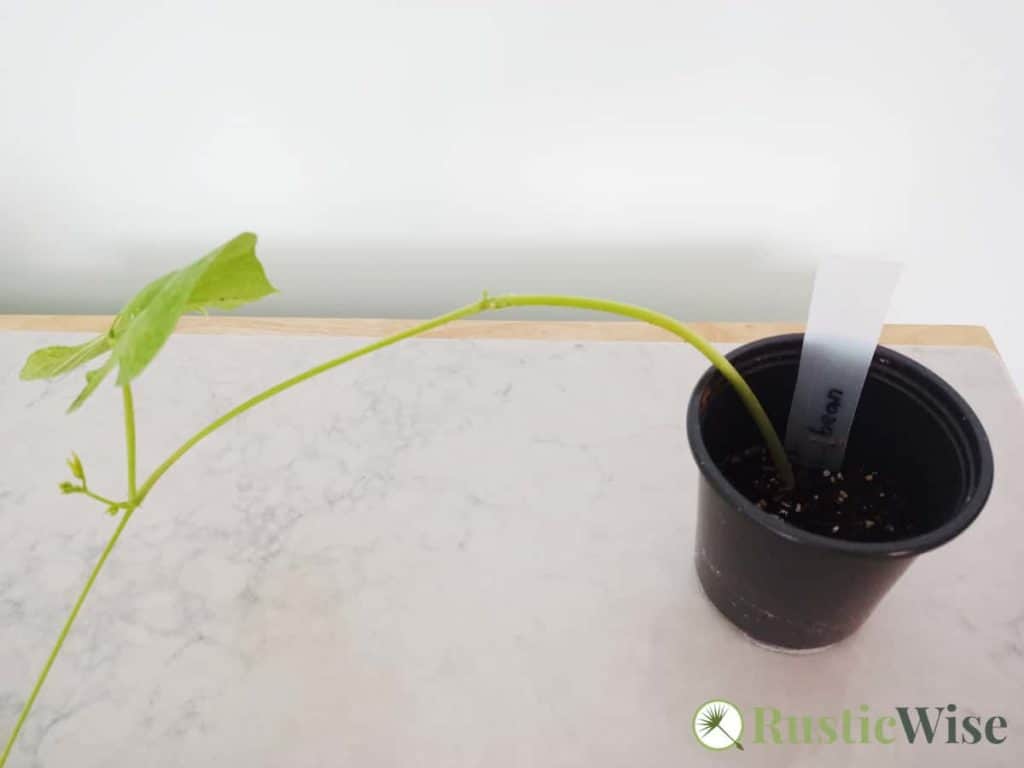
How to germinate seeds in paper towel: step-by-step
My son recently had to do a science experiment for a school project where he had to germinate bean and sweet pea seeds. His smart teacher (who obviously knows a thing or two about gardening!) taught them how to start seeds using the method I’m about to show you.
This really is a simple and satisfying way to start seeds.
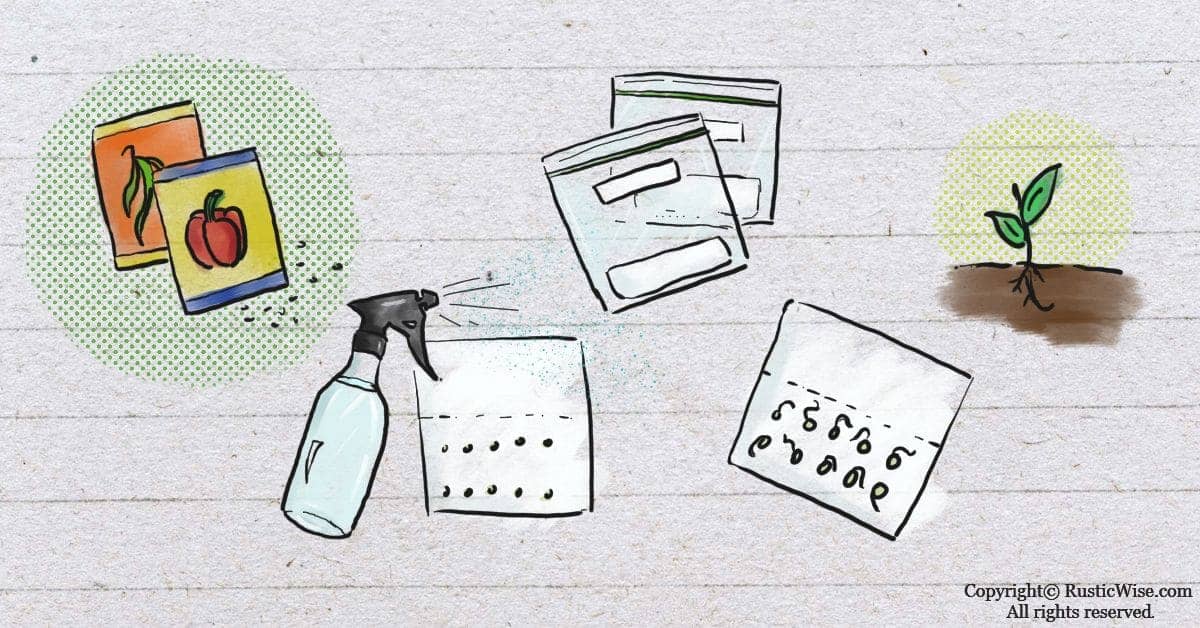
Let’s gather together a few supplies:
- Plastic ziploc bags (sandwich sized)
- Paper towels (or paper coffee filters, cone-shaped)
- Seeds
- Spray bottle with water
- Sharpie (for labeling)
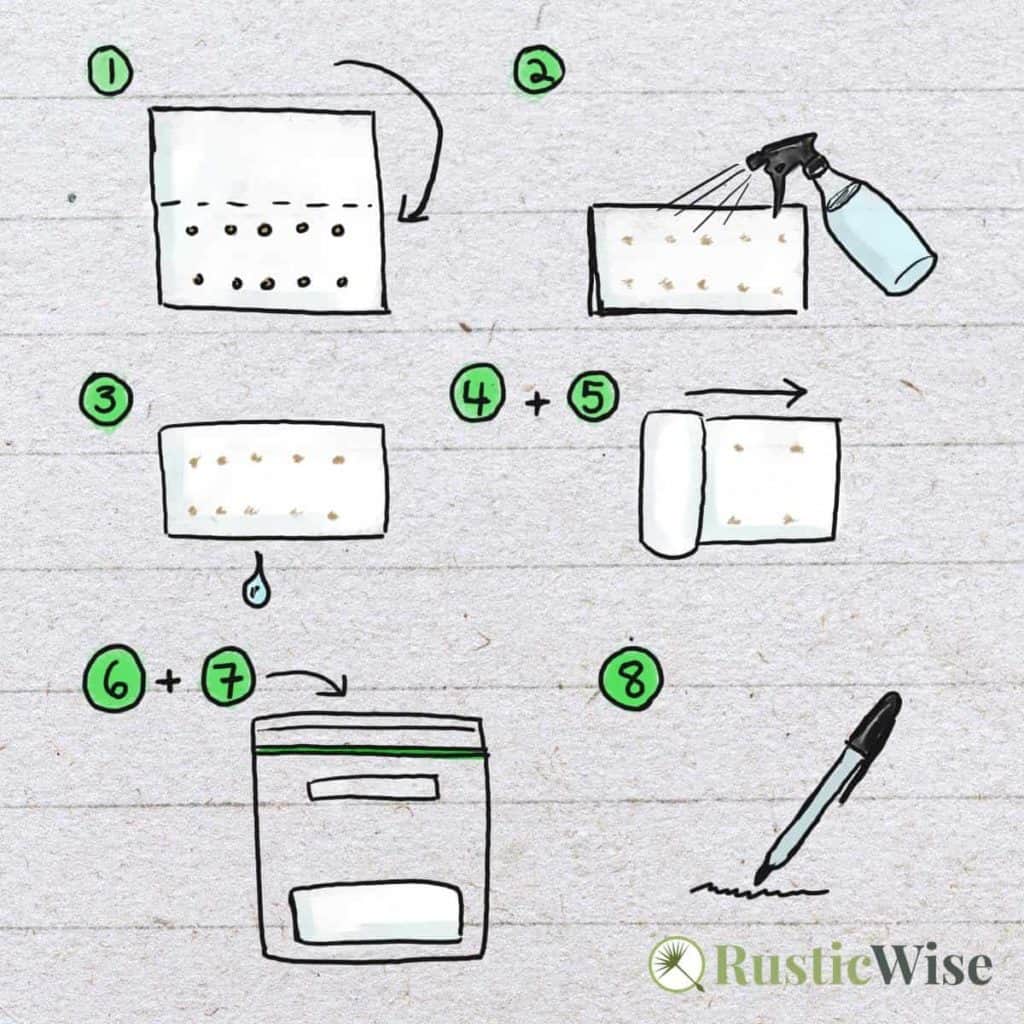
Step 1: Get one piece of paper towel. Place seeds onto bottom half of the towel. Fold the paper towel in half to cover the seeds.
Step 2: Gently mist the paper towel with the spray bottle. (I find using a spray bottle prevents the paper towel from getting too wet and possibly ripping.) If you don’t have a spray bottle, just moisten the paper towel gently by sprinkling water from your hands.
Step 3: Squeeze out excess water. Gently press the paper towel between your two hands and press down from top to bottom—avoid wringing which will rip the paper. This step is important as you don’t want the paper towel overly wet which may cause the seeds to rot. The paper towel should feel like a damp sponge.
Step 4: Lay the moistened paper towel on a flat surface.
Step 5: Roll the paper towel loosely like a tube.
Step 6: Place the wrapped seeds into a clean plastic bag. Notice that I emphasized the word clean? It’s important to start with a clean bag to keep the seeds away from any bacteria.
Step 7: Leave the bag open slightly. Sealing it closed won’t allow for sufficient airflow.
Step 8: Don’t forget to label each baggie with the type of seed and the date!
Place in a warm place at room temperature away from direct sunlight. This may be on the kitchen countertop, or if your house is on the cold side, on top of the fridge.
There’s no need to remoisten the paper towel unless it becomes dry. After several days, check on your seeds. Some may have germinated while others haven’t. If not all seeds have germinated, you can gently re-roll and and check back after several days.
Tip: Don’t wait too long before planting sprouted seeds into soil—the root may get entangled in the paper towel. Untangling the tap root may prove difficult.
How to germinate lemon seeds in paper towel
Propagating a lemon tree from cuttings is the faster, more reliable route if you want to start a lemon tree. However, if you have patience (and feel like doing a bit of an experiment), you can also start from seed. You can start lemon seeds using the method above, along with a few preparatory steps:
- Gather seeds from an organic lemon (this ensures it’s free of harmful chemicals).
- Wash and dry seeds, removing any pulp. Lay flat to dry on a clean towel.
- Carefully peel off the thin, white outer layer of skin on seeds. While this step is optional, it helps speed up germination.
- Follow the steps above by wetting paper towel and placing in a plastic bag.
Planting your new seedlings
You’ll notice that your seed may have a whitish radicle (root) emerging along with cotyledons. It’s time to plant your new seedlings!
Make sure to handle these delicate seedlings with care. You may want to use a pair of tweezers when removing seedlings from the paper towel. Avoid touching the fragile root—instead, handle the seed coat.
- Gather together a few small pots and a well-draining potting mix.
- Moisten the soil with water.
- Use a chopstick or end of a pencil to poke a hole in the potting soil.
- Place the seedling, radicle side down. Replace loosely with soil. Place in an area with proper lighting conditions according to the seed instructions.
Benefits of the paper towel or plastic bag method
Downsides? Yes, there are downsides to using this method. Mainly that you’ll need to transplant these delicate seedlings into soil, or a soilless medium once seeds have sprouted. While this may seem like an extra step, this method has worked well for me so far, and is worth the effort.
Troubleshooting: why didn’t my seeds germinate?
There are several reasons why your seeds may not have germinated:
- The temperature was too cold: Most plants require a warm, consistent environment to germinate, around 70 degrees Fahrenheit (21 degrees Celsius) or warmer.
- Insufficient moisture levels: Whether it was too much, or not enough water, this is a common mistake many gardeners make.
- Old or poor quality seeds: Sometimes some seeds just aren’t viable. Aren’t you glad you found this out using the paper towel method, instead of taking up precious gardening space with duds?
The final word: how to germinate seeds in paper towel
If you’re looking to start a garden but don’t have the time or resources, you might want to consider starting your seeds in paper towel (and a plastic bag). You’ll find that this technique is quick and easy for getting your seedlings off to a good start, without having to wait weeks for them to germinate.
Just be sure to give your seeds air, and the right amount of moisture and warmth. You’ll have happy seedlings in no time!

References
- Pennsylvania State University, Seed and Seedling Biology, Table 1. Soil temperature conditions for vegetable crop germination. https://extension.psu.edu/seed-and-seedling-biology. Accessed July 2021.
- Scalera, Sally (15 May 2020), “Here’s an easy, fun way to germinate seeds in a paper towel,” Florida Today. Accessed July 2021.
- The University of Florida, Starting from Seed, Transplant Ability of Common Vegetable Crops, https://gardeningsolutions.ifas.ufl.edu/care/planting/starting-from-seed.html. Accessed July 2021.
- Ionescu, Florina (03 April 2019). “How to Grow a Lemon Tree from Seed | Step-by-Step Guide,” You Had Me At Gardening. Accessed July 2021.

Author: Josh Tesolin
Josh is co-founder of RusticWise. When he’s not tinkering in the garden, or fixing something around the house, you can find him working on a vast array of random side projects.

